Installation and Operation Manual
Page
107 of 156
[PVI-XXX.0-YY(-TL) - Rev:1.0]
15.4.2
Plant Configuration
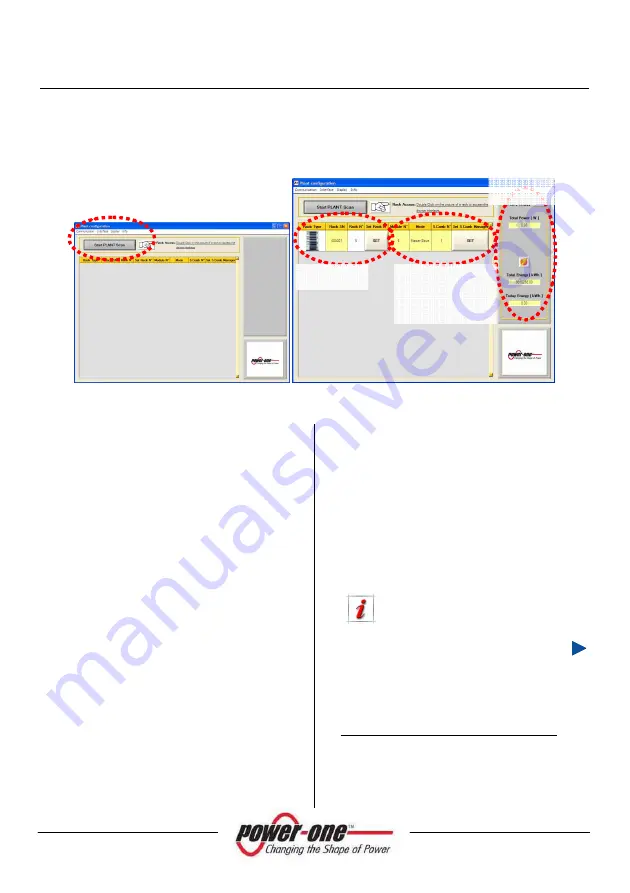
At first this window will be empty. This is because the first time the program has to scan to see
how the plant is configured.
Figure 15-5: Plant Configuration
Click on the button [
Start PLANT Scan
]:
the system will search through all the
connected and functioning Racks.
The screen of Figure 15-5 shows the
following information:
•
Plant value
: will display information
about the instantaneous power output
(W), the daily energy and the total
energy produced (kWh).
•
T
he rack serial number (Rack SN) and
identity number (Rack No.), the latter
being assigned to the rack and to all the
modules to identify the whole tower.
The rack number can be changed by
entering a new number using the [
Set
Rack Number
] button.
•
The number of modules contained in
the rack (Module No.), operating mode
(Mode) and the number of connected
string-
boxes (S.Comb N.)
1
. By pressing
the [
Set S.Comb Manager
] button you
can access the (Figure 15-6) menu by
which, pressing the [
SELECT>>
] button,
the management and monitoring of the
PVI-STRINGCOMB is assigned to the
corresponding module.
It is preferable to assign the string-
box management to a 55kW slave
module, if present.
1
Before assigning the stringcomb manager
it is necessary to configure the RS485 line of
the string boxes by means of the stringcomb
software installer (see stringcomb manual).
PLANT
VALUE
RACK SN
MODULE SN
MODE
STRINGCOMB
Содержание Aurora PVI-110.0-YY
Страница 109: ...Installation and Operation Manual Page 109 of 156 PVI XXX 0 YY TL Rev 1 0 Figure 15 7 Display of Solar monitoring...
Страница 154: ...Installation and Operation Manual Page 154 of 156 PVI XXX 0 YY TL Rev 1 0 22 DECLARATION OF CONFORMITY...
Страница 155: ...Installation and Operation Manual Page 155 of 156 PVI XXX 0 YY TL Rev 1 0 23 CERTIFICATE OF CONFORMITY...
Страница 156: ...Installation and Operation Manual Page 156 of 156 PVI XXX 0 YY TL Rev 1 0...


