MAINTENANCE
2.27
TOE ALIGNMENT
ADJUSTMENT
If toe alignment is incorrect, measure the distance
between vehicle center and each wheel. This will tell
you which tie rod needs adjusting.
NOTE:
Be sure
handlebars are straight ahead before determining
which tie rod(s) need adjustment.
CAUTION:
During tie rod adjustment, it is very
important that the following precautions be taken
when tightening tie rod end jam nuts. If the rod end
is positioned incorrectly it will not pivot, and may
break.
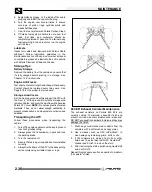
Incorrectly
Tightened
Jam Nut
Correctly
Tightened
Jam Nut
Hold
Rod End
Ill.2
Ill.2
To adjust toe alignment:
G
Hold tie rod end to keep it from
rotating.
G
Loosen jam nuts at both end of the tie
rod.
G
Shorten or lengthen the tie rod until
alignment is as required to achieve
the proper toe setting as specified
in Method 1 or Method 2.
G
IMPORTANT:
When tightening the
tie rod end jam nuts, the rod ends
must be held parallel to prevent rod
end damage and premature wear.
Damage may not be immediately
apparent if done incorrectly. See
illustration 2.
G
After alignment is complete, torque
jam nuts to 12-14 ft. lbs. (16-19 Nm).
EXHAUST PIPE
The exhaust pipe must be periodically purged of
accumulated carbon as follows:
1. Remove the clean out plugs located on the
bottom of the muffler as shown in illustration 1.
Clean Out Plug
Ill.1
2. Place the transmission in neutral and start the
engine. Purge accumulated carbon from the
system by momentarily revving the engine
several times.
3. If some carbon is expelled, cover the exhaust
outlet and rap on the pipe around the clean out
plugs while revving the engine several more
times.
4. If particles are still suspected to be in the muffler,
back the machine onto an incline so the rear of the
machine is one foot higher than the front. Set the
hand brake and block the wheels. Make sure the
machine is in neutral and repeat Steps 2 and 3.
SEE WARNING
5. If particles are still suspected to be in the muffler,
drive the machine onto the incline so the front of
the machine is one foot higher than the rear. Set
the hand brake and block the wheels. Make sure
the machine is in neutral and repeat Steps 2 and
3.
SEE WARNING
1 ft.
Содержание Sportsman 800 Efi 2005
Страница 116: ...ENGINE 3 62 NOTES ...
Страница 136: ...FUEL SYSTEM FUEL INJECTION 4 20 NOTES ...
Страница 186: ...CLUTCH 6 30 NOTES ...
Страница 256: ...BRAKES 9 24 NOTES ...
Страница 292: ...ELECTRICAL 10 36 BASIC WINCH WIRING 2005 ATV MODELS 2005 ATV WINCH WIRING DIAGRAM ...
Страница 300: ...ELECTRICAL 10 44 NOTES ...
Страница 301: ...ELECTRICAL 10 39 WIRING DIAGRAM 2005 SPORTSMAN 700 800 EFI Stator ...
Страница 302: ...ELECTRICAL 10 40 WIRING DIAGRAM 2005 SPORTSMAN 700 800 EFI ...

