TECHNICAL SUPPORT: [email protected] | (760) 727-0300
PG. 25
THIS DOCUMENT IS PROPRIETARY AND CONFIDENTIAL. © 2021 PRECISION MEASUREMENT ENGINEERING, INC. ALL RIGHTS RESERVED.
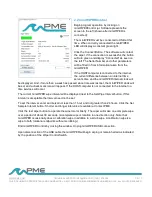
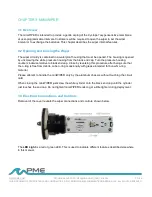
The
Wiper Control Switch
controls the wiper mode:
•
W
IPE
:
When the switch is in this position wipes occur.
•
H
ALT
:
When the switch is in this position wipes do not occur.
The
USB Connection
allows communication between the wiper and an external computer. When
connected, the wiper is in halt mode regardless of the Wiper Control Switch setting. When
disconnected the wiper mode is controlled by the Wiper Control Switch. The switch position may be
changed while the USB is connected.
The
Main Batteries
(2 X AA on side opposite to picture above) provide main power to the
miniWIPER. Note the positive (+) terminal.
3.4 Battery Replacement
Be sure that the replacement battery is compatible with miniWIPER. PME recommends Energizer
L91 AA size batteries. You may also use AA size alkaline batteries such as Duracell Coppertop.
http://data.energizer.com/PDFs/l91.pdf
http://ww2.duracell.com/media/en-
US/pdf/gtcl/Product_Data_Sheet/NA_DATASHEETS/MN1500_US_CT.pdf
Caution: Improper replacement of the battery will damage the miniWIPER. Installing the batteries backwards will
permanently damage the miniWIPER.
Follow these steps:
1. Move the Wiper Control Switch to the HALT position.
2. Remove the depleted batteries noting the position of the (+) terminal.
3. Use only new, fully charged batteries of the same type.
4. Install fresh batteries with the (+) position the same as the removed battery.
The (+) position is also marked on the inside of the battery holder.
5. The miniWIPER LED Light should flash once to indicate that software is beginning operation
within a second or two after you complete the battery installation. At this time the wiper will
enter the mode selected by the Wiper Control Switch.
Record the number of wipes at battery replacement time. This may be helpful later when
determining battery depletion.


