E-22
Creating Headers/Footers
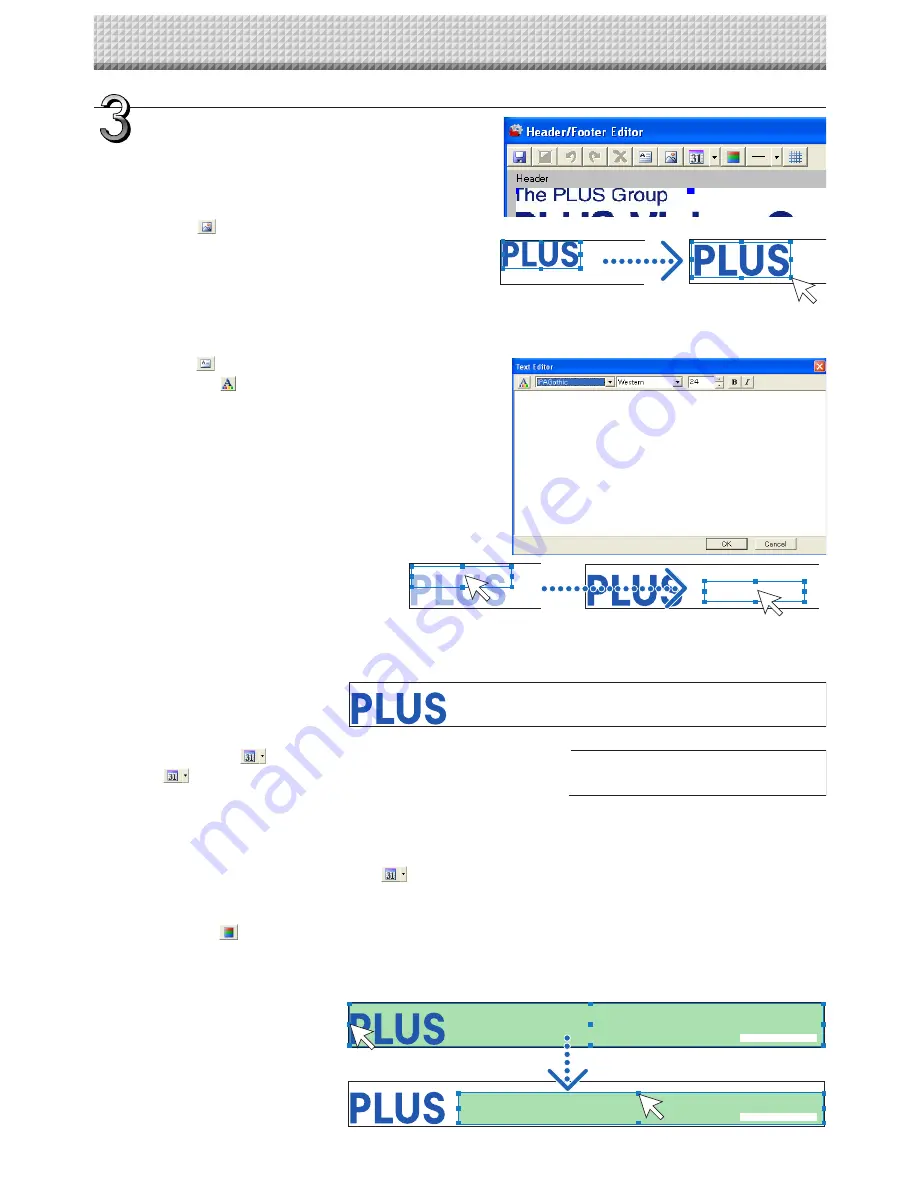
When opened, the header editing box will be selected.
Click the footer editing box to create a footer. The dark blue
frame will move to the footer.
①
Click
(Image Insertion) and select the target image
from the “Open file” screen.
The image will be placed at the upper left of the editing
box.
Adjust the position or size. See “Change of Size and
Swapping of Front-to-Back Order” on Page E-20
②
Click
(Add text) to open the text input box, enter the
text, click (text color specification) and specify the text
color, then click [OK].
The text will be placed at the upper left of the editing
box.
Adjust the position. When the text and image overlap
and the text is hidden, the text will be brought to the
front.
See “Change of Size and Swapping of Front-to-Back
Order” on Page E-20
③
Other text will also be input and placed in the same area.
Create the respective types when changing the text size
or text color, etc.
④
Click [
▼
] of
(Date and Time Insertion) and click
after selecting the display format of the date and
time. This will be inserted at the lower right of the editing
box. The date and time box is always placed at the very
front and is non-transparent. Movement of the position is
possible.
When the date and time are inserted,
becomes gray
to indicate that multiple placements are not possible.
⑤
Clicking
(Header and Footer Background Color
Specification) then clicking on the target color from with-
in the menu will fully paint over the header editing box or
the footer editing box with the selected color.
Adjust the size and position.
XX-0123
XX-0123
XX-0123
XX-0123
Product Planning Meeting
Technology Department No. 4
2 0 0 8 / 1 0 / 3 0 9 : 3 4
Planning Meeting
Technology Department No. 4
2 0 0 8 / 1 0 / 3 0 9 : 3 4
XX-0123
Product Planning Meeting
Technology Department No. 4
2 0 0 8 / 1 0 / 3 0 9 : 3 4
Technology Department No. 4
XX-0123
Product Planning Meeting
Creation and Editing of Headers/Footers
Содержание magicolor plus
Страница 28: ...23 4638 08A 2008 PLUS Vision Corp...


