


Pitney Bowes DA500/DA550 Operator Guide
2-7
Setting Up the DA500/DA550 Printer • 2
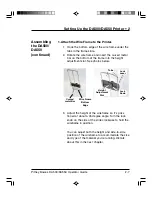
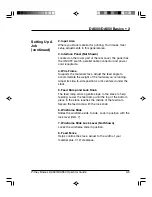
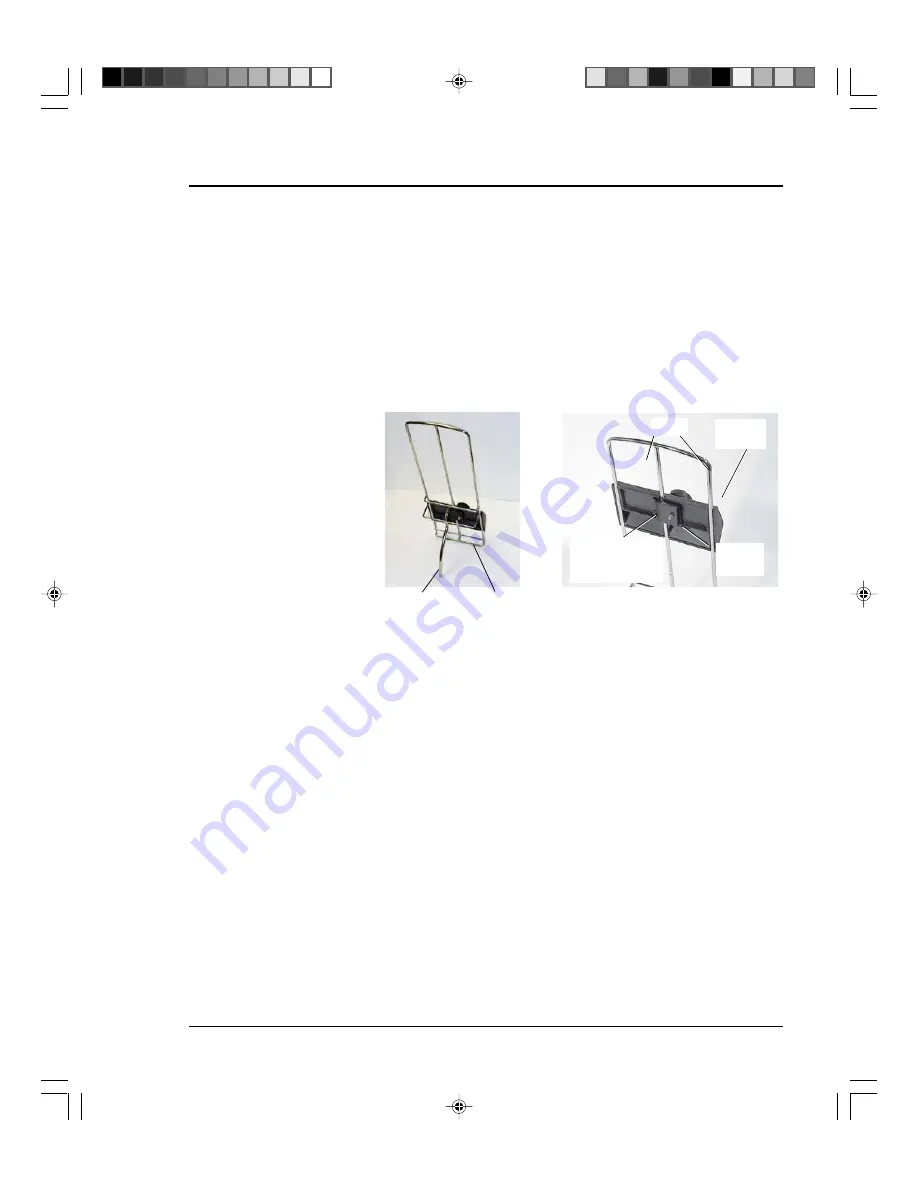
1. Attach the Wire Frame to the Printer.
1. Hook the bottom edge of the wire frame under the
tabs in the frame slide.
2. Rotate the wire frame and insert the curved metal
bar on the bottom of the frame into the height
adjustment slot. See photos below.
Assembling
the DA500/
DA550
(continued)
Tabs
Height
Adjustment
Slot
Lock
Knob
Lock
Lever
Wire Frame
Bottom
Edge
Curved
metal Bar
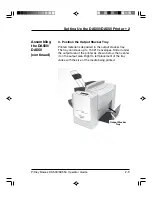
3. Adjust the height of the wireframe so it's posi-
tioned at about a 45 degree angle. Turn the lock
knob on the side of the slide clockwise to hold the
wireframe in position.
You can adjust both the height and side-to-side
position of the wireframe to accommodate the size
and type of the material you're running. We talk
about this in the next chapter.
Содержание ADDRESSRIGHT DA500
Страница 1: ...AddressRightTM Printer DA500 DA550 Operator Guide US English Version ...
Страница 6: ...Table of Contents Pitney Bowes DA500 DA550 Operator Guide iv ...
Страница 38: ...3 10 Pitney Bowes DA500 DA550 Operator Guide 3 DA500 DA550 Basics Setting Up A Job continued Lock Lever ...
Страница 72: ...5 Printer Maintenance 5 10 Pitney Bowes DA500 DA550 Operator Guide This page is intentionally blank ...
Страница 128: ...Appendix B Specifications B 12 Pitney Bowes DA500 DA550 Operator Guide This page is intentionally blank ...
Страница 129: ...Index ...