ENGLISH
16
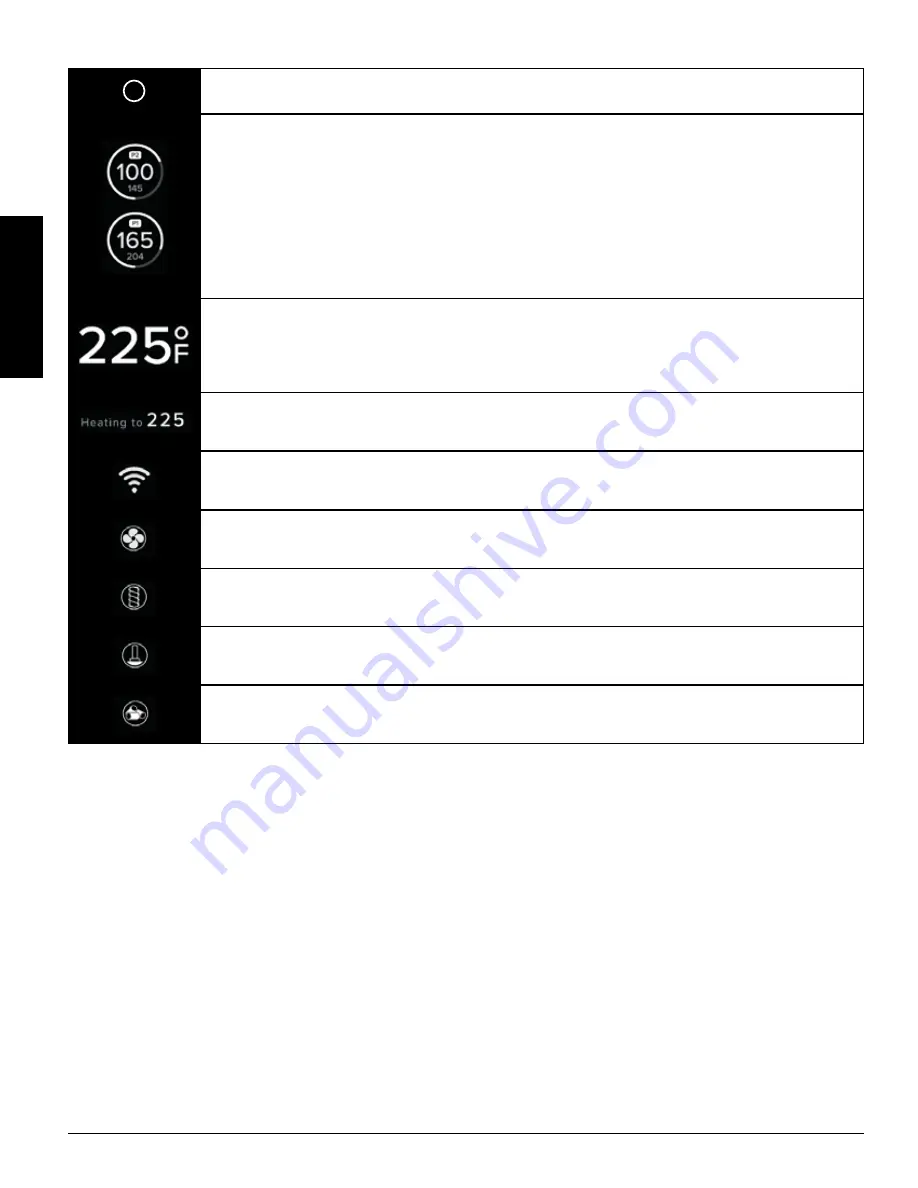
The left probe port is P1 and the right is P2.
When the Programmable Meat Probes are plugged in these icons will display. The Actual temperature is
shown in bold and the Set temperature, if one is set, will be shown below. Move to the P1 or P2 on the
Main Screen. Rotate the wheel to adjust the desired temperature and confirm the selection by pressing
the Control Knob. To access the Probes menu move the joystick up if hovering over P2 or down if
hovering over P1. Under the Probes menu select the probe, then the temperature to program, or select
the protein icon to set the default temperature for what is being cooked. When not in use, disconnect
the Meat Probe. Compatible with Pit Boss® Grills branded meat probes only. The ring around the probe
indicates how far along the current cooking temperature is from the programmed temperature, 0-100%.
P1/2 will beep and the bell icon will appear when the programmed temperature is reached.
The Actual temperature is constantly displayed. The temperature readout is taken by the grill probe
(sensor) from the inside of the grill barrel. Move the Control Knob over the temperature and rotate the
knob to adjust the Set Temperature. Press the Control Knob to confirm the selection.
The Set Temperature will be updated after the temperature is modified under the Actual Temperature.
The WI-FI icon is visible when the unit is connected to the Pit Boss application. It will blink when it is
not connected.
The FAN icon is visible when the fan is in operation. When it is not working the FAN error screen will
appear. See the section on troubleshooting for assistance.
The AUGER icon is visible when the auger is in operation. When it is not working the AUGER error screen
will appear. See the section on troubleshooting for assistance.
The IGNITER icon is visible when the igniter is in operation. When it is not working the IGNITER error
screen will appear. See the section on troubleshooting for assistance.
When the display has an error the PELLET error screen will appear, the fire in the Burn Pot has gone out
or the hopper may be empty. See the section on troubleshooting for assistance.
CONNECTING TO THE PIT BOSS
®
GRILLS APP
Follow these instructions on how to connect your grill to the Pit Boss® Grills app with your Android™ or iOS® device. The app will
allow you to control and monitor your grill and meat probe temperatures from your mobile device. Enjoy the benefits that Pit
Boss® mobile connectivity has to offer!
1. Download the Pit Boss® Grills app. Open the app and allow Bluetooth® to be enabled for setup. New users will need to
create an account and follow the prompts to login.
2. If you are within Bluetooth® range (9 m / 30 ft), the Pit Boss® Grills app will automatically detect your grill. Select your
grill model. If you do not see your grill on the screen, ensure your unit is connected to a power source and is turned on.
3. Name your grill model (ie. My Smoker) in the app and select "Connect" at the bottom of the screen. This will save your
grill model in the devices menu.
4. From the devices menu, click the grill model to connect. This will show you the control board screen.
5. Click the settings option (gear) in the top-right corner, enter your Wi-Fi credentials, then click the check mark at the
bottom of the screen to connect. Now both Bluetooth and Wi-Fi (cloud) icons will show on the devices menu, showing
that the grill is connected.
While using the app, the screen will shine bright when the grill is active and connected. If the app screen or grill goes
dark on the devices menu, check your wireless connection or power source.


