29
En/Fr
English
Français
1. Appuyez sur la touche de fonction TAPE
I
/
II
.
2. Introduisez la cassette à enregistrer dans TAPE
I
.
Faites avancer la bande au-delà de l'amorce.
3. Appuyez sur la touche de sélection DOLBY NR pour
mettre la fonction DOLBY NR sur ON ou sur OFF.
(Cette fonction n'est pas disponible sur le XR-A370.)
Le voyant
2
NR s'allume lorsque la fonction est mis sur ON.
Chaque pression commute la fonction Dolby NR entre ON et OFF.
4. Appuyez sur la touche PLAY/PAUSE (
2
ou
3
) qui
correspond au sens dans lequel vous voulez enregistrer.
Le voyant de l'écran d'affichage indique le sens de l'enregistrement.
Appuyez sur la touche STOP (
7
) après sélection du sens de
l'enregistrement.
5. Appuyez sur la touche de fonction AUX, TUNER
ou CD de l'appareil principal afin de sélectionner le
composant à partir duquel vous voulez enregistrer.
(Si vous avez sélectionné la fonction CD, appuyez sur la touche
PLAY/PAUSE pour mettre en attente le lecteur de CD.)
6. Appuyez sur la touche REC/STOP afin de
commencer l'enregistrement.
Si vous avez sélectionné CD, appuyez sur la touche PLAY/PAUSE
afin de commencer la lecture.
Le voyant REC (REC
) s'allume pendant l'enregistrement.
7. Passez la source du programme à enregistrer.
Pour arrêter l'enregistrement:
Appuyez sur la touche REC/STOP.
÷
En mode enregistrement, vous ne pouvez pas changer de source d'entrée.
÷
La fonction de manipulation de son est désactivée pendant
l'enregistrement.
÷
Cet appareil règle automatiquement le niveau d'enregistrement
avec la fonction ALC (Automatic Level Control).
«
5
6
«
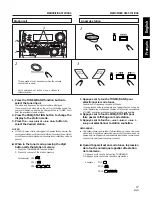
(Only if you select CD)
(Seulement si vous sélectionnez CD)
SO
UN
D MORPING JO
G
«
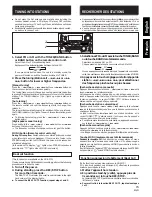
<XR-A670>
1
3
2
4, 5
6
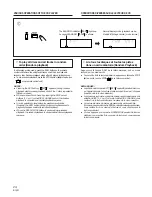
1
2
ON
OFF
2
3
ON
OFF
2
3
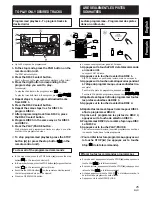
3
4
1. Press the TAPE
I
/
II
function button.
2. Insert the tape to be recorded in TAPE
I
.
Wind the tape forward past the leader tape.
3. Push the DOLBY NR button to switch Dolby NR
ON or OFF as required.
(This function is not available on the XR-A370.)
The
2
NR indicator lights when it is ON.
Each press switches Dolby NR ON or OFF.
4. Press the PLAY/PAUSE button (
2
or
3
) of the
direction you want to record.
The indicator on the display shows the direction by which
recording will start.
Press the STOP (
7
) button after choosing the recording direction.
5. Press one of the AUX, TUNER or CD input function
button of the main unit to select the component
to be recorded.
(If you selected the CD input function, press the PLAY/PAUSE
button to pause the CD player.)
6. Press the REC/STOP button to start recording.
If you selected CD, press the PLAY/PAUSE button to start playback.
The REC indicator (REC
) lights during recording.
7. Play the program source to be recorded.
To stop recording:
Press the REC/STOP button.
÷
In the recording mode, the input source cannot be changed.
÷
Sound morphing is turned off during recording.
÷
This unit automatically sets the recording level by ALC (Auto Level
Control) function.
5
7
RECORDING
ENREGISTRER


