
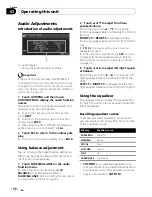


1
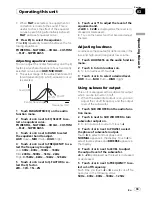
Touch PICTURE ADJUSTMENT on the
system menu.
The adjustment function names are displayed.
2
Touch any of the following touch panel
keys to select the function to be adjusted.
!
BRIGHTNESS
–
Adjust the black intensity
!
CONTRAST
–
Adjust the contrast
!
COLOR
–
Adjust the color saturation
!
HUE
–
Adjust the tone of color (red is em-
phasized or green is emphasized)
!
DIMMER
–
Adjust the brightness of display
!
REAR VIEW
/
SOURCE
–
Switch the picture
adjustment modes
#
You cannot adjust the picture adjustment for
rear view camera when
CAMERA POLARITY
is
set to
OFF
. (Refer to
Setting for rear view camera
(back up camera)
on the next page.)
#
With some rear view cameras, picture adjust-
ment may not be possible.
3
Touch
c
or
d
to adjust the selected
item.
Each time you touch
c
or
d
it increases or de-
creases the level of selected item.
+24
to
–
24
is displayed as the level is increased or de-
creased.
4
Touch ESC to hide the touch panel keys.
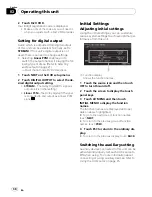
Adjusting the dimmer
To prevent the display from being too bright at
night, the display is automatically dimmed
when the car
’
s headlights are turned on. You
can turn the dimmer on or off.
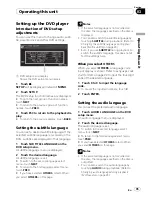
1
Touch PICTURE ADJUSTMENT on the
system menu.
The adjustment function names are displayed.
2
Touch DIMMER.
3
Touch
c
or
d
to adjust the brightness.
Each time you touch
c
or
d
it moves cursor
towards the left or the right.
The level indicates the brightness of the
screen being adjusted. The farther cursor
moves to the right, the brighter the screen.
4
Touch ESC to hide the touch panel keys.
Selecting the background display
You can switch background displays while lis-
tening to each source.
!
You can enjoy
AV
(AV input) as the back-
ground video image while you are listening
to audio source such as radio or CD.
%
Touch BACKGROUND on the system
menu to select the desired background dis-
play.
Audio source
BGP1
(background picture 1)
—
BGP2
(back-
ground picture 2)
—
BGP3
(background picture
3)
—
AV
(AV input)
Video source
OFF
(off)
—
BGP1
(background picture 1)
—
BGP2
(background picture 2)
—
BGP3
(back-
ground picture 3)
—
AV
(AV input)
#
When the AV (AV input) is not set to
VIDEO
,
AV
cannot be selected. (Refer to this page.)
Setting the AV input
You can switch the setting according to the
connected component.
!
Select
VIDEO
to watch video of a con-
nected component as
AV
source.
!
Select
S-DVD
to watch video of a con-
nected DVD player as
S-DVD
source.
!
Select
EXT-VIDEO
to watch video of a con-
nected video unit as
EXT
source.
!
Select
TV
to watch TV pictures from a con-
nected TV tuner as
TV
source.
%
Touch AV INPUT on the system menu to
select the AV input setting.
!
OFF
–
No video component connected
!
VIDEO
–
External video component (such
as portable video player)
!
S-DVD
–
DVD player connected with RCA
cable
!
EXT-VIDEO
–
External video unit (such as
Pioneer products available in the future)
!
TV
–
TV tuner connected with RCA cable
Operating this unit
En
42
Section
03