HDD and DVD recording
06
51
En
Recording time and picture quality
There are six preset recording quality modes
1
:
•
XP
– High quality setting, gives about one hour of
recording time on a DVD disc.
•
SP
(Standard Play) – Default quality, used for most
applications, gives about two hours of recording time
on a DVD.
•
LP
(Long Play) – Lower video quality than SP, but
doubles the recording time on a DVD to about four
hours.
•
EP
(Extended Play) – Lower quality than LP, but gives
about six hours of recording time on a DVD disc.
•
SLP
(Super Long Play) – Lower quality than EP, but
gives about eight hours of recording time on a DVD
disc.
•
SEP
(Super Extended Play) – Lowest video quality but
gives about ten hours of recording time on a DVD
disc.
Please note that there is a trade-off between recording
time and quality. The longer the possible recording time,
the lower the recorded picture quality.
In addition to these settings, when Manual Recording is
On (see
Manual Recording
on page 113) you can access
32 different recording quality/time settings (
MN1
–
MN32
), a high-quality audio mode (
LPCM
), and a super-
high quality (data transfer rate of around 15 Mbps) HDD
recording mode (
XP+
).
When setting a timer recording there is a further option,
AUTO
, which maximizes the recording quality for the
space available on the disc loaded at the time of
recording. (If recording to the HDD, the recording quality
is maximized to fit on to a DVD disc.)
Recorded audio
In all except the
LPCM
mode, sound is recorded in two
channel Dolby Digital format. When set to
LPCM
, sound
is recorded in high quality, uncompressed Linear PCM
format.
If the broadcast audio is bilingual and you are recording
in Video mode or to the HDD with the HDD Recording
Format set to Video Mode On, or on the
LPCM
setting,
use the Bilingual Recording setting (page 111) to select
the
A/L
or
B/R
audio channel to record before recording
starts. In other cases, both channels of a bilingual
broadcast will be recorded and you can switch on
playback.
Restrictions on video recording
You cannot record copy-protected video using this
recorder. Copy-protected video includes DVD-Video discs
and some satellite broadcasts. If copy-protected material
is encountered during a recording, recording will pause
automatically and an error message will be displayed on-
screen.
Video that is ‘copy-once only’ can only be recorded on the
HDD or in VR mode (see below).
When recording a TV broadcast or through an external
input, you can display copy control information on
screen. (see
Displaying disc information on-screen
on
page 36).
CPRM
CPRM is a copy protection/scrambling system developed
for the recording of ‘copy once’ broadcast programs.
CPRM stands for
Content Protection for Recordable
Media
.
This recorder is CPRM compatible, which means that
you can record copy-once broadcast programs, but you
cannot then make a copy of those recordings. CPRM
recordings can only be made on CPRM-compatible
DVD-R (ver. 2.0/8x or higher) or DVD-RW (ver. 1.1 or
higher) discs formatted in VR mode or on the HDD.
DVD CPRM recordings can only be played on players that
are specifically compatible with CPRM.
Recording equipment and copyright
Recording equipment should be used only for lawful
copying and you are advised to check carefully what is
lawful copying in the country in which you are making a
copy. Copying of copyright material such as films or
music is unlawful unless permitted by a legal exception
or consented to by the rightowners.
• This product incorporates copyright protection
technology that is protected by method claims of
certain U.S. patents and other intellectual property
rights owned by Macrovision Corporation and other
rights owners. Use of this copyright protection
technology must be authorized by Macrovision
Corporation, and is intended for home and other
limited viewing uses only unless otherwise
authorized by Macrovision Corporation. Reverse
engineering or disassembly is prohibited.
Note
1.All recording times (both in this manual and those shown by the recorder) are approximate. This is because of the way that the video is re-
corded; you may get slightly more or slightly less, depending on what you’re recording.
DVRRT601HS_WV_EN.book 51 ページ 2005年8月3日 水曜日 午後3時31分
Downloaded From DvDPlayer-Manual.com Pioneer Manuals
53
En
• While the recorder is stopped, you can also use the
number buttons on the remote to select the channel.
(For channel 6, press
6
then
ENTER
; for channel 24,
press
2, 4
then
ENTER
)
• If the recorder is stopped, you can also use the
+/–
buttons on the front panel to select the channel
number.
3
Use the REC MODE button to set the picture
quality/recording time.
• See
Setting the picture quality/recording time
above
for detailed instructions.
4
Use the AUDIO button to select the audio
channel to record.
See
Changing audio channels
on page 32 for more on
this.
• When recording in VR mode, if a broadcast is
bilingual, both audio channels are recorded, allowing
you to switch the audio channel on playback. The
only exception to this is when the picture quality is set
to
LPCM
, in which case you do need to select the
audio channel before recording.
5
Press
REC to start recording.
If you want to set a recording end time, press the
REC
button repeatedly. The recording time increases in 30
minute increments, up to a maximum of six hours. The
time the recording will end is shown on-screen and in the
front panel display. When the recording ends, the
recorder automatically switches into standby if no other
operation is being performed.
• To cancel the set recording time, press
REC
.
• If you want to pause recording at any time, press
PAUSE
. Press again to restart the recording. (If
recording to the HDD or in VR mode, a new chapter
is started after recording restarts)
6
To stop the recording, press
STOP REC.
• If you set the recording time in the previous step, you
can still stop the recording anytime by pressing
STOP REC
.
• Recording will stop automatically when there is no
more space on the HDD/DVD, or after 12 hours of
HDD recording (whichever is sooner).
If VPS/PDC is active for two timer programs that are
programmed to start at the same time, then the
program that actually starts first takes priority.
Tip
• During recording you can turn on/off the SCART loop
through function. During recording, press the front
panel
+
button to switch to
SCART THRU
(loop
through on), or
–
to switch to
SCART NORM
(loop
though off). Note that you can’t switch loop through
on if recording from the
AV2/(INPUT 1/DECODER)
or
AV1(RGB)-TV
connectors. Also, loop through is
automatically reset to off after recording has
finished.
Direct recording from TV
If you connected this recorder to your TV using a SCART
cable, and your TV supports Direct Recording, you can
record whatever is currently being shown on the TV
without having to worry about what channel preset the
recorder is on. Check the instructions that came with
your TV if you’re not sure whether your TV supports this
feature.
1
If necessary, load a recordable disc.
2
Set the picture quality/recording time using the
REC MODE button.
3
Press TV DIRECT REC to start recording.
If you want to set a recording time, press the
REC
button repeatedly. The recording time increases in 30
minute increments, up to a maximum of six hours. You
can see the recording time on-screen and in the front
panel display. When the recording ends, the recorder
automatically switches into standby if no other operation
is being performed.
• To cancel the set recording time, press
REC
.
• If you want to pause recording at any time, press
PAUSE
. Press again to restart the recording. (If
recording to the HDD or in VR mode, a new chapter
is started after recording restarts)
4
To stop the recording, press
STOP REC.
• If you set the recording time in step
3
, you can still
stop the recording anytime by pressing
STOP REC
.
• Recording will stop automatically when there is no
more space on the HDD/DVD, or after 12 hours of
HDD recording (whichever is sooner).
REC
STOP REC
REC MODE
TV DIRECT
REC
PAUSE
DVRRT601HS_WV_EN.book 53 ページ 2005年8月3日 水曜日 午後3時31分
Downloaded From DvDPlayer-Manual.com Pioneer Manuals
55
En
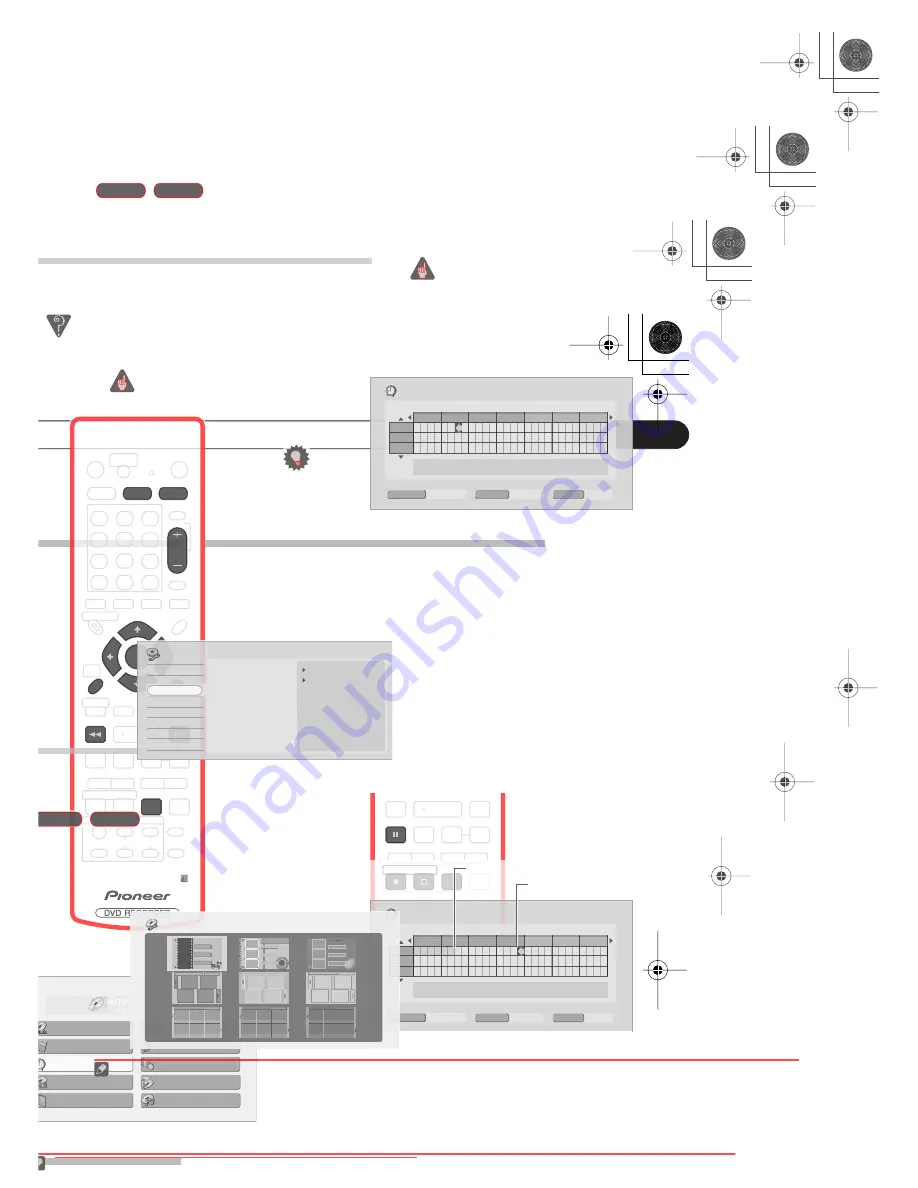
Easy Timer Recording
As the name suggests, Easy Timer Recording makes
setting up a timer recording as simple as possible.
1
1
Press HOME MENU and select ‘Easy Timer’.
2
Set the TV channel and recording quality.
• Use the
CH +/–
buttons to set the channel you want
to record.
• Use the
REC MODE
button to set the recording
quality. Press repeatedly to switch between
XP
,
SP
,
LP
,
EP
,
SLP
,
SEP
and
AUTO
(and
MN
if manual
recording mode is on).
•
DVD recording:
The
AUTO
option automatically sets
the best recording quality for the space available on
the disc loaded at the time of recording.
•
HDD recording:
The
AUTO
option automatically sets
the best recording quality that would fit on to a blank
DVD disc.
• Press
DVD
to record to DVD disc, or
HDD
if you want
to record to the hard disk drive.
3
Use
to move the cursor to the
recording start date and time on the grid.
• You can move the cursor forward or back an hour at
a time using the
and
buttons.
Each row of the grid is one day (you can set the timer
recording for up to a month in advance). Each column is
a 15 minute interval.
The darker area represents time that has already passed
and can’t therefore be selected. The lighter area is time
that’s available.
4
Press ENTER to set the start time.
The start date and time is displayed in the middle of the
screen.
• You can go back and reset the start time if you need
to by pressing
RETURN
.
Note
1.You can’t use VPS/PDC with Easy Timer Recording. Set a scheduled recording using the GUIDE Plus+ system if you want to use VPS/PDC.
CH
FWD SCAN
REC MODE
REV SCAN
ENTER
HOME
MENU
RETURN
DVD
HDD
Current time
Recording start time
DVRRT601HS_WV_EN.book 55 ページ 2005年8月3日 水曜日 午後3時31分
Downloaded From DvDPlayer-Manual.com Pioneer Manuals
57
En
Timer recording FAQ
Frequently Asked Questions
• Even though the timer is set, the recorder doesn’t start
recording!
Check that the disc loaded or HDD is recordable, not
locked (see
Lock Disc
on page 104), and that there are
fewer than 99/999 titles already on the DVD/HDD.
• The recorder won’t let me enter a timer program! Why
not?
You can’t enter a timer program if the clock isn’t set.
• What happens when two or more timer programs
overlap?
Basically, the program with the earlier recording start
time has priority. However, the recorder will start
recording the program with the later start time after
the earlier program is finished. If two programs have
the same times (but different channels, for example),
the program set most recently takes priority.
If VPS/PDC is active for two timer programs that are
programmed to start at the same time, then the
program that actually starts first takes priority.
Simultaneous recording and
playback
A feature called Chase Play makes it possible to watch a
recording in progress (DVD or HDD) from the start of the
recording (as in, playback is ‘chasing’ the recording). For
example, perhaps you have to miss the first 30 minutes of
a movie on TV; you can start recording, then start
watching the movie, from the beginning, while the
recorder is still recording 30 minutes ahead of you.
In fact, you’re not just limited to watching the recording
in progress; you can watch anything else already on the
DVD or HDD by selecting it from the Disc Navigator
screen (see
Using the Disc Navigator with recordable
discs and the HDD
on page 62).
Important
• Note that you must use a DVD-RW Ver. 1.1 / 2x or
Ver. 1.2 disc to be able to use this feature.
• You may not be able to use this feature with a
DVD-RW disc that was first initialized on another
recorder.
• Chase playback is not possible using a VR mode
DVD-R disc.
•
During recording, press
PLAY to start playback
from the beginning of the current recording
1
, or
press DISC NAVIGATOR and select another title to
play from there.
You can use all the usual playback controls, such as
pause, slow-motion play, scan
2
and skip.
• To stop playback, press
STOP
(recording will
continue).
• To stop recording, press
STOP REC
(playback will
continue).
• During recording or in timer recording standby, you
can’t play an HDD title, DVD or Video CD/Super VCD
disc if the Input Line System setting doesn’t match
the TV line system of the disc/HDD title (see also
Additional information about the TV system settings
on page 116). Also, during simultaneous recording
and playback, if the TV line system of the playback
track/title changes then playback will automatically
stop.
VR mode
HDD
Note
1.You can’t start playback immediately after recording starts. Simultaneous playback and recording doesn’t work while copying or backing up.
2.When scanning a DVD, no sound is output if the recorder is also recording the DVD (see
Scanning discs
on page 64).
DVRRT601HS_WV_EN.book 57 ページ 2005年8月3日 水曜日 午後3時31分
Downloaded From DvDPlayer-Manual.com Pioneer Manuals
59
En
Finalizing a disc
Finalizing ‘fixes’ the recordings in place so that the disc
can be played on a regular DVD player or computer
equipped with a suitable DVD-ROM drive.
1
Note that the disc name will appear in the title menu after
you finalize a disc. Make sure the disc name is as you
want it before you finalize the disc as it can’t be changed
afterwards. If you want to rename the disc, see
Input Disc
Name
on page 104 before starting the steps below.
Important
• Once you’ve finalized a disc recorded in Video mode,
you can’t edit or record anything else on that disc.
However, the finalization on a DVD-RW disc maybe
‘undone’; see
Undo Finalize
on page 105 for how to do
this.
• A VR mode disc can still be recorded and edited on
this recorder even after finalizing.
1
Load the disc you want to finalize.
Make sure that the recorder is stopped before
proceeding.
2
Press HOME MENU and select ‘Disc Setup’.
3
Select ‘Finalize’.
4
Select ‘Finalize’ from the finalize options, then
‘Next Screen’.
5
For Video mode discs only, select a title menu
style, then select ‘Yes’ to start finalization or ‘No’ to
cancel.
The menu you select will be the one that appears when
the ‘top menu’ is selected on any DVD player.
• Discs recorded partially or fully on the Pioneer
DVR-7000 DVD recorder do not support this feature.
These discs will have only a text title menu when
finalized on this recorder.
6
The recorder will now start finalizing the disc.
During finalization:
• If the finalization process of a DVD-RW disc is going
to take more than around four minutes, you can
press
ENTER
to cancel. Around four minutes before
completion, the option to cancel disappears.
• You can’t cancel the finalization of a VR mode DVD-R
disc.
• How long finalization takes depends on the type of
disc, how much is recorded on the disc and the
number of titles on the disc. A disc recorded in VR
mode can take up to one hour to finalize. A disc
recorded in Video mode can take up to 20 minutes.
Note
1.If the TV line system of the disc is different to the current setting of the recorder, you will not be able to finalize the disc. See
Additional infor-
mation about the TV system settings
on page 116 for how to change the recorder’s setting.
VR mode
Video mode
TITLE MENU
TITLE MENU
DVRRT601HS_WV_EN.book 59 ページ 2005年8月3日 水曜日 午後3時31分
Downloaded From DvDPlayer-Manual.com Pioneer Manuals
Содержание DVR-RT604H-S
Страница 6: ......
Страница 8: ......
Страница 10: ......
Страница 12: ......
Страница 14: ......
Страница 16: ......
Страница 18: ......
Страница 20: ......
Страница 22: ......
Страница 24: ......
Страница 26: ......
Страница 28: ......
Страница 30: ......
Страница 32: ......
Страница 34: ......
Страница 36: ......
Страница 38: ......
Страница 40: ......
Страница 42: ......
Страница 44: ......
Страница 48: ......
Страница 50: ......
Страница 52: ......
Страница 54: ......
Страница 56: ......
Страница 58: ......
Страница 60: ......
Страница 62: ......
Страница 64: ......
Страница 66: ......
Страница 68: ......
Страница 70: ......
Страница 72: ......
Страница 74: ......
Страница 76: ......
Страница 78: ......
Страница 80: ......
Страница 82: ......
Страница 84: ......
Страница 86: ......
Страница 88: ......
Страница 90: ......
Страница 92: ......
Страница 94: ......
Страница 96: ......
Страница 98: ......
Страница 100: ......
Страница 102: ......
Страница 104: ......
Страница 106: ......
Страница 108: ......
Страница 110: ......
Страница 112: ......
Страница 114: ......
Страница 116: ......
Страница 118: ......
Страница 120: ......
Страница 122: ......
Страница 124: ......
Страница 126: ......
Страница 128: ......
Страница 130: ......
Страница 132: ......

