


AXC F X152
PHOENIX CONTACT
107708_en_08
6.4.2
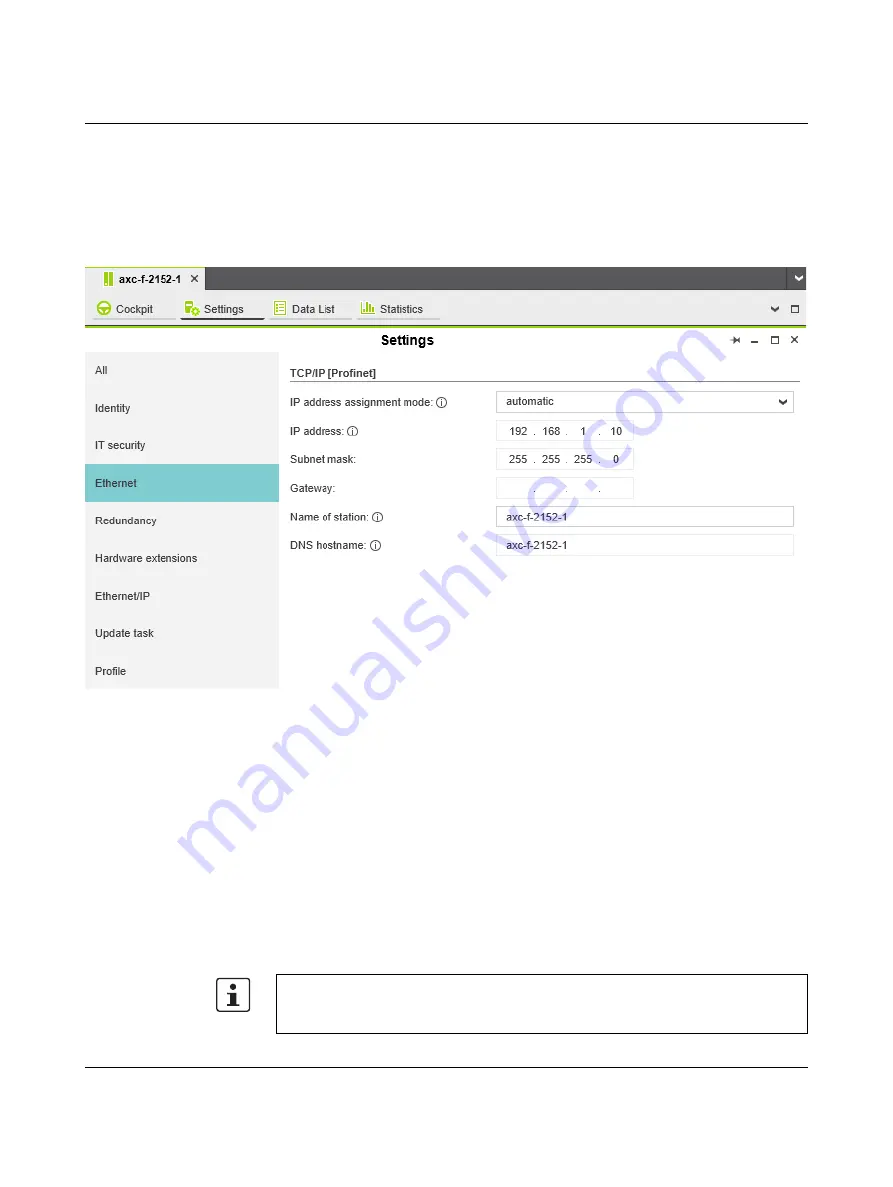
Setting the IP address
•
Double-click the controller node in the “PLANT” area.
The controller editor group opens.
•
Select the “Settings” editor.
•
Select the “Ethernet” view.
Figure 6-4
Setting the IP address
The IP address of the controller can be set automatically or manually. The IP address is
assigned to the controller when you have connected PLCnext Engineer to the controller,
.
Setting the IP address
automatically
•
From the “IP address assignment mode” drop-down list, select “automatic”.
PLCnext Engineer automatically assigns an IP address to the controller from the set IP ad-
dress range (see
Section 6.4.1, “Setting the IP address range”
) as soon as a connection to
the controller is established (see
Setting the IP address
manually
•
From the “IP address assignment mode” drop-down list, select “manual”.
•
Enter the IP address, subnet mask, and gateway in the respective input fields.
PLCnext Engineer assigns the manually set IP address to the controller as soon as a con-
nection to the controller is established (see
).
If you are using an SD card, the IP address will be stored there. In the event of a device
replacement, the IP address will then be adopted by the new controller when the SD card
is inserted.
Содержание AXC F 1152
Страница 1: ...User manual Installing starting up and operating the AXC F 1152 AXC F 2152 and AXC F 3152 controllers...
Страница 59: ...Startup 107708_en_08 PHOENIX CONTACT 59 112 Figure 6 3 Setting the IP address range...
Страница 90: ...AXC F X152 90 112 PHOENIX CONTACT 107708_en_08...
Страница 112: ......


