


15
14
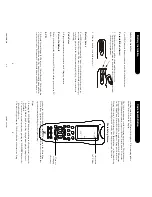
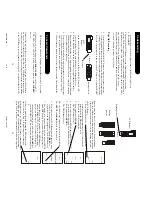
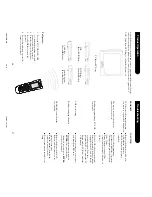
Changing Button Labels
display shows the Main Setup Screen.
2.
Release the Code Search button.
3.
Press and hold the Code Search button for approximately 5 seconds until
the LED blinks on then turns of
f (the LCD goes blank).
The Default Reset is now complete and the remote will be in TV Mode.
Lets you select which buttons and individual button label
segments are shown in the display
. Y
ou can select any LCD
button for change except the
SCREEN
button. Each button
can use any one of the available labels. Each button allows
just the “frame” to be shown. Y
ou can even completely
hide a button.
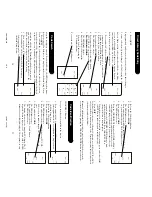
1.
Press and hold the Code Search button until the LED
remains on (after approximately 2-3 seconds) and the
display shows the Main Setup Screen.
2.
Release the Code Search button.
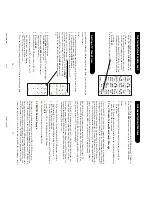
that Mode (Note this might not be the Default Labels). The
SETUP
and
SCREEN
labels are also shown.
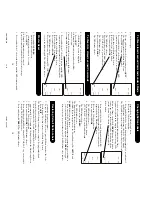
6.
Press any of the LCD buttons multiple times within the current Mode to
select the individual button label required. (Use
SCREEN
to toggle
between the two screens for that mode). The LED blinks of
f to indicate
SET
U
P
QU
IT
MO
D
E
SL
EEP
SET
U
P
QU
IT
LE
A
RN
SC
RE
EN
KE
Y?
CO
DE
3.
Press and release
MODE
.
The LED blinks of
f once.
4.
Press and release desired Mode button
(TV
, VCR, SA
T
, etc.) on the rubber keypad.
The LED blinks of
f once.
5.
Press and release
SCREEN
.
The LED blinks of
f once.
The display shows the current labels for
T
o
Clear ALL stored Learned Commands
(i.e. back to step 3).
8.
T
o
save and exit from the Learn routine press
QUIT
.
The display returns to the Main Setup Screen.
9.
Press
QUIT
. Learning is now complete.
1.
Press and hold the Code Search button until the LED
remains on (after approximately 2-3 seconds) and the
display shows the Main Setup Screen.
2.
Release the Code Search button.
3.
Press and release
MODE
.
The LED blinks of
f once.
4.
Press and release desired Mode button
(TV
, VCR, SA
T
, etc.) on the rubber keypad.
The LED blinks of
f once.
5.
Press and release
LEARN
.
The LED blinks of
f once.
T
o
Clear stored Learned Commands under a Mode
Master Reset
5.
Press and hold
LEARN
until the Main Setup Screen
is displayed (after approx. 5 seconds).
6.
Press
QUIT
.
All Learned Commands are now cleared.
Resets the remote defaults back to the factory settings.
1.
Press and hold the Code Search button until the LED remains on and
6.
Press and hold Code Search until
the Main Setup Screen is displayed.
7.
Press
QUIT
.
All Learned Command entries under that Mode
are now cleared.
Clears all stored Learned Commands in the Remote
(recommended before first time learning).
1.
Press and hold the Code Search button until the LED
remains on (after approximately 2-3 seconds) and the
display shows the Main Setup Screen.
2.
Release the Code Search button.
3.
Press and release
MODE
.
The LED blinks of
f once.
4.
Press and release any Mode button (TV
, VCR, SA
T
,
etc.) on the rubber keypad. The LED blinks of
f once.
SET
U
P
QU
IT
LE
A
RN
SC
RE
EN
KE
Y?
CO
DE
SET
U
P
QU
IT
MO
D
E
SL
EEP
SET
U
P
QU
IT
LE
A
RN
SC
RE
EN
KE
Y?
CO
DE
SET
U
P
QU
IT
MO
D
E
SL
EEP
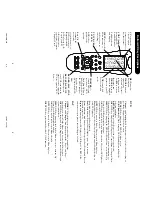
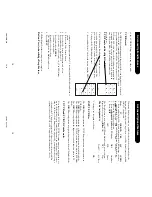
Restoring Default Button Labels
each button keypress acceptance.
7.
T
o
save the Label change selections, press the Mute button or the Code
Search button. This then returns to the Main Setup Screen.
8.
Press
QUIT
.
The Button Label change routine is now complete. Preprogrammed and
Learned codes are not af
fected by these changes.
1.
Press and hold the Code Search button until the LED remains on (after
approximately 2-3 seconds) and the display shows the Main Setup Screen.
2.
Release the Code Search button.
3.
Press and release
MODE
. The LED blinks of
f once.
4.
Press and release desired Mode button (TV
, VCR, SA
T
, etc.) on the rubber
keypad. The LED blinks of
f once.
5.
Press and release
SCREEN
. The LED blinks of
f once.
PM8TSMD.p65
12/9/02, 4:53 PM
14-15