Contr
ols
9
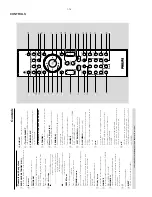
OK
–
to exit or conf
ir
m the selection.
0
w
/
–
Disc: skips to the previous/next chapter/title/
track.
–T
uner
: selects a preset r
adio station.
!
9
–
In DISC/USB mode
, to stop pla
yback or clear a
progr
am.
@
2;
–
In DISC/USB mode
, to star
t or inter
rupt
pla
yback.
#
VOL +/-
–
adjusts the v
olume upward/do
wnward.
–
adjusts the hour
s and min
utes in clock/timer
setting mode
.
–
selects a source in timer setting mode
.
$
MODE
–
selects var
ious repeat modes or the shuffle pla
y
mode f
or a disc
.
%
SUBTITLE
–
selects a subtitle language
.
^
SLEEP/TIMER
Standb
y mode
–
sets time f
or switching on the system
automaticall
y.
Po
we
r-on mode
–
sets the sleep timer function (auto off).
&
LOUDNESS
–
enab
les or disab
les automatic loudness
adjustment.
*
DSC
–
selects diff
erent types of preset sound equaliz
er
settings (CLASSIC
, JAZZ,
R
OCK,
POP or FLA
T;
for D
VD:
NORMAL,
CONCER
T,
DRAMA,
A
CTION or SCI-FI).
(
DBB
–
enab
les or disab
les bass enhancement.
)
MUTE
–
to interr
upt or resume sound reproduction.
¡
DISPLA
Y
–
displa
ys inf
or
mation on
TV screen during
pla
yback.
™
A-B
–f
or
VCD/CD/USB:
to repeat a specif
ic section
within the same track.
–f
or D
VD:
to repeat a specif
ic section in a disc
.
£
DIM
–
selects diff
erent levels of br
ightness f
or the
displa
y screen.
≤
A
UDIO
for VCD
–
sets Stereo
, Mono-Left or Mono-Right sound
mode
.
for D
VD
–
selects an audio language
.
∞
ZOOM
–D
VD/VCD/Picture CD:
enlar
ges or reduces a
picture or activ
e image on the
TV screen.
§
ANGLE
–
selects a D
VD camer
a angle
.
GO
TO/STEREO
–
In DISC mode
, to fast search in a disc b
y
enter
ing a time
, title
, chapter or tr
ack.
–
FM:
sets stereo or mono sound mode
.
•
CLOCK/RDS
Standby mode
*–
sets the system clock.
Playback mode
–
displa
ys the system clock.
For tuner
–
displa
ys RDS inf
or
mation.
ª
0
–
ejects a disc from the disc loader
.
º
CH.LEVEL (una
vailable f
or this v
ersion)
⁄
SURR
OUND (una
vailab
le f
or this
version)
Notes for r
emote contr
ol:
–
Fir
st,
select the source you wish to
contr
ol b
y pr
essing one of the source select
ke
ys on the r
emote contr
ol (DISC or
TUNER,
for e
xample).
–
Then select the desir
ed function (
2;
, ,
for e
xample).
* = Press and hold the button for mor
e than thr
ee seconds
.
w
≥
w
w
W
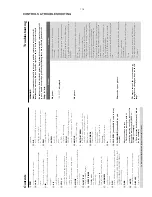
ARNING
Under no cir
cumstances should you tr
y to r
epair the system y
ourself,
as this will
in
validate the war
ranty
. Do not open the system as ther
e is a risk of electric shock.
If a fault occurs,
first check the points listed belo
w bef
or
e taking the system f
or r
epair
. If
y
ou are unab
le to r
emedy a pr
ob
lem b
y f
ollo
wing these hints,
consult y
our dealer or
Philips f
or help
.
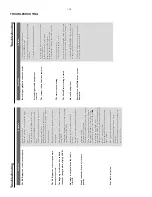
Pr
ob
lem
Solution
Tr
oub
leshooting
No po
wer
.
“
NO DISC
” is displa
y
ed.
No pictur
e
.
Distor
ted or poor pictur
e.
The aspect ratio of the scr
een cannot be
chang
ed e
v
en though y
ou ha
v
e set the
TV
sha
pe
.
Check if the
A
C pow
er cord is proper
ly
connected.
Check if the disc is inser
ted upside down.
W
ait until the moisture condensed at the lens
has cleared.
Replace or clean the disc
, see “Maintenance”.
Use a readab
le disc or cor
rectl
y recorded f
or
mat
MP3-CD
.
Select the appropr
iate video input mode on the
TV set.
Check if the
TV set is switched on.
Check the video connection.
Check if the system is securel
y connected.
If the progressiv
e scan f
eature is activated b
ut
the connected
TV does not suppor
t progressiv
e
signals or the cab
les are not connected
accordingl
y, see
“Prepar
ations-Setting up
Progressiv
e Scan f
eature”
f
or proper progressiv
e
scan setup or deactivate the progressiv
e scan
feature as belo
w:
1)
Tur
n off y
our
TV progressiv
e scan mode or
tur
n on to inter
laced mode
.
2) Press SYSTEM on the remote to exit the
system men
u and then DISC to exit progressiv
e
scan.
Sometimes a slight picture distor
tion ma
y appear
.
This is not a malfunction.
Clean the disc
.
Connect the system to the S-video input of your
TV set.
The aspect r
atio is f
ix
ed on the D
VD disc
.
The aspect r
atio ma
y not be changed f
or some
TV systems.
CONTROLS & TROUBLESHOOTING
1-15
Содержание MCD288
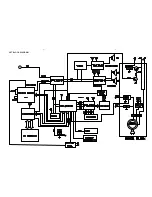
Страница 18: ...4 1 SET BLOCK DIAGRAM 4 1 ...
Страница 19: ...5 1 SET BLOCK DIAGRAM 5 1 ...
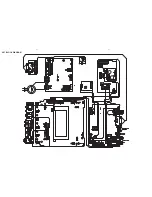
Страница 21: ...6 2 6 2 LAYOUT DIAGRAM DISPLAY BOARD TOP VIEW ...
Страница 22: ...LAYOUT DIAGRAM DISPLAY BOARD BOTTOM VIEW 6 3 6 3 ...
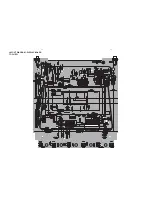
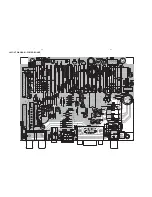
Страница 27: ...8 2 8 2 LAYOUT DIAGRAM POWER BOARD ...
Страница 30: ...9 2 9 2 LAYOUT DIAGRAM WOOFER OUTPUT BOARD ...

