background image

6

English

3139 115 22872

General Information

Supplied accessories ................................... 8
Care and safety information ..................... 8

Connections

Step 1: Placing the speakers and
subwoofer ..................................................... 9
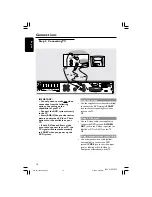
Step 2: Connecting speakers and
subwoofer ..................................................... 9
Step 3: Connecting TV .............................. 10

Using Scart jacks .................................. 10
Using S-Video jack ............................... 10
Using Composite Video jack (CVBS) 10

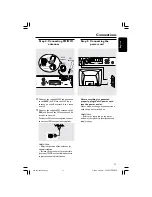
Step 4: Connecting FM / MW antennas . 11
Step 5: Connecting the power cord ..... 11

Connections (optional)

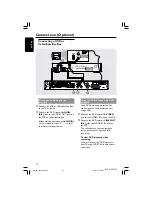
Connecting a VCR or Cable /
Satellite Box ............................................... 12

Viewing and listening to the
playback .................................................. 12
Using the VCR for recording
DVD playback ....................................... 12

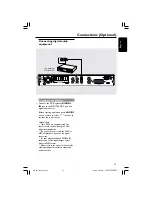
Connecting digital audio equipment ..... 13

Listening to the playback .................... 13

Functional Overview

Main unit and remote control ................ 14

Control buttons available on
the remote only ............................. 14–15

Getting Started

Step 1: Inserting batteries into the
remote control .......................................... 16

Using the remote control to
operate the system .............................. 16

Step 2: Setting the TV ............................... 16

Selecting the colour system that
corresponds to your TV ..................... 17
Setting the TV Display ......................... 17

Step 3: Setting language preferences ..... 18

On-Screen Display (OSD) language . 18
Audio, Subtitle and Disc menu
languages ................................................ 18

Step 4: Setting the speakers’ channels .. 19

Disc Operations

Playable discs .............................................. 20
Playing discs ................................................ 20

Auto Eco Power standby mode ........ 21

Basic playback controls ............................ 21
Selecting various repeat / shuffle
functions ...................................................... 21

Repeat play mode ................................ 21
Repeating a section within a
chapter / track ........................................ 21

Other operations for video playback
(DVD / VCD / SVCD) ................................. 22

Using the Disc Menu ........................... 22
Zooming in ............................................ 22
Using the OSD Menu .......................... 22
Resuming playback from the last
stopped point ........................................ 23
Advancing by frame ............................. 23
Changing sound track language ......... 23
Changing subtitle language
(DVD only) ............................................ 23
Viewing from another angle
(DVD only) ............................................ 23
Selecting a title (DVD only) ............... 23
Playback Control (PBC) (VCD only) 24
Preview Function (VCD only) ........... 24

Playing MP3 / JPEG / DivX / MPEG-4 disc 25

Playing MP3 music and JPEG
picture simultaneously ........................ 25

Playing Super Audio CD (SACD) ........... 26
Special features for picture
disc playback ............................................... 26

Preview Function .................................. 26
Zoom picture ........................................ 26
Playback with multi-angles ................. 26
Scan Effect .............................................. 26

Contents

001-041-LX39-22-Eng2

3/15/04, 6:09 PM

6

Содержание LX3900SA

Страница 1: ...1 DVDVIDEO DIGITAL SURROUND SYSTEM LX3900SA LX3950W DVD HOME CINEMA SYSTEM DVD HOME CINEMA SYSTEM LX3900SA LX3950W ...

Страница 2: ...ct either wire to the earth terminal in the plug marked E or e or coloured green or green and yellow Before replacing the plug cover make certain that the cord grip is clamped over the sheath of the lead not simply over the two wires Copyright in the U K Recording and playback of material may require consent See Copyright Act 1956 and The Performer s Protection Acts 1958 to 1972 Norge Typeskilt fi...

Страница 3: ...s issued and pending DTS and DTS Digital Surround are registered trademarks of DigitalTheater Systems Inc Copyright 1996 2000 DigitalTheater Systems Inc All Rights Reversed This product complies with the radio interference requirements of the European Community This DVD player is in conformity with the EMC directive and low voltage directive For Customer Use Read carefully the information located ...

Страница 4: ...Consumer Electronics B U Peripherals Accessories declara que el cumple con los requisitos esenciales y cualesquiera otras disposiciones aplicables o exigibles de la Directiva 1999 5 CE Deutsch Hiermit erklärt Philips Consumer Electronics B U Peripherals Accessories die Übereinstimmung des Gerätes mit den grundlegenden Anforderungen und den anderen relevanten Festlegungen der Richtlinie 1999 5 EG N...

Страница 5: ...nza estas mejoras estarán al alcance de todo tipo de usuarios y se podrán llevar a cabo fácilmente Visite la página www p4c philips com para buscar información sobre actualizaciones de software Da das Disk Format je nach Hersteller verschieden ist ist für Ihr DVD System möglicherweise die Erweiterung der Spielbarkeit oder eine Aktualisierung erforderlich Da die DVD Technologie sich ständig weitere...

Страница 6: ...r TV 17 Setting the TV Display 17 Step 3 Setting language preferences 18 On Screen Display OSD language 18 Audio Subtitle and Disc menu languages 18 Step 4 Setting the speakers channels 19 Disc Operations Playable discs 20 Playing discs 20 Auto Eco Power standby mode 21 Basic playback controls 21 Selecting various repeat shuffle functions 21 Repeat play mode 21 Repeating a section within a chapter...

Страница 7: ...2 MP3 JPEG Navigator turning on off 32 Changing the Password 33 Restoring to original settings 33 Tuner Operations Tuning to radio stations 34 Presetting radio stations 34 Using the Plug and Play 34 Automatic presetting 35 Manual presetting 35 Selecting a preset radio station 35 Deleting a preset radio station 35 Sound andVolume Controls Sound Control 36 Selecting surround sound 36 Selecting digit...

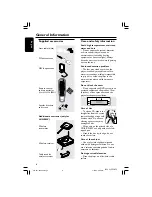
Страница 8: ...t impossible to play a disc Leave the player in the warm environment until the moisture evaporates Do not block the vents Do not operate the DVD system in an enclosed cabinet and allow about 10 cm 4 inches of free space all around the player for adequate ventilation 10 cm 4 inches 10 cm 4 inches 10 cm 4 inches DVD Home Cinema System PHILIPS Care of disc To clean a CD wipe it in a straight line fro...

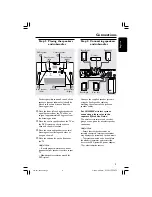
Страница 9: ...o close to your TV Allow adequate ventilation around the DVD system Front Speaker Left Front Speaker Right Subwoofer Rear speaker Right Rear speaker Left Step 2 Connecting speakers and subwoofer L R L R Front Right Rear Right Rear Left Centre Subwoofer Front Left DVD System Centre speaker Connect the supplied speaker systems using the fixed speaker cables by matching the colours of the jacks and s...

Страница 10: ...rTV the TV signal will detect automatically to SCART when you power up the DVD system Using Scart jack Use the supplied scart video cable black to connect the DVD system s SCART jack to the corresponding Scart input jacks on theTV OR Using S Video jack Use an S video cable not supplied to connect the DVD system s S VIDEO OUT jack to the S Video input jack or labelled asY C or S VHS on the TV OR Us...

Страница 11: ... Extend the FM antenna and fix its ends to the wall For better FM stereo reception connect an external FM antenna not supplied Helpful Hints Adjust the position of the antennas for optimal reception Position the antennas as far as possible from yourTV VCR or other radiation source to prevent unwanted interference After everything is connected properly plug the AC power cord into the power outlet N...

Страница 12: ...rting operation press AUX DI on the remote to select AUX in order to activate the input source Using theVCR for recording DVD playback Some DVDs are copy protected You cannot record or dub protected discs using aVCR 3 Connect the DVD system s S VIDEO jack to the S VIDEO IN jack on theVCR 4 Connect the DVD system s LINE OUT R L jacks to the AUDIO IN jacks on theVCR This will allow you to make analo...

Страница 13: ...er to activate the input source Helpful Hints Some DVDs are copy protected You cannot record the disc through aVCR or digital recording device You cannot hear or record the SACD or MP3 CD playback if you use the digital connection For your playback through DIGITAL IN connection set the digital output of that player to PCM format Always refer to the owner s manual of the other equipment for complet...

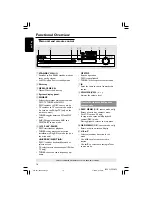
Страница 14: ...g Play mode only on the main unit S PREV NEXT T DISC searches backward forward or selects a track TV selects previous next channel Philips TV only TUNER tunes the radio frequency up down 1 2 3 5 4 6 8 7 Ç STOP Exits an operation DISC stops playback TUNER erases a preset radio station 7 iR Point the remote control towards this sensor 8 VOLUME VOL Adjusts the volume level Control buttons available o...

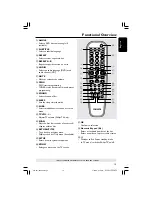
Страница 15: ...set programming SOUND Selects a sound effect SLEEP Sets the sleep timer function SURR Selects multichannel surround or stereo mode TVVOL Adjusts TV volume PhilipsTV only SCAN Plays the first few seconds of each track chapter within a disc RETURN TITLE To go back to previous menu Displays the disc sTitle menu if available SETUP Enters or exits system setup menu ZOOM Enlarges a picture on theTV scre...

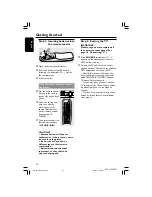
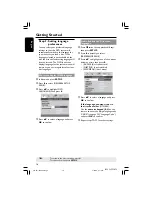
Страница 16: ...d new or different types of batteries in combination Batteries contain chemical substances so they should be disposed of properly Getting Started Step 2 Setting theTV IMPORTANT Make sure you have completed all the necessary connections See page 10 ConnectingTV 1 Press SOURCE control until DISC appears on the display panel or press DISC on the remote 2 Turn on the TV and set to the correct video in...

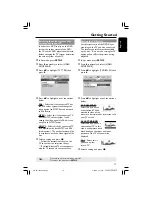
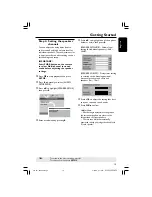
Страница 17: ...stem The output format will be in accordance with the video signal of the disc 5 Select a setting and press OK Follow the instructions show on the TV to confirm the selection if any If a blank distorted TV screen appears wait for 15 seconds for auto recovery Setting theTV Display Set the aspect ratio of the DVD Player according to the TV you have connected The format you select must be available o...

Страница 18: ...mode press SETUP 2 Press 2 to select GENERAL SETUP PAGE 3 Press 34 to highlight OSD LANGUAGE then press 2 4 Press 34 to select a language and press OK to confirm Audio Subtitle and Disc menu languages 1 Press Ç twice to stop playback if any then press SETUP 2 Press 2 repeatedly to select PREFERENCE PAGE 3 Press 34 to highlight one of the options below at a time then press 2 AUDIO disc s soundtrack...

Страница 19: ...select AUDIO SETUP PAGE 3 Press 34 to highlight SPEAKER SETUP then press 2 4 Enter its submenu by pressing 2 5 Press 34 to highlight one of the options below at a time then press 2 SPEAKERSVOLUME Volume level setting for individual speakers 6dB 6dB SPEAKERS DELAY Delay times setting in relation to the listening position distance for center and surround speakers 1m 10m 6 Press 1 2 to adjust the set...

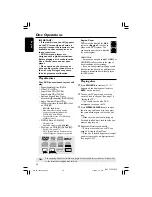
Страница 20: ... Operations Region Codes DVDs must be labelled for ALL regions or Region 2 in order to play on this DVD system You cannot play discs that are labelled for other regions Helpful Hints It may not be possible to play CD R RW or DVD R RW in all cases due to the type of disc or condition of the recording If you are having trouble playing a certain disc remove the disc and try a different one Improperly...

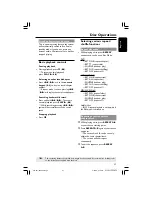
Страница 21: ...rching pressing S T again will decrease increase the search speed Stopping playback Press Ç Selecting various repeat shuffle functions Repeat play mode While playing a disc press REPEAT continuously to choose a Play Mode DVD RPT ONE repeat chapter RPT TT repeat title SHUFFLE random play RPT SHF repeat shuffling RPT OFF repeat off VCD SVCD CD RPT ONE repeat track RPT ALL repeat disc SHUFFLE random ...

Страница 22: ...ontinue 2 Press ZOOM repeatedly to return to the original size Disc Operations TIPS The operating features described here might not be possible for certain discs Always refer to the instructions supplied with the discs Using the OSD menu OSD menu shows the disc playback information for example title or chapter number elapsed playing time audio subtitle language a number of operations can be done w...

Страница 23: ...y to select the available audio languages ForVCD changing the audio channel Press AUDIO repeatedly to select the available audio channels provided by the disc STEREO LEFT MONO RIGHT MONO or MIX MONO Changing subtitle language DVD only This operation works only on DVDs with multiple subtitle languages you can change the language you want while playing DVD Press SUBTITLE repeatedly to select differe...

Страница 24: ...o highlight TRACK DIGEST DISC INTERVAL or TRACK INTERVAL 3 Press OK to open one option Track Digest This function will minimise the picture of every track in order to display every six of these tracks on the screen to help you know the content of every track on the disc Disc Interval This function is used to divide a disc into six parts by regular intervals and display them on one page to preview ...

Страница 25: ...NE one file being played repeatedly SHUFFLE all files in the current folder being played at random order Press Åto pause or PLAY B to resume playback Playing MP3 music and JPEG picture simultaneously 1 Load a MP3 disc that contains music and picture The disc menu appears on the TV screen 2 Select a MP3 track and press PLAY B 2 to start playback 3 During MP3 music playback select a picture folder f...

Страница 26: ...e 16 Setting theTV Load a Picture disc Kodak Picture CD JPEG For Kodak disc the slide show will begin For JPEG disc the picture menu appears on the TV screen Press PLAY B 2 to start the slide show playback Preview Function This function shows the content of the current folder or the whole disc 1 During playback press Ç 12 thumbnail pictures will appear on theTV screen 2 Press S T to display the ot...

Страница 27: ...s 1 To remove the menu press SETUP Dimming system s display panel You can select different levels of brightness for the display screen 1 In GENERAL SETUP PAGE press 34 to highlight DISPLAY DIM then press 2 100 Select this for full brightness 70 Select this for medium brightness 40 Select this for dimming the display 2 Press 34 to select a setting and press OK to confirm Programming disc tracks not...

Страница 28: ...ng damaged 1 In GENERAL SETUP PAGE press 34 to highlight SCREEN SAVER then press 2 ON Select this if you wish to turn off the TV screen when play is stopped or paused for more than 15 minutes OFF Select this to disable the screen saver function 2 Press 34 to select a setting and press OK to confirm DivX VOD registration code Philips provide you the DivX VOD Video On Demand registration code that a...

Страница 29: ... Multi channel output 2 Press 34 to select a setting and press OK to confirm Speaker Setup This menu contains setup options for your audio output which makes the speaker setup system reproduce high quality surround sound For details see page 19 Night Mode turning on off When night mode is activated the high volume outputs are softened and low volume outputs are brought upward to an audible level I...

Страница 30: ...f picture colour settings and one personal setting which you can define yourself 1 In VIDEO SETUP PAGE press 34 to highlight PICTURE SETTING then press 2 STANDARD Select this for standard picture setting BRIGHT Select this will make the TV picture brighter SOFT Select this will make the TV picture softer PERSONAL Select this to personalise your picture colour by adjusting the brightness contrast t...

Страница 31: ...atures 7 Press OK to confirm Preference Setup Menu 1 Press Ç twice to stop playback if any then press SETUP 2 Press 1 2 to select the Preference Setup icon 3 Press OK to confirm Audio Subtitle Disc Menu These menus contain various language options for audio subtitle and disc menu which may be recorded on the DVD For details see page 18 Restricting playback by Parental Control Some DVDs may have a ...

Страница 32: ...o children under age 17 not recommended viewing for children under age 17 8 ADULT Mature material should be viewed only by adults due to graphic sexual material violence or language Helpful Hints VCD SVCD CD have no level indication so parental control has no effect on these type of discs This also applies to most illegal DVDs Some DVDs are not encoded with a rating though the movie rating may be ...

Страница 33: ...the first time key in 136900 If you forget your old six digit password key in 136900 4 Enter the new six digit password 5 Enter the new six digit password a second time to confirm The new six digit password will now take effect 6 Press OK to confirm DVD Setup Menu Options Restoring to original settings Setting the DEFAULT function will reset all options and your personal settings to the factory de...

Страница 34: ... Operations Presetting radio stations You can store up to 20 FM and 10 MW preset radio stations in the memory Helpful Hints The system will exit presetting mode if no button is pressed within 20 seconds If no valid frequency is detected during Plug and Play CHECK ANTENNA appears Using the Plug and Play Plug and Play allows you to store all available radio stations automatically AUTO INSTALL PRESS ...

Страница 35: ...preset number is selected automatic preset will begin from preset 1 and all your former presets will be overridden Manual presetting You can choose to store only your favourite radio stations 1 Tune to your desired radio station see Tuning to radio stations 2 Press PROG 3 Press 1 2 to select a preset number 4 Press PROG again to store Selecting a preset radio station Press 1 2 or use the numeric k...

Страница 36: ...isc menu in order to select between multi channel and stereo tracks see page 26 You are not able to select the surround sound mode if the system setup menu is turned on Sound andVolume Controls Selecting digital sound effects Select a preset digital sound effects that matches your disc s content or that optimises the sound of the musical style you are playing Press SOUND on the remote When playing...

Страница 37: ...see page 12 Connections optional 2 Select the source to record from your DVD system DISC TUNER TV or AUX DI and start playback if necessary 3 For ultimate recording press SOUND to select CLASSIC or CONCERT and press SURR to select STEREO 4 Start recording on the external recording device Helpful Hint Refer to the owner s manual of the connected equipment for details Setting the Sleep timer The sle...

Страница 38: ... changing the setting of the TV TYPE wait for 15 seconds for auto recovery Check the video connection Sometimes a small amount of picture distortion may appear This is not a malfunction Clean the disc The aspect ratio is fixed on the DVD disc Depending on the TV it may not be possible to change the aspect ratio Adjust the volume Check the speaker connections and settings Press the correct source b...

Страница 39: ...eless transmitter and receiver must using the same transmission frequency If the signal is too weak adjust the antenna or connect an external antenna for better reception Increase the distance between the system and your TV or VCR Tune in to the correct frequency Place the antenna farther away from any equipment that may be causing the noise Select the source DISC orTUNER for example before pressi...

Страница 40: ...8 IEC 61937 SACD D A converter DSD SACD cut off frequency 30 kHz Specifications MAIN UNIT Power Supply Rating 220 240V 50 Hz Power Consumption 80W Dimensions w x h x d 360 mm x 55 mm x 325 mm Weight 3 kg FRONT SPEAKERS System 2 way closed box system Impedance 4 Ω Speaker drivers 18mm cone dome tweeter Frequency response 120 Hz 20 kHz Dimensions w x h x d 92 mm x 170 mm x 64 mm Weight 0 73 kg each ...

Страница 41: ...ality in spite of its high compression ratio MP3 A file format with a sound data compression system MP3 is the abbreviation of Motion Picture Experts Group 1 or MPEG 1 Audio Layer 3 By using the MP3 format One CD R or CD RW can contain about 10 times more data then a regular CD Multichannel DVDs are formatted to have each sound track constitute one sound field Multichannel refers to a structure of...

Страница 42: ...ourTV is not equipped with a SCART connector connect your TV through the corresponding S VIDEO or CVBS jack cable not supplied S VIDEO CVBS Front Speaker left Rear Speaker right Rear Speaker left Centre Speaker MW loop antenna FM antenna Scart cable 12nc 3139 115 23022 Front Speaker right Subwoofer Wireless Receiver see next page for complete setup Wireless Transmitter K L B C B C D K H J L A J A ...

Страница 43: ...you want to play face up 4 Playback will start automatically If a disc menu appears use 3 4 1 2 buttons on the remote to make the necessary selection then press OK to confirm Or use the numeric keypad on the remote to select features Follow the instructions given in the disc menu 5 To stop playback press STOPÇ Make sure your DVD system and TV are connected and turned on Check the AV Audio Video mo...

Страница 44: ...s au mode d emploi du téléviseur Guía de utilización rápida En primer lugar conecte A Altavoz delantero derecha B Altavoz delantero izquierdo C Altavoz central D Subwoofer E Cable Scart F Antena de cuadro MW G Antena de alambre FM H Altavoz trasero izquierdo J Altavoz trasero derecho K Transmisor inalámbrico L Receptor inalámbrico vea la configuración completa en la página siguiente Consejos útile...

Страница 45: ...n Taste wiederholt bis Sie denVideoeingangskanal sehen Oder die Fernsehgerät Fernbedienung könnte eineTaste oder einen Schalter haben womit verschiedeneVideomodi gewählt werden Nähere Angaben sind Ihrem Fernsehgerät Handbuch zu entnehmen Verkorte handleiding Eerst aansluiten A Voorluidspreker rechts B Voorluidspreker links C Middenluidspreker D Subwoofer E Scart kabel F MW antenne G FM antenne H S...

Страница 46: ...ale più alto e quello più basso e potrebbe essere denominato FRONT A V IN oVIDEO Oppure si potrebbe andare al canale 1 dellaTV quindi premere ripetutamente il pulsante giù del canale fino a quando si vede il canale d ingresso video Oppure il telecomando dellaTV potrebbe avere un pulsante o un interruttore che seleziona diverse modalità video Per ulteriori dettagli consultare il manuale dellaTV Sna...

Страница 47: ...ifterknap som vælger mellem forskellige videostillinger Angående flere detaljer se iTV ets brugervejledning Pikakäyttöohje Yhdistä ensin A Etukaiutin oikea B Etukaiutin vasen C Keski kaiutin D Subwoofer E Scart johto F KA antenni G ULA antenni H Surround kaiutin vasen J Surround kaiutin oikea K Langaton lähetin L Langaton vastaanotin Hyödyllisiä vinkkejä Sinun tarvitsee tehdä vain yksi kytkentä te...

Страница 48: ...es Para assegurar a qualidade do som produzido e transmitido Coloque tanto o transmissor como o receptor sem fios pelo menos a 3 metros de distância e fora do chão altura mínima recomendada de 30 cm Não os coloque muito próximo do televisor do sistema de DVD do adaptador de corrente CA ou de quaisquer fontes de radiação Tenha também em atenção que o áudio pode ser interrompido devido às ondas refl...

Страница 49: ...nik pozwalający na wybór różnych trybów wideo Więcej informacji znajduje się w instrukcji obsługi odbiornikaTV Краткое руководство Сначала подключите A Передняя колонка Правая B Передняя колонка Левая C Центральная колонка D Низкочастотная колонка E Кабель Scart F Рамочная антенна MW G Проводная антенна FM H Колонка объемного звучания Левая J Колонка объемного звучания Правая K Беспроводный переда...

Отзывы: