


E
ng
l
i
sh
58
Edit Recordings - HDD
About HDD title edit menu
In the HDD title edit menu, you can
change the title name, hide unwanted
scenes, delete titles, split a title or change
the title index picture.
The edit options in the HDD title edit
menu are:
{
Play Title
}
– Select a title (recording) to play.
{
Delete Title
}
( For unprotected and unlocked titles only )
– Delete the title (recording).
{
Divide Title
}
– Divide the recording into two separate
titles.
{
Edit Title
}
– Hide the unwanted scene in the recording.
{
Rename
}
– Change the name of a title (recording).
{
Lock/ Unlock
}
– Lock or unlock a title (recording) to
prevent/allow playback.
{
Protect/ Unprotect
}
– Protect or unprotect a title (recording) to
prevent/allow erasure or changes being made.
Accessing the HDD title edit
menu
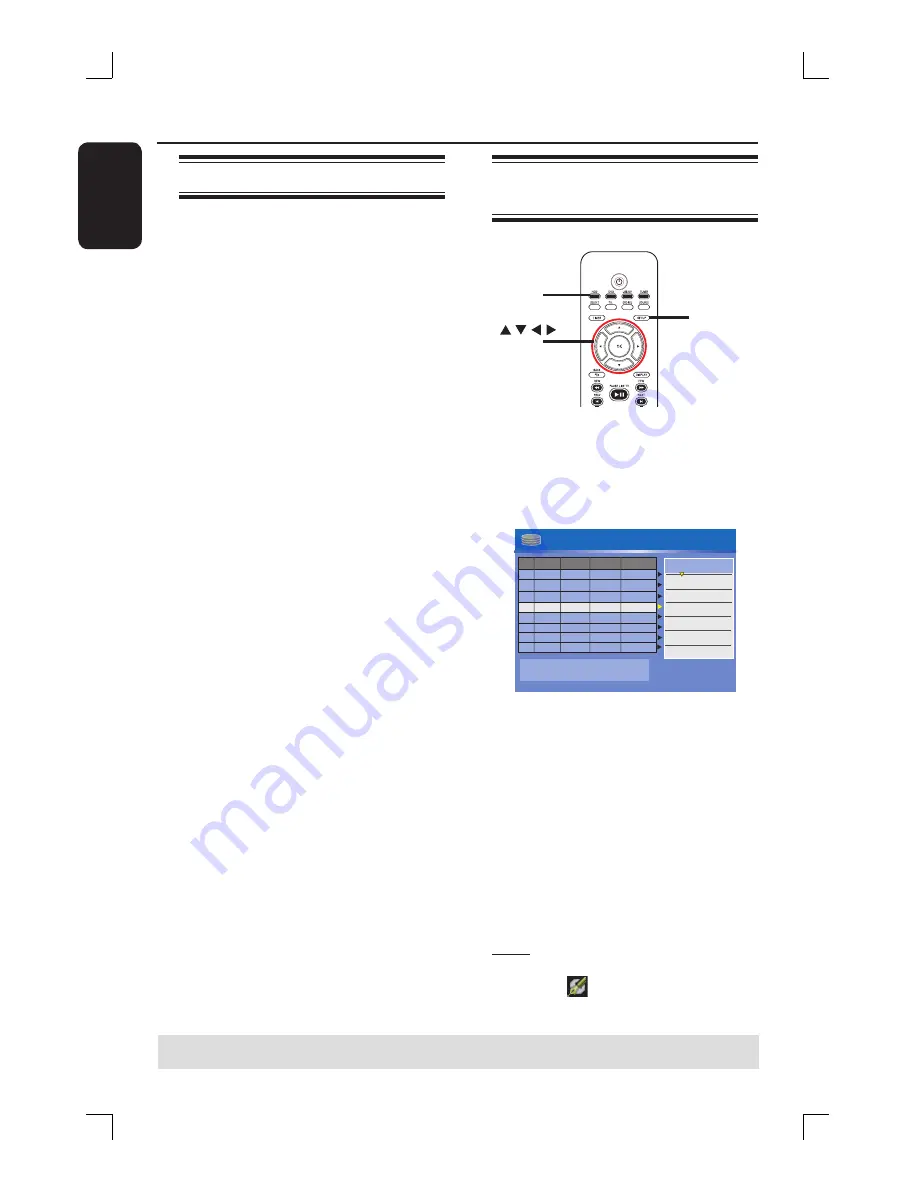
SETUP
OK
HDD
A
Press
HDD
on the remote control.
The HDD content menu appears.
B
Use
ST
keys to highlight a title
(recording) and press
X
.
The HDD title edit menu appears.
001 CH001
CH003
CH009
CH008
CH002
CH008
002
003
004
005
006
Date
Time
No Ch.
Title
HDD 8 Titles
01/14/06
01/20/06
01/25/06
02/30/06
02/27/06
03/12/06
02.00 PM
04.00 PM
Travel
Nature
News
Drama
CSI
Title 3
03.30 AM
08.30 PM
08.30 PM
01.15 PM
11.00 AM
Press [OK] to play title.
00:20:20
SP NTSC
Play Title
Delete Title
Divide Title
Edit Title
Rename
Lock
Protect
CH012
007
04/08/06
News
08.30 PM
CH010
008
05/30/06
Discover
08.30 PM
If you have many HDD title recordings,
use
í
(PREV) or
ë
(NEXT) to view the
previous/ next page of HDD titles for
selection.
C
Use
ST
keys to access the different
options and press
OK
.
Instructions and explanation of the
options are provided in the following
pages.
D
To exit, press
W
to go back to the HDD
title menu screen.
Note:
Any title/ recording which has
been edited will be marked with an
edited icon
next to the selected title’s
index picture.
TIPS:
Press
W
to go back to the previous menu.


