background image

14

English

After recording the display will show 

UPDATE

for several

seconds.

Note:
- The CD recorder will not start until it recognizes a digital

signal. Although the reaction time is less than 200
milliseconds, the very beginning of the music may
sometimes not be recorded. If this happens, you can start
the recording manually (see digital recording-
unsynchronized).

- Recordings from DAT or DCC will only stop after 20 silence.

Only make analogue recordings if digital recording is not
possible. 

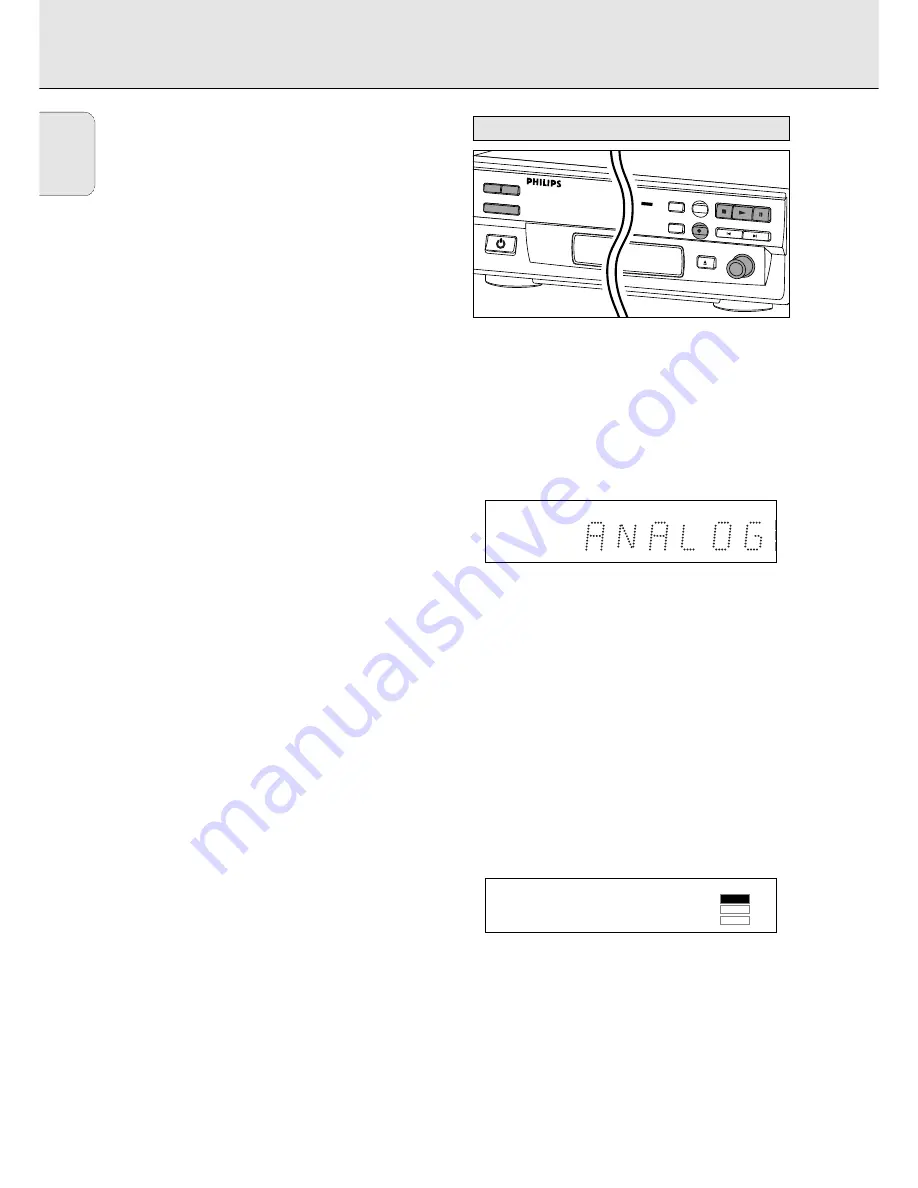
Preparing for analogue recording

1

Make sure the disc is absolutely free of scratches and dust
particles.

2

Press Source repeatedly until:

ANALOG

appears on the display.

3

Press AUTO/MANUAL to switch between auto and manual
track numbering.

If Auto is selected (preferred), 

AUTO TRACK

appears on

the display.

AUTO: The track number is automatically incremented after

a silence on the original of at least 3 seconds.

MANUAL: Track numbers can be incremented manually by

pressing 

§

. (minimum track length is 4 seconds ).

(This can also be done in AUTO mode)

Track numbers cannot be changed after recording.

4

With the recorder stopped, press RECORD to enter Record
standby mode.

RECORD

will flash

5

Play the source first to set the optimal recording level on
the CD recorder.

6

Adjust the REC LEVEL until all blue segments on the
Record/Play Level bar light up but no red segments light
continuously during the loudest passages.

7

Stop the source.

G

REPEAT 1

DIG

ERASE

CD SYNC

TOTAL

AUTO

TRACK

TRACK

REM

TIME

RECORD

FINALIZE

PROG

REPEAT 1

ANALOG

DIG

TOTAL

AUTO

TRACK

TRACK

REM

TIME

CDR 

MINI CD RECORDER

SOURCE

DISPLAY

AUTO / MANUAL

POWER ON/OFF

OPEN/CLOSE

RECORD LEVEL

MIN

MAX

PREV

STOP

CD SYNCRO

RECORD

ERASE

FINALIZE

PLAY

PAUSE

NEXT

PAUSE

CD SYNC

TIME

0

OVER

RECORD

Analogue recording

RECORDING

Содержание CDR 538

Страница 1: ... recorder CDR MINI CD RECORDER OPEN CLOSE RECORD LEVEL MIN MAX PREV STOP CD SYNCRO RECORD ERASE FINALIZE PLAY PAUSE NEXT INPUT DISPLAY AUTO MANUAL POWER ON OFF PROG REPEAT 1 PAUSE DIG CD SYNC TOTAL TRACK REM TIME L R 50 40 30 20 10 6 3 0 OVER RECORDABLE RECORD CD Recordable ...

Страница 2: ...ance is not defeated 12 Power Cord Protection Power Supply cords should be routed so that they are not likely to be walked on or pinched by items placed upon or against them paying particular attention to cords at plugs convenience receptacles and the point where they exit from the appliance 13 Cleaning The appliance should be cleaned only as recommended by the manufacturer 14 Nonuse Periods The p...

Страница 3: ...CONTENTS English 4 Français 19 Español 37 English Français Enspañol ...

Страница 4: ...EVISION SETS AND OTHER ELECTRONIC DEVICES IF YOU HAVE ANY PROBLEMS CONTACT YOUR DEALER ANY CHANGE OR MODIFICATIONS TO THE EQUIPMENT BY THE USER NOT EXPRESSLY APPROVED BY THE GRANTEE OR MANUFACTURER COULD VOID THE USER S AUTHORITY TO OPERATE SUCH EQUIPMENT C Ca an na ad da a This digital apparatus does not exceed the Class B limits for radio noise emissions from digital apparatus as set out in the ...

Страница 5: ...pt to provide service although there may be a delay if the appropriate spare parts and technical manual s are not readily available MAKE SUREYOU KEEP Please keep your sales receipt or other document showing proof of purchase Attach it to this owner s manual and keep both nearby Also keep the original box and packing material in case you need to return your product BEFORE REQUESTING SERVICE Please ...

Страница 6: ...range 92dB Recording total harmonic distortion 0 0056 85dB Digital coaxial input IEC 958 44 1Khz 100ppm Digital optical input IEC958 44 1Khz 100ppm Analogue input level potmeter 500mVrms 50kΩ 0dB Audio output 2V RMS 2dB Digital coaxial output 0 5 Vpp 75Ω Dimensions 435 x 305 x 88mm Weight 4kg Power consumption 15W Operating temperature 5 35 C Power Supply AC 120V Technical information Table of con...

Страница 7: ...oft lint free cloth Cleaning agents may damage the disc Write only on the printed side of a CD R or CD RW and only with a soft felt tipped pen Clean the CD recorder with a soft slightly dampened lint free cloth Do not use any cleaning agents as they may have a corrosive effect Do not expose the CD recorder batteries or CDs to humidity rain sand or excessive heat caused by heating equipment or dire...

Страница 8: ...t of an amplifier left and right 3 ANALOG OUT connects to the line input of an amplifier left and right 4 DIGITAL IN connects to the digital coaxial output of a CD player 5 DIGITAL OUT connects to the digital coaxial input of e g amplifier or recording device 6 OPTICAL IN connects to the digital optical output of a CD player Connections on the back Operating buttons on the front ANALOG IN L R L R ...

Страница 9: ... opening CLOSE during tray closing NO DISC no disc inserted or disc unreadable UPDATE updating disc contents ERROR write error during recording RECOVER during recovery procedure WAIT recording stop 4 seconds in progress SYNC during synchronized recording standby TRACK during erase track standby DISC during erase disc standby SERVICE self test failed OPCFAIL laser power calibration failed Further r...

Страница 10: ... ensures a high sound quality via the analogue output We recommend that both digital and analogue connections be made so that analogue recordings can be made when digital recording is not possible The most common ways of connecting the CD recorder are explained below If you still have difficulties with the connections feel free to contact the Philips Consumer Service desk in your country Use the a...

Страница 11: ...ween the digital optical input of the CD recorder and the digital optical output of a CD player FW538 Note For playback the digital coaxial output or analogue output should be connected to an amplifier For use with FW538 AUX IN L R L R LINE OUT OPTICAL IN DIGITAL IN OUT ANALOG IN OUT DIGITAL IN OUT L R L R FW538 1 2 OPTICAL OUT OPTICAL IN 4 CD RECORDER OPTICAL OUT RECEIVER CD PLAYER L R L R OUT IN...

Страница 12: ...rface Do not place the CD recorder near a source of heat or in direct sunlight Do not use the CD recorder under extremely damp conditions If the CD recorder is placed in a cabinet make sure that a one inch space remains free on all sides of the recorder for proper ventilation Note For CDR538 see Remote Control FW538 1 Open the battery compartment cover 2 Insert 2 batteries AAA R03 or UM 4 as suppl...

Страница 13: ...r press OPEN CLOSE to close the tray see also Playing a CD The display will indicate the type of disc you have inserted If a CD R is finalized the display will indicate CD If a CD RW is finalized it is still a CD ReWritable and the display will indicate CD REWRITABLE If you insert a blank or partly recorded CD R or CD RW the CD recorder will calibrate the disc for optimum recording During this pro...

Страница 14: ...h an output Sample Frequency of 44 1 kHz 100 ppm via the digital input Important If you want to play the recorded CD R disc on a regular CD player it must be finalized first See finalizing discs p 15 Finalized CD RW discs play only on CD RW compatible CD players Preparing for digital recording 1 Make sure the disc is absolutely free of scratches and dust particles 2 Press Source repeatedly until d...

Страница 15: ...ly free of scratches and dust particles 2 Press Source repeatedly until depending on the connection used DIG COAXIAL or DIG OPTICAL will appear on the display Start synchronized digital recording 1 With the CD recorder stopped press CD SYNC On the display CD SYNC SYNC appears After a time RECORD starts to flash If DIG also flashes the digital connection is incorrect 2 To start recording press Play...

Страница 16: ...he display AUTO The track number is automatically incremented after a silence on the original of at least 3 seconds MANUAL Track numbers can be incremented manually by pressing minimum track length is 4 seconds This can also be done in AUTO mode Track numbers cannot be changed after recording 4 With the recorder stopped press RECORD to enter Record standby mode RECORD will flash 5 Play the source ...

Страница 17: ...free of scratches and dust particles 2 With the recorder stopped press FINALIZE and then within 3 seconds press RECORD The approximate finalization time will appear in the display RECORD FINALIZE lights up The display counts down through the finalization On completion the total number of tracks and the total time recorded will appear on the display For CD R CD RECORDABLE will change to CD on the d...

Страница 18: ...PAUSE PAUSE will light up on the display 4 To continue play press PAUSE again or press PLAY 5 To stop play press STOP The number of tracks and the total playing time will appear on the display Selecting a track during play 1 Briefly press or one or more times Play skips to the beginning of the present previous or following track or Press the required track number using the numerical keys on the re...

Страница 19: ...epeatedly When REPEAT appears on the display the disc or program plays repeatedly 2 To return to normal play press REPEAT one or more times until the REPEAT message disappears from the display Note You can use shuffle in combination with repeat CD or program play Repeat is also cleared when you open the disc tray You can program up to 30 tracks to play in any desired sequence Tracks can be program...

Страница 20: ... recording level is correct 20 second pause between recordings see synchronized digital recording CD SYNC p 8 Player does not react switch the ON OFF button on the front of the player off and back then on SERVICE on display after switching on try switching off and on again RECOVER on display a power failure has occurred during recording the CD recorder is attempting to repair the disc if RC DISC t...

Страница 21: ...ent analogue 90dB Rapport signal bruit en enreg numérique identique a la source Gamme dynamique en enregistrement 92dB Distorsion harmonique totale en enregistrement 0 0056 85dB Entrée coaxiale numérique CEI 958 44 1 Khz 100ppm Entrée optique numérique CEI 958 44 1 Khz 100ppm Entrée analogique potentiomêtre de niveau 500mVrms 50kΩ 0dB Sortie audio 2V RMS 2dB Sortie coaxiale numérique 0 5 Vpp 75Ω D...

Страница 22: ...et non pelucheux en un mouvement rectiligne dirigé du centre vers les bords Les produits de nettoyage peuvent endommager le disque Écrivez seulement sur le côté imprimé des CD R ou des CD RW et uniquement avec un stylo feutre à pointe douce Nettoyez l enregistreur de CD avec un linge doux non pelucheux légèrement humide N utilisez pas de produits de nettoyage car ils peuvent être corrosifs N expos...

Страница 23: ...ent analogique 1 Connexion secteur 2 ANALOG IN pour connexion à sortie de linge d un amplificateur gauche et droite 3 ANALOG OUT pour connexion à entrée de ligne d un amplificateur gauche et droite 4 DIGITAL IN pour connexion à sortie coaxiale numérique d un lecteur de CD 5 DIGITAL OUT pour connexion à entrée coaxiale numérique d un amplificateur ou d un système d enregistrement par exemple 6 OPTI...

Страница 24: ...nformations du disque OPC procédure de calibrage en cours Optical Power Calibration OPEN ouverture du tiroir en cours CLOSE fermeture du tiroir en cours NO DISC aucun disque mis en place ou disque illisible UPDATE mise à jour du contenu du disque ERROR erreur d écriture en cours d enregistrement RECOVER procédure de récupération en cours WAIT fin de l enregistrement 4 secondes en cours SYNC attent...

Страница 25: ...termédiaire de la sortie analogique Nous vous conseillons d établir systématiquement les deux types de connexions numériques et analogiques Ainsi vous pouvez toujours réaliser des enregistrements analogiques lorsque l enregistrement numérique est impossible Nous décrivons ci après les méthodes les plus courantes pour connecter le lecteur de CD Si vous éprouvez malgré tout des difficultés vous pouv...

Страница 26: ...hez un câble en fibres optiques 4 d un côté sur l entrée optique numérique de l enregistreur de CD et de l autre sur la sortie optique numérique d un lecteur de CD FW538 Remarque Pour la lecture la sortie coaxiale numérique ou la sortie analogique doit être connectée à un amplificateur À utiliser avec la chaîne FW538 AUX IN L R L R LINE OUT OPTICAL IN DIGITAL IN OUT ANALOG IN OUT DIGITAL IN OUT L ...

Страница 27: ...de chaleur ou au soleil N utilisez pas l enregistreur de CD dans des conditions d humidité extrêmes Si l enregistreur de CD est placé dans un meuble assurez vous qu il reste autour de l appareil un espace d au moins 2 5 cm pour permettre une ventilation suffisante Remarque Pour le CDR538 se reporter à la télécommande de la chaîne FW538 1 Ouvrez le couvercle du compartiment des piles 2 Mettez en pl...

Страница 28: ...e un CD un CD R ou un CD RW dans l évidement du tiroir face imprimée vers le haut IMPORTANT Pour l enregistrement il est important d utiliser un disque vierge absolument exempt de particules de poussière ou de rayures voir Entretien p 22 3 Poussez le tiroir avec précaution ou appuyez sur OPEN CLOSE pour le refermer le voir également Lecture d un disque compact Le type de disque s allume sur l affi...

Страница 29: ...istrements numériques du contenu de disques compacts ou d autres sources ayant une fréquence d échantillonnage en sortie de 44 1 kHz 100 ppm par l intermédiaire de l entrée numérique de l enregistreur Important Si vous voulez passer un disque CD R enregistré sur un lecteur de CD classique vous devez d abord le finaliser Reportez vous à la section relative à la finalisation des disques voir p 30 Le...

Страница 30: ...matériel numérique source Il n est pas possible d ajouter manuellement des numéros de plages 1 Vérifiez que le disque est absolument exempt de rayures et de particules de poussière 2 Appuyez sur SOURCE plusieurs fois selon le type de connexion utilisée Jusqu à ce que DIG COAXIAL ou DIG OPTICAL s affiche Démarrage de l enregistrement numérique synchronisé 1 L enregistreur de CD étant à l arrêt appu...

Страница 31: ...é automatiquement dès que l appareil détecte un silence d au moins 3 secondes sur l original MANUAL Le numéro de plage peut être incrémenté manuellement en appuyant sur durée minimale des plages 4 secondes Cette opération peut être également effectuée en mode AUTO Les numéros de plage ne peuvent être changés une fois l enregistrement terminé 4 L enregistreur étant à l arrêt appuyez sur RECORD pour...

Страница 32: ... effacer des plages 1 Vérifiez que le disque est absolument exempt de rayures et de particules de poussière 2 L enregistreur étant à l arrêt appuyez sur FINALIZE puis dans les 3 secondes sur RECORD La durée approximative de finalisation s affiche alors RECORD et FINALIZE s allument L afficheur décompte la durée restante jusqu à la fin de la finalisation Une fois celle ci terminée le nombre total d...

Страница 33: ...démarrer la lecture d un disque Le numéro et la durée de la plage s affichent ainsi que l indicateur de niveau d enregistrement et de lecture 2 Appuyez une deux ou trois fois sur DISPLAY pour afficher respectivement les données suivantes durée de la plage restant à lire durée totale restante durée de la plage sans affichage de l indicateur de niveau d enregistrement et de lecture 3 Pour interrompr...

Страница 34: ... mode lecture aléatoire SHUFFLE répétition de lecture REPEAT ou lecture programmée PROGRAM la recherche est restreinte à la plage en cours d exécution 1 Appuyez sur SHUFFLE ou PLAY sur la télécommande avant ou pendant la lecture d un CD pour activer le mode de lecture aléatoire Toutes les plages du CD ou du programme le cas échéant sont lues dans le désordre SHUFFLE s affiche entre chaque plage 2 ...

Страница 35: ... plages programmées et de la durée totale du programme 3 Répétez l étape 2 pour chaque plage à programmer 4 Appuyez sur STOP ou PROGRAM pour mettre fin à la programmation PROG Le message PROG s allume Remarques Pour vérifier le programme appuyez sur ou le lecteur étant à l arrêt Pour ajouter des plages au programme répétez les étapes 1 à 4 Si vous tentez de programmer plus de 30 plages le message ...

Страница 36: ...e directement vers l enregistreur Inspectez les piles et remplacez les si nécessaire Commencez par sélectionner la source souhaitée L enregistrement n est pas possible Nettoyez le disque Dans le cas d un disque CD RW vérifiez qu il n est pas finalisé Vérifiez que le disque est enregistrable et remettez le en place si nécessaire Il ne s agit pas d un disque AUDIO La source d entrée choisie est inad...

Страница 37: ...ation aux consommateurs CIC Philips afin d obtenir les coordon nées du centre de réparation le plus proche Le numéro de téléphone du CIC figure dans le livret de garantie Si le message PASSED s affiche il est possible que vous ayez interprété le mode d emploi de façon erronée que vous utilisiez un disque inapproprié qu il y ait un défaut mécanique ou qu un branchement soit incorrect Dans ce cas re...

Страница 38: ...REMARQUES 36 Français ...

Страница 39: ...argen dinámico en grabación 92 dB Distorsión armónica total en grabación 0 0056 85 dB Entrada digital coaxial IEC 958 44 1 Khz 100 ppm Entrada digital óptica IEC958 44 1 Khz 100 ppm Entrada analógica medidor de nivel 500 mVrms 50 kΩ 0 dB Salida de audio 2 V RMS 2 dB Salida digital coaxial 0 5 Vpp 75 Ω Dimensiones 265 x 305 x 88mm Peso 4 kg Consumo 15 W Temperatura de funcionamiento 5 35 C Alimenta...

Страница 40: ...oductos de limpieza pueden dañar el disco Escriba únicamente en la cara rotulada del CD R o CD RW y sólo con rotulador punta de fieltro blanda Limpie el grabador de CD con un paño suave que no suelte pelusa ligeramente humedecido No utilice productos de limpieza ya que podrían tener un efecto corrosivo No exponga el grabador de CD las pilas ni los discos a la humedad lluvia arena o temperaturas el...

Страница 41: ...onexión a la salida de línea de un amplificador izquierda y derecha 3 ANALOG OUT conexión a la entrada de línea de un amplificador izquierda y derecha 4 DIGITAL IN conexión a la salida digital coaxial de un reproductor de CD 5 DIGITAL OUT conexión a la entrada digital coaxial de por ejemplo un amplificador o equipo de grabación 6 OPTICAL IN conexión a la salida digital óptica de un reproductor de ...

Страница 42: ...a NO DISC no hay ningún disco insertado o es ilegible UPDATE actualizando el contenido del disco ERROR error de escritura durante la grabación RECOVER procedimiento de recuperación en curso WAIT parada de grabación 4 segundos SYNC espera de grabación sincronizada TRACK espera de borrado de pista DISC espera de borrado de disco SERVICE error encontrado en autocomprobación OPCFAIL fallo en calibraci...

Страница 43: ...vés de la salida analógica Le recomendamos efectuar siempre las conexiones digitales y analógicas De esta manera siempre podrá realizar grabaciones analógicas cuando no sea posible la grabación digital A continuación explicamos las maneras más habituales de conectar el grabador de CD Si aun así tiene dudas con las conexiones puede contactar en cualquier momento con el Centro de Información al Cons...

Страница 44: ...da digital óptica del grabador de CD y la salida digital óptica de un reproductor de CD FW538 Observación Para la reproducción la salida digital coaxial o la salida analógica deberán conectarse a un amplificador Para ser utilizado con el mando FW538 AUX IN L R L R LINE OUT OPTICAL IN DIGITAL IN OUT ANALOG IN OUT DIGITAL IN OUT L R L R FW538 1 2 OPTICAL OUT OPTICAL IN 4 CD RECORDER OPTICAL OUT RECE...

Страница 45: ...ador de CD cerca de una fuente de calor o a la luz solar directa No utilice el grabador de CD en entornos extremadamente húmedos Si se integra el grabador de CD en un mueble asegúrese de que quede libre un espacio de 2 5 cm alrededor de la unidad para su correcta ventilación Observación con CDR 538 véase el mando FW538 1 Abra el compartimento de las pilas 2 Inserte 2 pilas AAA R03 o UM 4 incluidas...

Страница 46: ...vo y rayas véase Mantenimiento p 38 3 Pulse ligeramente el frente a bandeja o pulse el botón OPEN CLOSE para cerrar el compartimento véase también Reproducción de un CD La pantalla le informará sobre el tipo de disco insertado Si un CD R está finalizado se visualizará CD en la pantalla Si un CD RW está finalizado seguirá siendo regrabable y se visualizará CD REWRITABLE en la pantalla Si inserta un...

Страница 47: ... la entrada digital Importante Si desea reproducir un CD R en un lector de CD normal antes deberá ser finalizado Véase el capítulo de finalización de discos P 48 Los CD RW finalizados sólo son utilizables en reproductores de CD compatibles con el formato CD RW Preparación para la grabación digital 1 Asegúrese de que el disco está absolutamente limpio y no presenta rayas 2 Pulse SOURCE repetidas ve...

Страница 48: ...os de pista se detectan automáticamente del material original y no se pueden añadir manualmente 1 Asegúrese de que el disco está absolutamente limpio y no presenta rayas 2 Pulse SOURCE repetidas veces hasta que según la conexión utilizada DIG COAXIAL o DIG OPTICAL aparezcan en la pantalla Inicie la grabación digital sincronizada 1 Con el grabador en la posición de parada pulse CD SYNC En la pantal...

Страница 49: ...eces hasta que ANALOG aparezca en la pantalla 3 Pulse AUTO MANUAL para seleccionar la numeración de pistas automática o manual Si se selecciona AUTO recomendable en la pantalla aparece la indicación AUTO TRACK AUTO El número de pista se incrementa automáticamente después de un silencio en el original de más de 3 segundos MANUAL Los números de pista se pueden incrementar manualmente pulsando la lon...

Страница 50: ...vación La finalización impide realizar más grabaciones en un CD R Un CD RW finalizado deberá rehabilitarse para poder grabar o borrar pistas 1 Asegúrese de que el disco está absolutamente limpio y no presenta rayas 2 Con el grabador parado pulse FINALIZE y antes de 3 segundos RECORD En la pantalla se visualiza el tiempo aproximado de la operación RECORD y FINALIZE se iluminan La pantalla inicia un...

Страница 51: ... pantalla aparece el número de pista y su duración junto con el indicador de nivel de grabación reproducción 2 Pulse DISPLAY una dos o tres veces para visualizar tiempo restante de pista tiempo restante total tiempo de pista con la barra de nivel apagada 3 Para interrumpir momentáneamente la reproducción pulse PAUSE PAUSE se ilumina en la pantalla 4 Para reanudar la reproducción pulse PAUSE de nue...

Страница 52: ...o hacia adelante a 10 veces la velocidad normal con el sonido a bajo volumen y después prosigue el avance o retroceso rápidos con el sonido silenciado 2 Libere el botón cuando localice el pasaje deseado La reproducción se inicia en el pasaje deseado Observación Durante la reproducción aleatoria repetida o programada la búsqueda se limita a la pista en curso 1 Pulse SHUFFLE o PLAY en el mando a dis...

Страница 53: ...ón PROG parpadea en la pantalla 2 Teclee el número de pista con los botones numéricos Si el número consta de dos cifras teclee los botones en rápida sucesión En la pantalla se visualiza brevemente el número de pista seguido del número total de pistas programadas y el tiempo total del programa 3 Repita el paso 2 con todas las pistas que desee incluir en el programa 4 Pulse STOP o PROGRAM para final...

Страница 54: ...n Pausa de 20 segundos entre grabaciones véase la grabación digital sincronizada CD SYNC p 46 El reproductor no responde apague la unidad con el botón ON OFF del panel frontal y vuélvala a encender Indicación SERVICE en pantalla después del encendido pruebe a apagar y encender la unidad Indicación RECOVER en pantalla se ha producido un corte de fluido durante la grabación y la unidad está intentan...

Страница 55: ...es described herein are not necessarily available in all contries The specifications and design of this product are subject of change without notice Printed in Belgium PHILIPS 1999 All trademarks acknowledged 3104 125 2270 2 ...

Отзывы: