2.7.5 Video stores
4/6
Rent a video
To rent a video, select its icon on the video store page and
press OK. In most cases you can rent a video for 1 day or
for a couple of days or even just 1 hour. The way you select
and rent a video varies from store to store.
Payment
The store will ask you to log in or to open a new log in
account if you don't already have one. The login might
consist of your email address and a personal PIN code.
When you are logged in, you can select the payment
method, a credit card or a value code in most cases.
Consult the video store website for more information on
their payment terms.
. . .
Содержание 32PFL8605H
Страница 3: ...1 1 1 The remote control 1 12 To adjust the volume ...
Страница 4: ...1 1 1 The remote control 2 12 To switch TV channels ...
Страница 11: ...1 1 1 The remote control 9 12 Green With the green key you select the green option or the Eco settings ...
Страница 12: ...1 1 1 The remote control 10 12 Yellow With the yellow key you select the yellow option or the Help menu ...
Страница 13: ...1 1 1 The remote control 11 12 Blue With the blue key you select the blue option or open the Widgets ...
Страница 20: ...1 1 2 The menus 6 6 Go to the Search page to look for any topic in Help ...
Страница 32: ...1 2 1 Wall mounting 4 12 Unscrew the bolt in the middle of the bar with the supplied hex key ...
Страница 33: ...1 2 1 Wall mounting 5 12 Turn the bar as shown ...
Страница 34: ...1 2 1 Wall mounting 6 12 Reposition the bar on the stand and fix the bolt with the hex key ...
Страница 35: ...1 2 1 Wall mounting 7 12 Fix the stand to the TV ...
Страница 37: ...1 2 1 Wall mounting 9 12 Fix the 2 mounting discs Use screws with a diameter of max 6mm ...
Страница 38: ...1 2 1 Wall mounting 10 12 Slide the bottom plate of the stand onto the mounting discs ...
Страница 40: ...1 2 1 Table top stand 12 12 Unscrew the bolt and turn the bar in the position shown ...
Страница 52: ...1 3 2 Volume Press V Volume or to adjust the volume Or use the or keys on the remote control ...
Страница 55: ...1 3 5 Channel Press CH Channel or to switch channels Or use the W or X keys on the remote control ...
Страница 69: ...2 1 2 EasyLink Remote Control 4 4 Read more about EasyLink in Help Setup Devices EasyLink HDMI CEC ...
Страница 117: ...2 4 1 Switch satellite channels 1 3 To watch satellite channels press h select Watch satellite and press OK ...
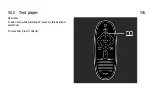
Страница 183: ...3 1 1 Text pages 1 6 Open Text To open Text while watching TV press e Browse and select Text To close Text press b Back ...
Страница 212: ...3 4 1 Child locks 5 5 Forgotten your code To override the code if you forget it enter 8888 ...
Страница 237: ...4 1 4 Ambilight Read the chapter Ambilight in Help Use your TV Ambilight ...
Страница 274: ...4 4 2 What you need 3 3 See the list of supported media server software read Help Specifications Multimedia ...
Страница 276: ...4 4 3 Wired installation 2 2 Read more about how to connect in Help Connections Network Wired ...
Страница 324: ...5 3 1 SoundBar 1 3 Use an HDMI cable to connect the device to the TV ...
Страница 325: ...5 3 1 SoundBar 2 3 If you use the HDMI ARC connections on both TV and device no other cable is needed If not read on ...
Страница 326: ...5 3 1 SoundBar 3 3 If you do not use the HDMI ARC connection add a digital audio cable cinch coaxial ...
Страница 327: ...5 3 2 Blu ray Disc DVD player Use an HDMI cable to connect the device to the TV ...
Страница 328: ...5 3 3 Home Theatre System with disc player 1 4 Use an HDMI cable to connect the device to the TV ...
Страница 332: ...5 3 4 Recorder 1 2 Use 2 antenna cables to connect the antenna to the device and the TV ...
Страница 333: ...5 3 4 Recorder 2 2 Add an HDMI cable to connect the device to the TV ...
Страница 334: ...5 3 5 Digital receiver or Satellite receiver 1 2 Use 2 antenna cables to connect the antenna to the device and the TV ...
Страница 335: ...5 3 5 Digital receiver or Satellite receiver 2 2 Add an HDMI cable to connect the device to the TV ...
Страница 336: ...5 3 6 Digital receiver and Disc Recorder 1 3 First use 3 antenna cables to connect the devices to the TV ...
Страница 337: ...5 3 6 Digital receiver and Disc Recorder 2 3 Then use an HDMI cable to connect the digital receiver to the TV ...
Страница 338: ...5 3 6 Digital receiver and Disc Recorder 3 3 Finally use an HDMI cable to connect the Disc Recorder to the TV ...
Страница 344: ...5 3 8 Digital HD receiver 1 2 First use 2 antenna cables to connect the device to the TV ...
Страница 345: ...5 3 8 Digital HD receiver 2 2 Use an HDMI cable to connect the device to the TV ...
Страница 347: ...5 4 1 Game console 2 3 Use an HDMI cable to connect the device to the side of the TV ...
Страница 348: ...5 4 1 Game console 3 3 Or use a Scart adapter to connect the device to the TV ...
Страница 353: ...5 4 4 Camcorder 2 3 Use an HDMI cable to connect the camcorder to the side of the TV ...
Страница 354: ...5 4 4 Camcorder 3 3 Or use a Scart adapter to connect the device to the TV ...
Страница 372: ...5 8 1 3D This TV is prepared for future 3D TV accessories ...
Страница 395: ...7 1 2 Open source software 2 2 Read the Open Source Licences in Help To begin Open Source Licences ...
Страница 421: ......

