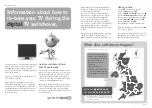
Information about how to
re-tune your TV during the
digital
TV switchover.
Info for UK only.
*
*
Digital UK, the body leading the digital TV
switchover, will advise you when you need to
re-tune during the switchover.
If you do not re-tune your channels when
advised to do so by Digital UK, you may lose
some or all of your channels until you do
re-tune. You should re-tune your TV every
few months to check for any new channels.
If you choose to connect your TV to satellite or
cable with a digital box then it will not be
affected by switchover, and you won’t need to
re-tune.
If you have any questions, please contact your
equipment supplier or call Digital UK on …
0845 6 50 50 50 or visit www.digitaluk.co.uk
How to re-tune:
1
. Press
h
on the remote control.
2
. Select
Setup
and press
OK
.
3
. Select
Search for channels
and press
OK
.
4
. Select
Reinstall channels
and press
OK
.
5
. Select your country (UK) and press
OK
.
6
. Select
Antenna DVB-T
and press
OK
.
7
. Select
Start
and press
OK
.
The installation can take several minutes.
When the installation is complete, press
OK
.
Your TV is now retuned.
If you are missing any channels, it may be
that they are not available in your area, or
that your aerial needs upgrading.
Television in the UK is going digital, bringing us
all more choice and new services. Starting in
late 2007 and ending in 2012, television
services in the UK will go completely digital, TV
region by TV region.
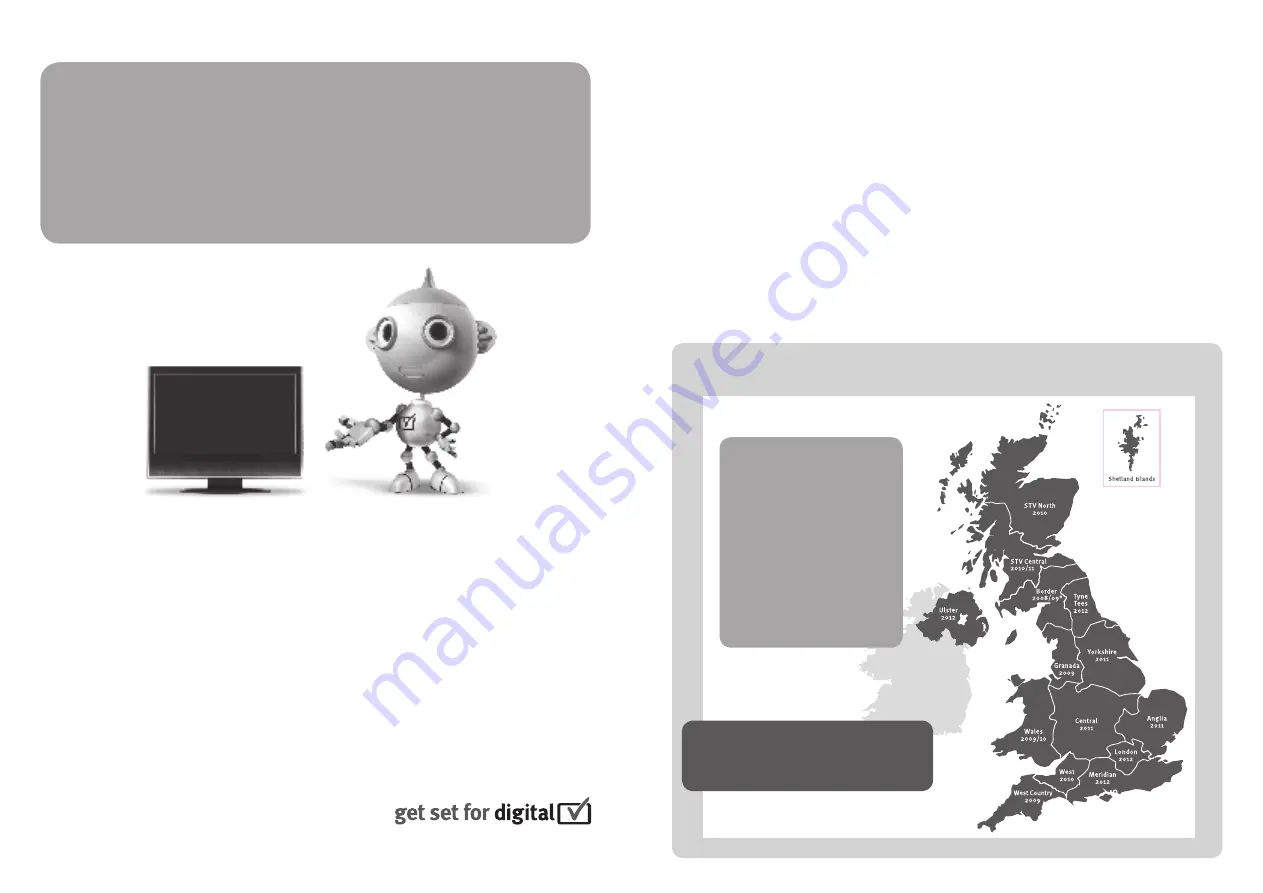
Please see the next page to find out when your
area switches to digital.
Digital UK is the independent, non-profit
organisation leading the process of digital TV
switchover in the UK. Digital UK provides im-
partial information on what people need to do
to prepare for the move to digital, and when
they need to do it.
How the switchover affects
your TV equipment:
Your new TV has a digital tuner built in, which
means it is ready to receive the Freeview signal
by simply plugging it into your aerial socket
(check if you can get digital TV through your
aerial now, or whether you’ll have to wait until
switchover, at www.digitaluk.co.uk).
When the TV switchover happens in your area,
there are at least two occasions when you will
need to re-tune your TV in order to continue
receiving your existing TV channels, and also to
pick up new ones.
20100422
When does switchover happen?
Calls charged at BT rate of 3p per minute daytime and
1p per minute evenings and weekends. Rates may vary
for calls from non-BT lines.
Visit us at
digitaluk.co.uk
Call us on
0845 6 50 50 50
†
Copeland switches on October 17, 2007
The exact date you switch
depends on the transmitter
you are served by. To check
when you switch, go to
Digital UK’s postcode
checker on
www.digitaluk.co.uk
Check your ITV news service
or look at Teletext page 106
to see what TV region you’re
in.
Содержание 32PFL8605H
Страница 3: ...1 1 1 The remote control 1 12 To adjust the volume ...
Страница 4: ...1 1 1 The remote control 2 12 To switch TV channels ...
Страница 11: ...1 1 1 The remote control 9 12 Green With the green key you select the green option or the Eco settings ...
Страница 12: ...1 1 1 The remote control 10 12 Yellow With the yellow key you select the yellow option or the Help menu ...
Страница 13: ...1 1 1 The remote control 11 12 Blue With the blue key you select the blue option or open the Widgets ...
Страница 20: ...1 1 2 The menus 6 6 Go to the Search page to look for any topic in Help ...
Страница 32: ...1 2 1 Wall mounting 4 12 Unscrew the bolt in the middle of the bar with the supplied hex key ...
Страница 33: ...1 2 1 Wall mounting 5 12 Turn the bar as shown ...
Страница 34: ...1 2 1 Wall mounting 6 12 Reposition the bar on the stand and fix the bolt with the hex key ...
Страница 35: ...1 2 1 Wall mounting 7 12 Fix the stand to the TV ...
Страница 37: ...1 2 1 Wall mounting 9 12 Fix the 2 mounting discs Use screws with a diameter of max 6mm ...
Страница 38: ...1 2 1 Wall mounting 10 12 Slide the bottom plate of the stand onto the mounting discs ...
Страница 40: ...1 2 1 Table top stand 12 12 Unscrew the bolt and turn the bar in the position shown ...
Страница 52: ...1 3 2 Volume Press V Volume or to adjust the volume Or use the or keys on the remote control ...
Страница 55: ...1 3 5 Channel Press CH Channel or to switch channels Or use the W or X keys on the remote control ...
Страница 69: ...2 1 2 EasyLink Remote Control 4 4 Read more about EasyLink in Help Setup Devices EasyLink HDMI CEC ...
Страница 117: ...2 4 1 Switch satellite channels 1 3 To watch satellite channels press h select Watch satellite and press OK ...
Страница 183: ...3 1 1 Text pages 1 6 Open Text To open Text while watching TV press e Browse and select Text To close Text press b Back ...
Страница 212: ...3 4 1 Child locks 5 5 Forgotten your code To override the code if you forget it enter 8888 ...
Страница 237: ...4 1 4 Ambilight Read the chapter Ambilight in Help Use your TV Ambilight ...
Страница 274: ...4 4 2 What you need 3 3 See the list of supported media server software read Help Specifications Multimedia ...
Страница 276: ...4 4 3 Wired installation 2 2 Read more about how to connect in Help Connections Network Wired ...
Страница 324: ...5 3 1 SoundBar 1 3 Use an HDMI cable to connect the device to the TV ...
Страница 325: ...5 3 1 SoundBar 2 3 If you use the HDMI ARC connections on both TV and device no other cable is needed If not read on ...
Страница 326: ...5 3 1 SoundBar 3 3 If you do not use the HDMI ARC connection add a digital audio cable cinch coaxial ...
Страница 327: ...5 3 2 Blu ray Disc DVD player Use an HDMI cable to connect the device to the TV ...
Страница 328: ...5 3 3 Home Theatre System with disc player 1 4 Use an HDMI cable to connect the device to the TV ...
Страница 332: ...5 3 4 Recorder 1 2 Use 2 antenna cables to connect the antenna to the device and the TV ...
Страница 333: ...5 3 4 Recorder 2 2 Add an HDMI cable to connect the device to the TV ...
Страница 334: ...5 3 5 Digital receiver or Satellite receiver 1 2 Use 2 antenna cables to connect the antenna to the device and the TV ...
Страница 335: ...5 3 5 Digital receiver or Satellite receiver 2 2 Add an HDMI cable to connect the device to the TV ...
Страница 336: ...5 3 6 Digital receiver and Disc Recorder 1 3 First use 3 antenna cables to connect the devices to the TV ...
Страница 337: ...5 3 6 Digital receiver and Disc Recorder 2 3 Then use an HDMI cable to connect the digital receiver to the TV ...
Страница 338: ...5 3 6 Digital receiver and Disc Recorder 3 3 Finally use an HDMI cable to connect the Disc Recorder to the TV ...
Страница 344: ...5 3 8 Digital HD receiver 1 2 First use 2 antenna cables to connect the device to the TV ...
Страница 345: ...5 3 8 Digital HD receiver 2 2 Use an HDMI cable to connect the device to the TV ...
Страница 347: ...5 4 1 Game console 2 3 Use an HDMI cable to connect the device to the side of the TV ...
Страница 348: ...5 4 1 Game console 3 3 Or use a Scart adapter to connect the device to the TV ...
Страница 353: ...5 4 4 Camcorder 2 3 Use an HDMI cable to connect the camcorder to the side of the TV ...
Страница 354: ...5 4 4 Camcorder 3 3 Or use a Scart adapter to connect the device to the TV ...
Страница 372: ...5 8 1 3D This TV is prepared for future 3D TV accessories ...
Страница 395: ...7 1 2 Open source software 2 2 Read the Open Source Licences in Help To begin Open Source Licences ...
Страница 421: ......

