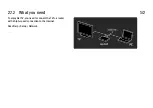
2.7.3 First use
2/5
To start the Net TV registration, enter your email address
on screen. To open the on-screen keyboard, press OK with
the text field highlighted. Enter the characters one by one.
Select Register and press OK.
A message will appear if a registration email has been
send to your email address. Open the email on your PC and
click the link to the registration form. Complete the form
and click the button to submit.
On the TV, select OK and press OK to open the Net TV Start
page.
. . .
Содержание 32PFL8605H
Страница 3: ...1 1 1 The remote control 1 12 To adjust the volume ...
Страница 4: ...1 1 1 The remote control 2 12 To switch TV channels ...
Страница 11: ...1 1 1 The remote control 9 12 Green With the green key you select the green option or the Eco settings ...
Страница 12: ...1 1 1 The remote control 10 12 Yellow With the yellow key you select the yellow option or the Help menu ...
Страница 13: ...1 1 1 The remote control 11 12 Blue With the blue key you select the blue option or open the Widgets ...
Страница 20: ...1 1 2 The menus 6 6 Go to the Search page to look for any topic in Help ...
Страница 32: ...1 2 1 Wall mounting 4 12 Unscrew the bolt in the middle of the bar with the supplied hex key ...
Страница 33: ...1 2 1 Wall mounting 5 12 Turn the bar as shown ...
Страница 34: ...1 2 1 Wall mounting 6 12 Reposition the bar on the stand and fix the bolt with the hex key ...
Страница 35: ...1 2 1 Wall mounting 7 12 Fix the stand to the TV ...
Страница 37: ...1 2 1 Wall mounting 9 12 Fix the 2 mounting discs Use screws with a diameter of max 6mm ...
Страница 38: ...1 2 1 Wall mounting 10 12 Slide the bottom plate of the stand onto the mounting discs ...
Страница 40: ...1 2 1 Table top stand 12 12 Unscrew the bolt and turn the bar in the position shown ...
Страница 52: ...1 3 2 Volume Press V Volume or to adjust the volume Or use the or keys on the remote control ...
Страница 55: ...1 3 5 Channel Press CH Channel or to switch channels Or use the W or X keys on the remote control ...
Страница 69: ...2 1 2 EasyLink Remote Control 4 4 Read more about EasyLink in Help Setup Devices EasyLink HDMI CEC ...
Страница 117: ...2 4 1 Switch satellite channels 1 3 To watch satellite channels press h select Watch satellite and press OK ...
Страница 183: ...3 1 1 Text pages 1 6 Open Text To open Text while watching TV press e Browse and select Text To close Text press b Back ...
Страница 212: ...3 4 1 Child locks 5 5 Forgotten your code To override the code if you forget it enter 8888 ...
Страница 237: ...4 1 4 Ambilight Read the chapter Ambilight in Help Use your TV Ambilight ...
Страница 274: ...4 4 2 What you need 3 3 See the list of supported media server software read Help Specifications Multimedia ...
Страница 276: ...4 4 3 Wired installation 2 2 Read more about how to connect in Help Connections Network Wired ...
Страница 324: ...5 3 1 SoundBar 1 3 Use an HDMI cable to connect the device to the TV ...
Страница 325: ...5 3 1 SoundBar 2 3 If you use the HDMI ARC connections on both TV and device no other cable is needed If not read on ...
Страница 326: ...5 3 1 SoundBar 3 3 If you do not use the HDMI ARC connection add a digital audio cable cinch coaxial ...
Страница 327: ...5 3 2 Blu ray Disc DVD player Use an HDMI cable to connect the device to the TV ...
Страница 328: ...5 3 3 Home Theatre System with disc player 1 4 Use an HDMI cable to connect the device to the TV ...
Страница 332: ...5 3 4 Recorder 1 2 Use 2 antenna cables to connect the antenna to the device and the TV ...
Страница 333: ...5 3 4 Recorder 2 2 Add an HDMI cable to connect the device to the TV ...
Страница 334: ...5 3 5 Digital receiver or Satellite receiver 1 2 Use 2 antenna cables to connect the antenna to the device and the TV ...
Страница 335: ...5 3 5 Digital receiver or Satellite receiver 2 2 Add an HDMI cable to connect the device to the TV ...
Страница 336: ...5 3 6 Digital receiver and Disc Recorder 1 3 First use 3 antenna cables to connect the devices to the TV ...
Страница 337: ...5 3 6 Digital receiver and Disc Recorder 2 3 Then use an HDMI cable to connect the digital receiver to the TV ...
Страница 338: ...5 3 6 Digital receiver and Disc Recorder 3 3 Finally use an HDMI cable to connect the Disc Recorder to the TV ...
Страница 344: ...5 3 8 Digital HD receiver 1 2 First use 2 antenna cables to connect the device to the TV ...
Страница 345: ...5 3 8 Digital HD receiver 2 2 Use an HDMI cable to connect the device to the TV ...
Страница 347: ...5 4 1 Game console 2 3 Use an HDMI cable to connect the device to the side of the TV ...
Страница 348: ...5 4 1 Game console 3 3 Or use a Scart adapter to connect the device to the TV ...
Страница 353: ...5 4 4 Camcorder 2 3 Use an HDMI cable to connect the camcorder to the side of the TV ...
Страница 354: ...5 4 4 Camcorder 3 3 Or use a Scart adapter to connect the device to the TV ...
Страница 372: ...5 8 1 3D This TV is prepared for future 3D TV accessories ...
Страница 395: ...7 1 2 Open source software 2 2 Read the Open Source Licences in Help To begin Open Source Licences ...
Страница 421: ......


