background image

06-10-2020 14

:

42

Pagina 2 van 9

http://manual.zwave.eu/backend/make.php?lang=en&sku=PHI_PST02-1B

When  included  securely  the  device  is  able  to  accept  secure  commands  and  to  send  secure  commands  to  other  devices.  The  commands  and  the  rece
commands sent out on single click and on double click of the rocker can be defined in configuration parameters and association groups.

Prepare for Installation / Reset

Please read the user manual before installing the product.

In order to include (add) a Z-Wave device to a network it 

must be in factory default state.

 Please make sure to reset the device into factory default. You ca

by performing an Exclusion operation as described below in the manual. Every Z-Wave controller is able to perform this operation however it is recommend
the primary controller of the previous network to make sure the very device is excluded properly from this network.

Reset to factory default

This device also allows to be reset without any involvement of a Z-Wave controller. This procedure should only be used when the primary controller is inope

1.  Pressing tamper key four times within 1.5 seconds and do not release the tamper key in the 4th pressed, and the LED will light ON.
2.  After 3 seconds the LED will turn OFF, after that within 2 seconds, release the tamper key. If successful, the LED will light ON one second. Otherwise

will flash once. 

3.  IDs are excluded and all settings will reset to factory default.

Safety Warning for Batteries

The product contains batteries. Please remove the batteries when the device is not used. Do not mix batteries of different charging level or different brands.

Installation

Battery Installation

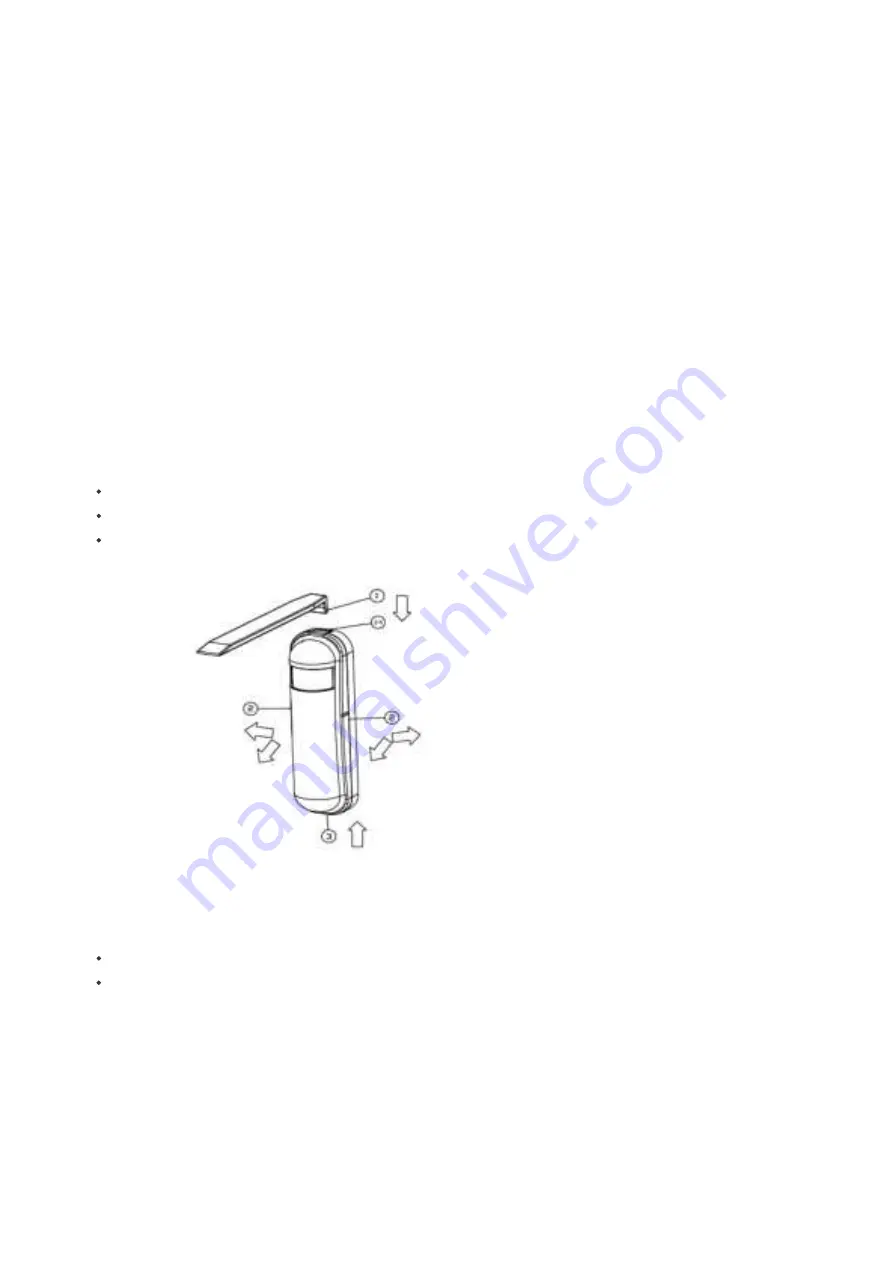
When the device report the low battery message. The user should replace the battery to new one. The battery type is CR123A, 3.0V. The way to open the f
please follow below steps. 

Using a tool to press the 1-1 position, to release the cover.

Hold the front cover and pull back

Hold the front cover and pull up

Replace the new battery and install the cover back.

Put the front cover bottom to 1-1, and press down.

Push the front cover top to 2-1.

Содержание PHI PST02-1B

Страница 1: ...t as a repeater for other nodes meshed network in case the receiver is not in direct wireless range of the transmitter This device and every other certified Z Wave device can be used together with any other certified Z Wave device regardless of brand and origin as long as both are suited for the same frequency range If a device supports secure communication it will communicate with other devices sec...

Страница 2: ...set without any involvement of a Z Wave controller This procedure should only be used when the primary controller is inope 1 Pressing tamper key four times within 1 5 seconds and do not release the tamper key in the 4th pressed and the LED will light ON 2 After 3 seconds the LED will turn OFF after that within 2 seconds release the tamper key If successful the LED will light ON one second Otherwis...

Страница 3: ...nds You will see the LED light ON one second Let the controller associate with the device into the first group any light switch that intend to be turned on when the device trig please associate with the into the second group In the accessory pack There are two type of double coated tape one is thicker hereinafter referred to as A tape and another is thinner hereinafter refe as B tape you can use A ...

Страница 4: ...ep state Without such a controller communication may become impossible and or the battery life time significantly decreased This device will wakeup regularly and announce the wakeup state by sending out a so called Wakeup Notification The controller can then empty the mailbo Therefore the device needs to be configured with the desired wakeup interval and the node ID of the controller If the device wa...

Страница 5: ...us 256 For example To set a parameter to 200 it may be needed to set a value of 200 minus 256 minus 56 In case of a two byte value the same applies Values greater than 32768 may needed to be given as negative values too Parameter 2 Basic Set Level Setting the BASIC command value to turn on the light Size 1 Byte Default Value 255 Setting Description 0 turn off the light 1 100 the light strength 254...

Страница 6: ...tomer function switch using bit control Size 1 Byte Default Value 4 Setting Description 1 Reserve 2 Enable sending motion OFF report 0 Disable 1 Enable 4 Enable PIR super sensitivity mode 0 Disable 1 Enable 8 Reserve 16 Notification Type 0 Using Notification Report 1 Using Sensor Binary Report 32 Disable Multi CC in auto report 1 Disable 0 Enable 64 Disable to report battery state when the device tr...

Страница 7: ...27 Auto Report Temperature Time Parameter 20 Auto Report Tick Interval The interval time for auto report each tick Setting this configuration will effect configuration No 10 No 11 No 12 and No 13 Caution Setting to 0 means turn report function Size 1 Byte Default Value 30 Setting Description 0 255 Auto Report Tick Interval Parameter 21 Temperature Differential Report The temperature differential to ...

Страница 8: ...mware Update Md Manufacturer Specific Multi Command Sensor Multilevel Notification Powerlevel Security Version Wake Up Zwaveplus Info Controlled Command Classes Basic Explanation of Z Wave specific terms Controller is a Z Wave device with capabilities to manage the network Controllers are typically Gateways Remote Controls or battery operated wall controllers Slave is a Z Wave device without capabili...

Страница 9: ...vice to announces that is able to communicate Node Information Frame is a special wireless message issued by a Z Wave device to announce its capabilities and functions c 2020 Z Wave Europe GmbH Antonstr 3 09337 Hohenstein Ernstthal Germany All rights reserved www zwave eu The template is maintained by Z Wave Europe GmbH The product content is maintained by Z Wave Europe GmbH Supportteam support zw...

Отзывы: