PhaseOne XF IQ4 Скачать руководство пользователя страница 77

XF Camera System 

Settings Overview

XF Camera Body basic settings

The XF is delivered from the factory preconfigured with a set of default settings. 
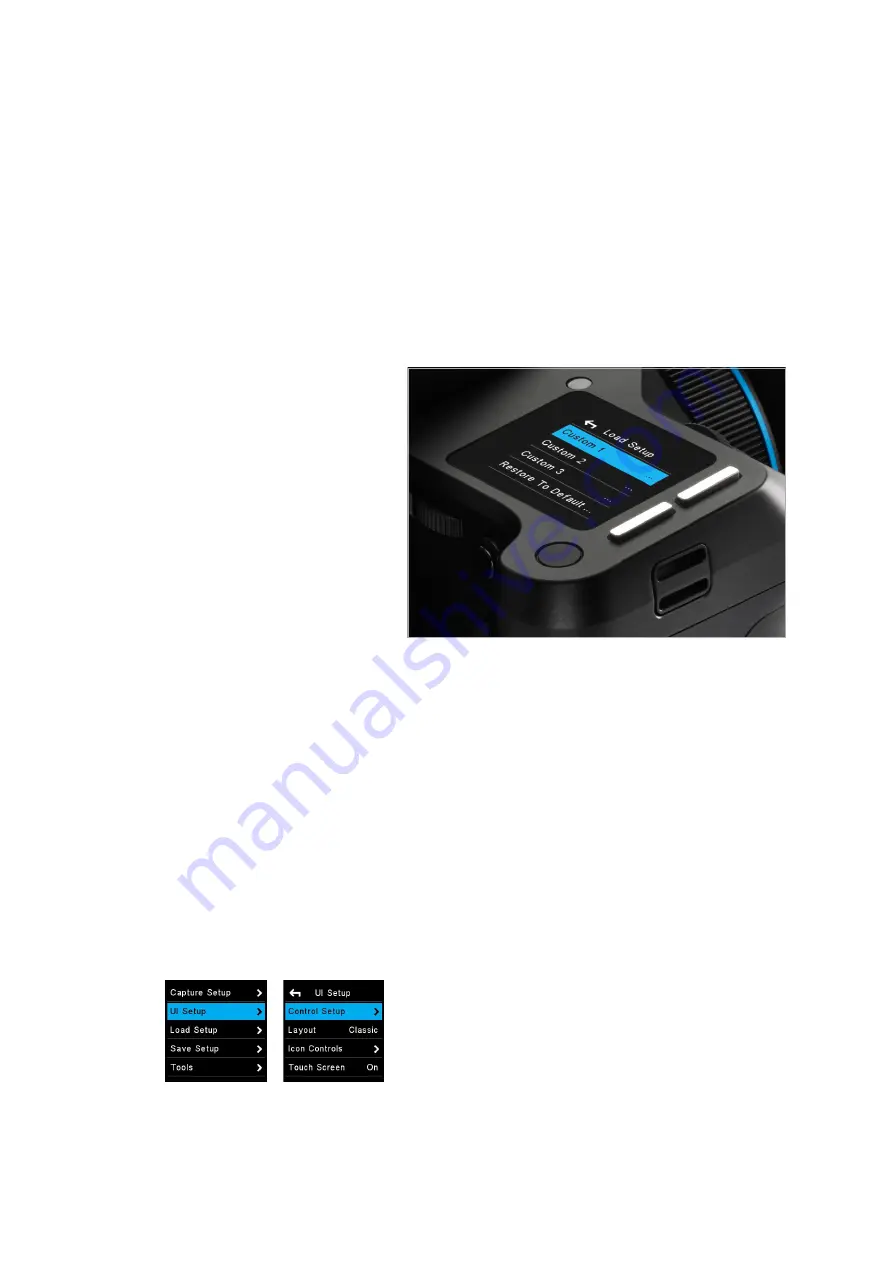
The XF Camera Body can be reset to the default settings from the Camera 
menu, Load Setup > Restore to Default.

Shutter Speed

Shutter Speed can be adjusted using the Front Dial.

Aperture

Aperture can be adjusted using the Side Dial.

ISO Selection 

ISO can be adjusted using the Rear Dial. ISO speed options are dependent on 
which IQ back is attached. Auto ISO speed range can be selected by touch, 
and is also dependent on the IQ Digital Back attached.

Any one of the three dials may be reconfigured to adjust Exposure Compensation 
in Auto mode (O

ff

 by default). This option is selected by pushing the Rear Key 

to enter the Camera menu and selecting: 
UI Setup > Control Setup > Front / Rear / Side Dial > In Auto > ExpComp.

All three dials turning direction may be reversed by pushing the Rear Key to 
enter the Camera menu and selecting:
 UI Setup > Control Setup > Front / Rear / Side Dial > Direction > CCW 
(default) / CW. 

Please note the symbol (/) denotes an optional setting.

Control Setup

UI Setup Menu

77

XF Camera Settings Overview

77

XF IQ4 Camera System Manual   |

Содержание XF IQ4

Страница 1: ...XF IQ4 Camera System User Manual Version 1 2 March 2020...

Страница 2: ...tion 33 Accessing Tools Settings and Status 33 Using the Shortcuts Menu 34 Using the Status Bar 34 Status Menu 35 Camera Controls 35 Live View 35 Changing settings in Tools 36 Four Key Navigation 36 V...

Страница 3: ...e 91 Continuous capture 91 Vibration Delay 91 Exposure Bracketing 91 Delayed 92 Manual Bulb Toggle 92 XF Camera System Exposure Modes 93 Changing the Exposure Mode 93 Auto ISO Setting 93 OneShot AE Ex...

Страница 4: ...stem Lens XF Camera Body IQ4 Manual focusing ring AF MF selector ring Focus Distance scale and DOF indicator markings Detachable hood Leaf shutter lens Lens release button 4 Primary parts of the XF IQ...

Страница 5: ...der Flash sync port XF Flash sync port IQ4 Hot shoe 12 pin multi connector port XF On Off button Rear touch screen Side dial Rear dial Back release button Back lock slider XQD and SD card compartment...

Страница 6: ...a phy applications and are referred to as buttons as opposed to keys which are the user interface keys designed to control the user interface on the OneTouch UI described later in this manual XF Camer...

Страница 7: ...als and keys All the controls are customizable Top Touch Screen Dials and Keys Front dial Rear dial Side dial Rear User Button Power On Off Button Top front key Top rear key Top touch screen Top left...

Страница 8: ...eously pressing the IQ4 release button Note that the lock slider acts as a safety catch 3 Tilt the IQ4 slightly backward from the top and gently lift the IQ4 off the XF Camera s guide rail Attaching t...

Страница 9: ...iewfinder securely with your right hand with the viewfinder tilting downwards slightly 3 Place the front edge of the viewfinder so that it is resting on the front edge of the body 4 Ensure that the vi...

Страница 10: ...particular amount of mAh is enough to get you 100 captures for example The three dots over a battery icon indicates on the display which one is currently being measured Dual battery system The XF Came...

Страница 11: ...on Please read the Power Connections chapter for more information Use in foreign countries The AC power adapter is supplied with several power plug adaptors for international use The power adaptor is...

Страница 12: ...the battery cover located on the underside of the IQ4 2 Insert the battery power contacts first 3 Push the battery up until it locks into position 4 Close the compartment cover Removing a battery from...

Страница 13: ...es Note If you choose a language by mistake and can no longer read the menu look for the menu item with L in it Security Code Protection Access to the IQ4 can be protected by a four digit security cod...

Страница 14: ...mm to ensure it locks into place You will hear a click once that point has been reached If resistance is felt stop immediately and check whether the card is oriented correctly Removing an XQD card Bef...

Страница 15: ...fault settings ready for use either when purchased by itself or with the XF After adjustment of these settings you can restore the back to the factory defaults from the back s screen by pressing Menu...

Страница 16: ...gle press of one of the two aluminum Top Keys is all that s required The Front Key accesses the touch screen s shortcut Camera Function mode while the Rear Key is used to reveal the integral Camera Me...

Страница 17: ...elease the shutter or initiate a chosen action Top Touch Screen As a multifunction panel the screen layout varies depending on the status of the camera However the Classic layout is the main display a...

Страница 18: ...o scroll down through the menu options with the Top Front Key used to scroll back up Note the Front Dial can be used to scroll up and down the menu instead On Off button A quick press will power up th...

Страница 19: ...control B O B The XF Camera System gives you the option to customize the functionality of the Phase One Break Out Box accessory This is done by pressing the rear user key and selecting UI Setup Contr...

Страница 20: ...using Aperture Priority AV for example the Side Dial will control the aperture value and you can then assign the Front Dial to control the Exposure Compensation value The Auto function can only be se...

Страница 21: ...ar User Button and is in effect locked once you let go of the button Add Focus Nudge to the Rear Dial If you are working with a very narrow depth of field it can difficult to adjust focus with the nec...

Страница 22: ...Time Priority P Program ISO Dependent on IQ back 50 100 200 400 800 1600 3200 6400 12800 Exposure Compensation 0 0 5 5 Drive Single Continous Vibr delay Bracketing Metering Matrix Center Spot AF Mode...

Страница 23: ...100 0 External Save Setup Custom 1 Custom 2 Custom 3 Capture Setup AF Mode Spot Average HyperFocal AF Drive Single Continous AF Priority Focus Release Assist Light O 50 100 Shutter LS Priority FPS On...

Страница 24: ...nfirmation is required If operating the camera from the rear positioned at a high level on a tripod for example the main panel can be duplicated on the IQ Touch Screen and operated either by touch or...

Страница 25: ...icon is replaced with a flashing red Folder icon as a warning Simple Layout A Simple layout is offered as an option from the XF menu or the IQ XF Camera menu This layout may be preferred because it di...

Страница 26: ...ortcut icon and turn the Side Dial to choose one of the four positions Note that you can also change a shortcut icon simply by pressing on one of them on the top touch screen for a few seconds and the...

Страница 27: ...advanced features If any of these are available in chosen the tool an icon will appear just below the close tool icon in the upper left corner Just tap on the tool option icon in order to access the...

Страница 28: ...e black reference option by tapping on the advanced tool option icon and selecting the option required with the Side Dial Once it is active the suppression is indicated with a red cross over a moon Pl...

Страница 29: ...f 3 5 55mm LS f 2 8 80mm LS f 2 8 110mm LS f 2 8 Macro 120mm LS f 4 0 Macro 150mm LS f 2 8 150mm LS f 3 5 240mm LS f 4 5 IF Additionally the Phase One 120mm AF Macro f 4 0 is also supported Focus Sta...

Страница 30: ...g the largest aperture of the lens for example f 2 8 setting the Drive Mode to Vibration Delay metering to Spot and AF Mode to Average Focus Once you are ready select the Focus Trim Tool as explained...

Страница 31: ...Groups at the same time regardless of which group is selected If TTL mode is selected the Rear Dial will instead control the flash compensation value The Profoto Remote Tool is described in more detai...

Страница 32: ...nd is available for the latest captured image The peaks in the Vibration Analysis Tool represent the amount of vibration during time The white vibration peaks encapsulated within the two white markers...

Страница 33: ...switch between Camera Controls and Tools Viewer for instance even though they are not next to each other You can also select a mode from the Shortcuts Menu that is accessed by swiping up from the bot...

Страница 34: ...odes or the IQ4 Menu It is similar to the Contextual menu on the older IQ3 The features and settings that you can select from the Shortcuts Menu are Camera Controls Browser Tools Viewer Viewer Live Vi...

Страница 35: ...ngs and capture the image Please see the Camera Controls chapter on how to use it Viewing Images When you want to review the captured images select either Viewer or Browser by pressing the top left bu...

Страница 36: ...ble the selected menu item The two keys to the right are used to navigate up and down The top left key is used to move a step back out of the currently selected menu item and will finally end in the M...

Страница 37: ...th the image selected swipe in from the left of the screen and press on the Rate Delete icon to toggle the functionality on A row under the image will now appear where you can delete the image by tapp...

Страница 38: ...arnings by selecting Thresholds Then move either the Highlight Threshold or the Shadow Threshold slider until they reach the desired level Close the menu by tapping on the arrow in the top left corner...

Страница 39: ...tool will now automatically adjust the white balance based on the color in that spot Next tap on the White Balance Picker icon on the screen and you will get the option to save the white balance adjus...

Страница 40: ...l the Metadata Overlay menu becomes available Then choose the Show Rating Show File Name and or Show Storage as desired Close the menu screen by tapping on the arrow in the top left corner If you have...

Страница 41: ...u are in Live View mode or viewing images you can get back to the Camera Controls by tapping on the top right button until it is selected The illustration on the left gives you a quick overview of the...

Страница 42: ...nges will be reflected on the XF Camera Body Setting the White Balance You set the white balance by tapping the White Balance icon XF Camera settings In addition to adjusting exposure and white balanc...

Страница 43: ...orizon Tool The Virtual Horizon tool provides a quick and accurate visual aid to ensure that the camera is level in both horizontal and vertical planes and is particularly useful when the camera is mo...

Страница 44: ...ou have a specific area with highlights you need to preserve you can also use Live View with Exposure Simulation zoom in to that area and use Live RAW Clip Warning to ensure that no pixels are being b...

Страница 45: ...mated Frame Average It is important to ensure that no highlights are burned out when you establish the proper exposure Specular highlights in for example waterfalls can introduce purple fringing which...

Страница 46: ...n the IQ4 screen Using the Tools Viewer You activate the Tools Viewer by either pressing the top left button on the IQ4 until the Tools Viewer icon is highlighted or by swiping up from the bottom of t...

Страница 47: ...ges to let you check whether the exposure is correct Press on the image thumbnail to display any burned out areas of an image with a red color overlay and lost shadow detail with a blue color This too...

Страница 48: ...ure Labels should be denoted as EV steps Luminosity values or turned off None To toggle the visibility of the Exposure Zone tool on and off tab at the bottom right thumbnail Displaying a Grid You have...

Страница 49: ...ressing a finger on the screen and move it You can zoom all the way in to 400 in Live View by either using the pinch outward gesture or by triple tapping on the screen Triple tap again to zoom back to...

Страница 50: ...nt settings The histograms will reflect the results of the captured image and are excellent tools to ensure that you get a proper exposure and doesn t clip either the shadows or the highlights You ena...

Страница 51: ...ng it easy to switch back and forth between Exposure Simulation and Auto Gain on the set It is activated by swiping in from the left and tapping on Auto The IQ4 will now analyze the image and adjust t...

Страница 52: ...pressing on the icon until the Grid Mode menu becomes available Then choose either the Square Golden Ratio Center Cross or 3x3 option and close the menu by tapping on the arrow in the top left corner...

Страница 53: ...the IQ4 Menu and selecting IQ Settings LiveView Auto Pause It is set to 1 minute by default Set Preview Zoom Level You can set whether the preview of the captured image should reflect the zoom level...

Страница 54: ...HDMI has the option to show a normal RGB Histogram a RAW Histogram as well as a Clip Warning tool To enable these Select HDMI Settings Hdmi Overlay and set it to Enable Display Focus Peaking The Focu...

Страница 55: ...he zoom level of the Live View feed with the hdmi LiveView Zoom option By default it is set to Overview which shows the full image You can change this to view the Live View feed zoomed into the image...

Страница 56: ...mode The user interface is locked both the touch screen and the buttons but it is still possible to capture images with the XF Camera Body or by tethering Lock UI is useful when you want to lock all...

Страница 57: ...ld be in effect for USB C and or IP Ethernet and Wifi connections separately This feature needs Capture One 12 0 2 or later Select Security Settings Edit Host Access Code and enter a four digit code T...

Страница 58: ...nge of the sensor IIQ 14 Large Saves a 14 bit version of the RAW file using a completely lossless compression It provides a smaller file size and faster capture rate compared to IIQ 16 Large and strik...

Страница 59: ...second You enable it by going to the menu and selecting File Settings Black Ref Prerecorded It is only available on IQ4 150MP models not on the 100MP Trichromatic Setting image orientation You can cha...

Страница 60: ...enes with a high dynamic range The style boost saturation slightly as well as recovering detail in the highlights and shadows Finally midtones are warmed slightly 2 Fashion is optimized to ensure that...

Страница 61: ...l Punch Neutral Curves Color Balance Color Editor Advanced Levels Black White enable disable Note that some image adjustments in Capture One like Film Grain and Vignetting will not show up on IQ4 as t...

Страница 62: ...If it is empty it will be labelled Available Once ready tap on the checkmark in the bottom left corner to accept Your Style is now saved on the IQ4 Loading a Custom Style on the IQ4 Once your Style i...

Страница 63: ...aptured images there If you have inserted a XQD card and is shooting tethering you will get two copies of each captured image one on the XQD card and one on the host storage computer You can control t...

Страница 64: ...JPEG Only Note that the IQ4 will need to save a RAW file to the XQD card to create the JPEG version from it is not possible to only save a JPEG version of the captured image Saving a RAW backup on th...

Страница 65: ...option on the screen The Direct Image Transfer feature can be turned On and Off by going to the IQ4 Menu Storage Setup Direct Image Transfer If the images files are already present in the Capture fold...

Страница 66: ...One and you are ready to start your capture session Note The automatic IP connection feature works natively on the macOS but if you re working on a Windows pc you need to have Apple s Bonjour install...

Страница 67: ...Mac s that have additional support for Thunderbolt 3 They are also compatible with the USB 3 1 Gen 2 standard data transfer up to 10 Gbps If you have a computer with an USB 3 0 Type A port use the sup...

Страница 68: ...the cross in the top right corner The IQ4 will now connect to your wireless router Ensure that your computer is connected to the same wireless router and launch Capture One version 11 2 1 or later Nex...

Страница 69: ...use select Network Settings WiFi Known Networks in the IQ4 Menu Then tap on the trash icon to delete the network from the list Ensure Bonjour is enabled Bonjour is enabled by default to ensure that IQ...

Страница 70: ...ugh to keep the XF IQ4 Camera System running during normal usage without the need to recharge the batteries However if you are using Live View constantly the XF Power Supply and the USB C power delive...

Страница 71: ...backs older than IQ4 uses an 8 pin multi connector port and thus need an adapter to use the XF Power Supply or the BOB accessories With the IQ4 the port has been aligned to use a 12 pin multi connecto...

Страница 72: ...lt It can be set from 20 seconds to Off Display Off Time This option will ensure that the screen on the IQ4 will turn off after a period without use to preserve battery power It is set to 1 minute by...

Страница 73: ...ality will resume as soon as you exit Live View or HDMI and the Camera System is idle again If the XF IQ4 Camera System is turned off you will only be able to charge the battery on the device that you...

Страница 74: ...hoosing On The white balance will now be applied and saved automatically when you deactivate White Balance Picker tool Note that you will not get the option on the screen to select whether the new whi...

Страница 75: ...ch Screen To change the AF area mode touch the icon and select the appropriate area option from the screen Viewfinder Display The XF has a comprehensive viewfinder display However for clarity only rel...

Страница 76: ...ted 5 to 2 diopter Part 70279 Diopter correction lens DE403 Far sighted 0 to 3 diopter For replacement of the supplied diopter correction lens please order Part 70277 Diopter correction lens DE401 Sta...

Страница 77: ...ached Auto ISO speed range can be selected by touch and is also dependent on the IQ Digital Back attached Any one of the three dials may be reconfigured to adjust Exposure Compensation in Auto mode Of...

Страница 78: ...ingle default Continuous Vibration Delay Bracketing Delayed and Manual Bulb Toogle Exposure Mode Manual default Aperture Priority Time Shutter Priority and Program exposure modes can be changed by sel...

Страница 79: ...HAP2 under the AF item Focus Modes There are two autofocus mode AF Drive options available from the XF Camera Body Single and Continuous The camera is delivered with the AF Drive mode set to Single a...

Страница 80: ...covered is displayed in the center of the viewfinder and is represented by the outer brackets etched onto the focusing screen The Average mode can be used with long lenses and small Apertures in low l...

Страница 81: ...wfinder Manual Focus MF Manual focus is achieved by switching the AF MF selector ring on the lens from AF to MF Note autofocus cannot be performed if the lens is set to MF The point of focus can be de...

Страница 82: ...ighting conditions or at a similar distance with as close to the anticipated conditions as possible To set the amount of front or back focus compensation press the Rear Key to enter the Camera Menu an...

Страница 83: ...arget or download it from www phaseone com and print it Mount the XF Camera on a tripod and make sure that it is perpendicular to the focus target You will get the best result by using the same distan...

Страница 84: ...n Then proceed to step 3 2b Using Capture One Pro It is easier to do the manual focus fine tuning step using Capture One Pro for a couple of reasons Adjusting the focus from the software will ensure t...

Страница 85: ...alue Save the obtained Focus Trim value by either pressing the Save icon on the touch screen or by pressing the Top Rear Key Step 5 Done It can be a good idea to verify the new focus trim value by cap...

Страница 86: ...pplies to your captured image is anticipated based on your preceding captures In this way AFr Mode can effectively learn your specific technique and improve as you continue to capture The initial act...

Страница 87: ...subsequent images will apply and fine tune the adjustment to your movement It is suggested that you pair this audible feedback with the Zoom to Focus to visually confirm success Checking for correct f...

Страница 88: ...as AFr mode toggle Press the Rear Key and select UI Setup Control Setup Then select the button that you want to customize and turn the Side Dial until you have selected AFr Mode Here we have assigned...

Страница 89: ...ll be a distance where setting your point of focus will result in the entire scene being within the depth of field How you set it per tradition For many photographers the best way to optimize the poin...

Страница 90: ...perfocal increment Step your selected MCUs multiplied 2 1 1 2 It is strongly recommended to work tethered to Capure One to accurately inspect each image for focus and depth of field and secondly to ge...

Страница 91: ...ted from 0 5 to 8 seconds or even set to Infinity When the Vibration Delay time set in seconds is reached the camera will always capture the shot regardless of the vibration level With Infinite Vibrat...

Страница 92: ...of the capture while using this mode Note that after you have stopped the capture a black frame calibration will take place automatically and the top touch screen will display a timer countdown while...

Страница 93: ...O Setting An auto ISO option is useful in rapidly changing lighting conditions On the XF Camera Body the function is accessed by pressing the ISO icon on the top screen or from the XF Camera Body menu...

Страница 94: ...ose any combination and allow the camera to change all three values automatically or just one to obtain the right exposure By default the XF Camera is set to only change the Shutter Time but you can f...

Страница 95: ...elected from the camera s top screen by touch or the Front Key and applied by scrolling through the value EV value using the rear or Side Dials Exposure Compensation Quick Set in Auto In the semi auto...

Страница 96: ...eaf shutter option if available over to the camera s integrated focal plane shutter Noise Reduction Dark Frame Subtraction In order to minimize noise an additional dark frame is captured for the same...

Страница 97: ...longer on the IQ4 100MP Trichromatic and as a consequence large moving subjects like a car will be distorted in the image For the same reason Electronic Shutter only support a very slow flash synchro...

Страница 98: ...hutter ES is turned Off This is by design as the IQ4 will then assume that shutter speed is being controlled by the mechanical shutter on the Tech Camera Self Timer Delay It is possible to specify a d...

Страница 99: ...on the Technical Camera lens please ensure that Electronic Shutter ES is set to Off the IQ4 in the menu system under Camera Electronic Shutter When operating the IQ4 in ES mode wake up cables are not...

Страница 100: ...e two exposures are captured almost simultaneously via a continuous readout from the sensor This unique procedure overcomes the traditional limitation of shooting bracketing for HDR where each image h...

Страница 101: ...eliminary support Workflow and Feature Notes The Dual Exposure feature relies on using the Electronic Shutter ES and will thus have the same advantages and limitations as using ES under normal shootin...

Страница 102: ...posures under changing lighting conditions when working on location You can even trigger a capture remotely with a Profoto Air Remote or review flash duration output power and flash sync timing after...

Страница 103: ...lash generator is at 6 0 and you dial in a 0 5 value on the Profoto Remote Tool the energy level on the flash generator will be changed to 6 5 Once the flash has fired the energy value on the Profoto...

Страница 104: ...Note that the Advanced Setting menu also lets you change Transit and Receive channels as well as Profoto PreFlash and AirTTL mode Triggering a Capture with the Profoto Remote You can use a Profoto Re...

Страница 105: ...of the Light Meter Sample is always equal to approximately 7 ms 1 125th of a second and start right after the flash is triggered So when a flash is fired within this time interval you will see the beg...

Страница 106: ...be as fast as 1 1600 seconds Note that when the XF Camera is using the leaf shutter as the second curtain it automatically uses an electronic first curtain The electronic first curtain works almost i...

Страница 107: ...ing ES Only In that case the XF Camera Body will display ES on the top screen Advantages of FPS Focal Plane Shutter One notable advantage of FPS is ability to shoot up to 1 4000th of a second This ove...

Страница 108: ...y to use installer that will install all the software necessary to run the application on a Mac running macOS 10 13 macOS 10 14 or macOS 10 15 1 1 Download the latest version of Capture One Pro from w...

Страница 109: ...dows 10 Anniversary Update build 1607 through to October 2018 Update build 1809 Apple Macintosh minimum requirements Intel CPU with 2 cores 8 GB of RAM 10 GB of free hard disk space Calibrated color m...

Страница 110: ...and supports Phase One backs only It does however now requires a product key for activation The key can be obtained for free It is valid for up to 10 users at the same time You can get the product key...

Страница 111: ...a computer using either Gigabit Ethernet or USB C cables or WiFi Please see the previous chapter Tethering Connections for more information Online Support For more information on shooting tethered wit...

Страница 112: ...ay the Import Images dialog window when Capture One Pro is running Manual Import of images 1 Go to File and select Import Images The dialog box will open to browse files 2 Navigate to the Import From...

Страница 113: ...Phase One Capture Pilot app from the Apple App Store and install it on your iOS device Version 1 12 requires iOS 10 or later Capture Remote the remote camera operation function of Capture Pilot is fre...

Страница 114: ...move to another location on the screen The Star icon opens a little row that let you set the color tag and star rating of the current image Finally you can set the white balance by tapping on the pic...

Страница 115: ...of the light A new LCC reference image needs to be created if you change any of the following parameters Use a new sensor lens combination Change the Focal Length Change the Aperture Adjust the Shift...

Страница 116: ...shot letting you check immediately whether it was successful It should show an evenly exposed light grey image without a color cast vignetting or dust spots if you have selected that option It may be...

Страница 117: ...x and Shift y metadata in the Movement tab is saved during the creation of the LCC profile itself so anything entered now will not be a part of the Preset When ready click Save Applying the LCC profil...

Страница 118: ...Custom Settings Yes No Selecting Yes instantly enables the group of settings Settings may be continued to be changed afterwards as normal and to return to the initial group of settings simply repeat t...

Страница 119: ...hen choose the Custom Setup you want to rename and enter the name on the touch keyboard Once you are done press the green check mark to accept the change Restore to Default To return the camera to the...

Страница 120: ...e back only the IQ4 settings will be stored Load System Setup from XQD or Sd Card To load your saved System Setup select IQ4 Menu System Settings Save Restore System Setup then select either XQD or SD...

Страница 121: ...corroding of the contacts and camera system malfunction Lenses If there is any dust on the surface of optics first try to remove it with a rocket air blower Never use compressed air unless the product...

Страница 122: ...The focusing screen is a very delicate part that can easily be damaged If you observe any dust or dirt on the top outside of the focusing screen you can gently try to remove it with a rocket air blow...

Страница 123: ...n one motion swipe the surface of the sensor from one end to another Do not swipe a second time in the opposite direction 6 Inspect if the sensor is clean by holding it into the light If necessary mov...

Страница 124: ...with the Front Dial to reveal further information like the number of shutter release cycles Error Messages The XF Camera System has a comprehensive list of error messages that will appear on either th...

Страница 125: ...interrupt the updating process Should this happen by mistake the update will fail and you will have to run the update again Note that the firmware update process runs an assessment of what firmware fi...

Страница 126: ...than RA003841 have the focusing screen changed from the top of the XF Camera Body Please check the serial number on the bottom of your XF Camera Body and proceed to the section below that matches your...

Страница 127: ...Body This will drop the mirror Remove the lens and tilt the XF Camera Body backwards with your hand so that you can access the mirror box more easily Locate the focusing screen frame release lever an...

Страница 128: ...rame Make sure that the tab is on the right side otherwise the focusing screen will be upside down Push the screen frame upwards using the tweezers while being careful not to touch the focusing screen...

Страница 129: ...will release the focusing screen and its frame Slowly tilt the XF Camera Body backwards until the focusing screen frame tilts out and downwards Continue with the tilting movement until the focusing s...

Страница 130: ...rwise the focusing screen will be upside down Push the screen frame upwards by pressing the tweezers against the corner of the frame Slowly tilt the XF Camera Body to its upright position while keepin...

Страница 131: ...if your Phase One equipment requires servicing please either contact Phase One or a Phase One subsidiary at www phaseone com contact or reach out to your Phase One Partner at www phaseone com partners...

Отзывы: