background image

45

Phantom Flex Manual

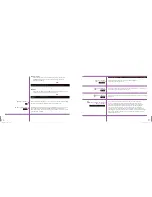
Chroma is the color component of the video signal.

1. To increase the Chroma value hold in Menu button and rotate clockwise.

2. To decrease the Chroma hold in and rotate counter clockwise.

The hue angle is adjustable both in a positive & negative value.

1. To turn the Hue more positive, hold in Menu knob and rotate clockwise.

2. To turn the Hue more negative, hold in the settings knob and rotate

counter clockwise.

Chroma

Hue

44

Phantom Flex Manual

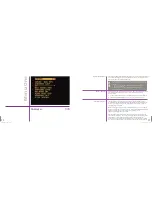
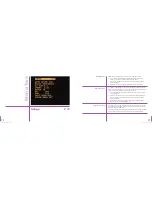
The pedestal can be adjusted in three separate color channels, red, blue &
green.

1. To increase the red, green or blue channel, hold in Menu button and
rotate clockwise.

2. To decrease red, green or blue channel, hold in and rotate counter

clockwise.

The gamma can change be changed in individual red & blue channels.

1. To increase the red or blue amount, hold in Menu button and rotate
clockwise.

2. To decrease red or blue amount, hold in and rotate counter clockwise.

PEDR, PEDG, PEDB

GAMMA

R

, GAMMA

B

Содержание Flex

Страница 1: ...MANUAL ...

Страница 2: ...MANUAL New York Chicago Los Angeles First Edition 09 20 10 www abelcine com ...

Страница 3: ...cs 21 7 On Camera Controls 25 8 CineMag 53 9 Phantom Software 61 10 CineStation 81 11 Post Flow File Formats 83 12 Maintenance Troubleshooting 85 13 FAQ 87 Contents Writthen and produced by the Technical Dept at AbelCineTech Inc Jamie Alac Mitch Gross Liz McGill Jesse Rosen Moe Shore With SpecialThanks to Rick Robinson of Vision Research 09 23 10 Flex Manual Preliminary Edition ...

Страница 4: ...hanical shutter for hands free and remote Black Balance Global electronic shutter to 1µs shutter angles in HQ mode dependent upon frame rate Phantom CineMag compatible CineMag interface has field replaceable pin array 12VDC 1 5A auxiliary power outputs for powering external devices External trigger signal through dedicated port and aux power connectors Advanced on camera controls for camera modes ...

Страница 5: ...ion market In terms of resolution the camera goes beyond HD to support 4 megapixel imaging 2560x1600 Frame rates are increased to over 2500fps at 1920x1080 or more than 5 000fps at 1280x720 A new proprietary image enhancement technology results in electronic image stability unprecedented in digital high speed cameras stable blacks low noise higher dynamic range and repeatable shots over the full r...

Страница 6: ...e video output The full resolution of the sensor is scaled to standard HD SDI output 1920x1080 or 1280x720 This oversampling technique results in higher quality video A Global Shutter which ensures no artifacts on fast moving objects or strobes flashes An internal capping shutter which makes for a more convenient black balance procedure New connectors improved buttons and streamlined user interfac...

Страница 7: ...ng in the motion picture and television industries The ability to reveal what had never been seen before could extend beyond the industrial scientific and military realm into story telling and human emotion The Phantom Flex brings that capability to a new plateau Fifty years later high speed photography was used by business and industry to analyze events too fast to see with the naked eye Eastman ...

Страница 8: ... a shot it can only be as long as what fits in RAM but allows great flexibility in capturing fast events The camera can be left continuously recording without consuming any permanent storage At the critical moment the camera can be triggered before during or even after the event stopping recording and allowing the shot to be played back or saved to permanent storage The primary factor determining ...

Страница 9: ...ode captures some extra information in between frames which increase the signal to noise ratio of the camera as well as eliminates the need for black balancing the camera The trade off is that the maximum frame rate and shot length are reduced to about half of what they would otherwise be From the temporary storage of RAM there are a few paths to permanent storage These include HD SDI out data out...

Страница 10: ...ots When recording to a CineMag directly one starts and stops the capture similarly to a traditional camera Lighting for high speed cinematography can be a challenge The two major issues have been the intensity of light needed and flicker With the high sensitivity of the Phantom Flex the light needed is much less of an issue but many lighting sources that work perfectly for low frame rate shooting...

Страница 11: ...ode a continuous closed contact switch is required for recording in run stop mode To be controlled by a computer the Phantom Flex needs to be on the same Ethernet network as the computer All Phantoms are preset with permanent IP addresses on the same subnet A computer needs to be on the same subnet to communicate with the camera To ensure this set the computer s address to 100 100 100 1 with a sub...

Страница 12: ...e on the viewfinder you probably need to change the video format See Phantom Software Chapter If you will be recording to a CineMag mount it now For more information on CineMags see The CineMag Chapter For continuous shooting at lower frame rates you may want to enable HQ mode to reduce the need for black balance Press the Settings knob on the operator side of the camera to enter the menu turn the...

Страница 13: ...epare for recording the next clip press theTRIGGER button for a few seconds to return to the live view Press and hold theTRIGGER button again to erase the clip in RAM and begin recording the next shot Playing Back a Clip Trimming and Saving a Clip to the CineMag Downloading a Clip to a Computer Beginning the Next Clip 17 Phantom Flex Manual On page 1 of the camera menu Change SPEED and SHUTTER to ...

Страница 14: ... provided to enable hot swapping between power sources Power Out Connectors 2 x Fischer 4 pin Female Spec 12V accessory power 1 5A Max Power Draw Min 80W in standby mode with no CineMag Max 150W with CineMag recording at high frame rate Typical 110W Power draw increases with frame rate and while actively recording Power Connectors 5 Rear View ...

Страница 15: ...ion will output 1920x1080P Any resolution below 2560x1600 can be extracted including standard 1920x1080 or 1280x720 When a 1080P extraction is used the equivalent focal length of the lens will slightly longer see chart on right Optics 6 35mm FULL APERTURE 31 1mm Diameter equiv AOV 1 28 FOCAL LENGTH equiv FL x1 28 11 mm 14 mm 18 mm 39 mm 50 mm 65 mm 58 mm 75 mm 96 mm 77 5 mm 100 mm 129 mm 1920x1080...

Страница 16: ... Flex imager 1920x1080 22mm Diameter 1920x1080 19 2x10 8mm 22mm Diagonal Standard 2 3 B4 11mm Diameter 2 3 B4 The Abel HDx2 adapter converts B4 mount lenses to PL mount The 11mm diagonal coverage of the B4 lens is blown up by a factor of x2 to 22mm The angle of view is the same as it would have been if the lens were placed directly on a 2 3 B4 camera but the depth of field will be shallower and cl...

Страница 17: ...and to navigate select recording parameters In Playback mode it can be used to select and scroll through clips which have been recorded When the camera is is outputting a live image the tools button is used to toggle between live preview zoom and threshold modes When the camera is in playback mode theTools button is used to play and or stop the playback of the recorded stored cine file in reverse ...

Страница 18: ...cus on the subject Zoom in to 1 1 pixel view to assist in focus Define the recording parameters Determine if any image area is over exposed Examine the recording duration time and the number of frames that will be recorded within the recording time frame LIVE Display Screens LIVE A Camera State Designators B Time Indicator C w PHANTOM CINEMAG Phantom CineMag State Indicator Number ofTakes Memory U...

Страница 19: ...era LIVE PRE In this state the camera is in LOOP mode and will display a live image from the video output The camera is not recording LIVE WT1 The camera is in LOOP mode and will display a live image from the video output The camera is currently recording to RAM and awaiting a trigger signal LIVE CST The camera is in LOOP mode and will display a live image from the video output there is a clip sto...

Страница 20: ...ter a trigger signal is detected by the camera are referred to as PostTrigger frames and the frames recorded prior to the trigger signal are referred to as Pre Triggered frames Resolution Sample Rate Shutter Angle Memory Buffer Graphical Representation Mag RecordingTn It indicates that a cine is presently being saved into the Phantom CineMag TheTn indicates the take number being recorded to the Ph...

Страница 21: ...change 2 Once the desired Camera field has been selected a Hold in the Settings Setup button then b Rotate the button to the desired operational setting and release 3 To exit the Camera Setup Display Screens press theTrigger button one time Maximum RecordingTime Maximum Recordable Frames The above step is required to define all subsequent Camera parameters NOTE This field indicates the total lengt...

Страница 22: ...lso sets the number of pre trigger images captured When a PostTrigger value is defined in the Phantom Camera Control software the camera will continue to record and store to the camera s DRAM buffer image data after a trigger signal is detected for n fames where n is the number of post trigger frames specified After the trigger signal is detected by the camera recording continues for an exact numb...

Страница 23: ... Maximum Recordable Frames Non Selectable size When a post trigger value has been defined the camera will only store the maximum image count allowed for the particular capture settings The camera will only display the frames stored in the memory buffer the last x images where x is the total number of images recorded or stored in the image buffer 1 To move theTP Trigger Point to the right decreasin...

Страница 24: ...s vertical banding 1 To set the black balance hold in the Menu button and rotate clockwise until OK appears 2 Release the Menu button The built in mechanical shutter will activate and a countdown will be visible After approx 5 seconds the black balance will be set 3 Black balance can also be performed by holding in the B REF button for approx 2 seconds while in the LIVE mode Also known as ISO or A...

Страница 25: ... nonlinear relationship between signal level and brightness out put of pixels a small signal level change at low voltage produces a larger variation in brightness than the same change in level at high voltage gamma correction for monitors is the compensation for this nonlinearity The default camera setting is 2 2 1 To increase the Gamma value hold in Settings button and rotate clockwise 2 To decre...

Страница 26: ...ton and rotate clockwise 2 To decrease red relative to green amount hold in and rotate counter clockwise This is the amount of blue relative to green When a white balance is performed this value is automatically changed This value can also be changed manually 1 To increase the blue relative to green amount hold in Menu button and rotate clockwise 2 To decrease blue relative to green amount hold in...

Страница 27: ...ve hold in the settings knob and rotate counter clockwise Chroma Hue 44 Phantom Flex Manual The pedestal can be adjusted in three separate color channels red blue green 1 To increase the red green or blue channel hold in Menu button and rotate clockwise 2 To decrease red green or blue channel hold in and rotate counter clockwise The gamma can change be changed in individual red blue channels 1 To ...

Страница 28: ...gs Up to four matrices can be set and individually selected by changing 0 off to values from 1 to 4 Sat will increase or decrease the overall color saturation with the value 0 00 being a completely desaturated black and white image 1 00 being the default value and values over 1 00 being hyper saturated 1 To increase any of the above options hold in the Menu knob and rotate clockwise 2 To decrease ...

Страница 29: ... user adjustable options in the menu 1 Select which user file to save USER 1 6 highlight SAVE 2 Push hold the Menu Knob while turning clockwise until OK appears 3 Release the Menu Knob LOAD will now appear immediately right The user file will now be saved into memory 1 Select which user file to load USER 1 6 highlight LOAD 2 Push hold the Menu Knob while turning clockwise until OK appears 3 Releas...

Страница 30: ...ntially and each clip has its own label RAM 1 MAG 1 MAG 2 etc To playback a selected clip press the B REF button The frame numbers on the top right of image will appear and start to roll To pause the playback press the B REF button while playing back To playback in reverse press the TOOLS button To step through the clip frame by frame turn the MENU knob To go back into LIVE mode press the TRIGGER ...

Страница 31: ...a hard drive it is possible to record at the highest speed no matter how many clips are already recorded without ever dropping a frame Due to the nature of how the CineMag works the use of the CineMag differs slightly from a hard drive recorder Because all frames are and must be recorded contiguously it is not possible to delete individual clips off the Cin eMag It is important to take this into c...

Страница 32: ...g across the pins Removing a CineMag To remove the CineMag pull the red tab on the back of the camera and lift the mag being sure not to damage the pins on the camera There have been two generations of CineMags The newer CineMag II is thin ner and lighter than the first generation CineMags The functionality of the two is identical When the erase protect switch is in the lock position the CineMag c...

Страница 33: ... support for these files Make sure that your post production tools are compatible with these files before creating them From the Play tab in PCC select the cine you want to save from the Cine pull down menu You will see all clips in the RAM as well as the CineMag in this list Once you ve selected a clip you can mark an in and out point if de sired by clicking the and buttons respectively Then clic...

Страница 34: ...ht of the Save Cine button and from the popup menu choose Save All Flash CinesTo File Alternately from the Cine menu choose Save All Flash CinesTo File In the subsequent save dialog navigate to the folder where you wish to save the clips and choose the appropriate file format generally Cine Raw Choose a name for the clips and click the Save button In the PlayTab click the triangle to the right of ...

Страница 35: ... mode Programs installed by the PCC1 1 installer Before Running the Software Phantom Software 9 Note There are two versions of Phantom software that are installed with a single installer As of this writing they will appear on your desktop as Phantom 689 and PCC 1 1 This manual covers only the newer PCC Phantom Camera Control software The older Phantom software will work though there are a few feat...

Страница 36: ...changing viewing options and starting the video output program PVP There are several menus which will be covered in detail later in this section Note now the Help menu which leads to several help documents which provide valuable reference information about the software and different camera models Overview of Phantom Camera Controller PCC The computer connects to the camera via Ethernet To get acce...

Страница 37: ...his section but for now set it to Percent All the camera parameters that effect your shooting are set in the Live tab In order for the controls to be active you must select the camera you want to control from the Camera pull down menu If you have multiple cameras connected on the same network they will all appear in the pull down menu Controlling the Camera with PCC The PVP software can either be ...

Страница 38: ...except white balance to their default values The Default White Balance restores white balance to the default which under most typical lighting will produce a green image Keep in mind that all changes made in the ImageTools window affect the meta data of the cine file only not the raw data If you are recording the camera s video output however it is important that these be set to values that produc...

Страница 39: ...window click the Update and Set button This will set the camera s time to the computer s time The Phantom Flex always operates in 12 bit mode no other option will be available in thr Bit Depth pull down selector 69 68 Phantom Flex Manual Phantom Flex Manual Right clicking on a point on the displayed image brings up a white balance popup It is not necessary to fill the frame with white a small targ...

Страница 40: ... bottom of this section 71 Phantom Flex Manual You can partition the RAM of the camera by changing the number in the Partitions pull down menu This lets you record more than one clip in the camera s memory at a time It is rare that you will need to do this especially if working with a CineMag Generally this should be set to 1 By far the most common operation performed in Camera Settings is CSR whi...

Страница 41: ...ayback and saving to the CineMag If Restart Recording is checked recording will start automatically after the auto actions are performed 72 Phantom Flex Manual When working with a single camera Sync Imaging should be set to Internal For information on syncing two cameras such as in a 3D rig please read the chapter Camera Setup Once the camera is set click the red Capture button to begin recording ...

Страница 42: ...please read the CineMags chapter Reviewing Clips in PCC 75 Phantom Flex Manual Once the camera is recording the red button changes to Abort Recording and the green Trigger button is enabled In loop mode the Abort Recording button will stop recording leaving the camera s RAM empty In Direct to CineMag mode Abort will stop recording but the footage already recorded to the CineMag will remain in the ...

Страница 43: ...To File option on the Cine menu or clicking the Save Cine button in the Play tab There is a long list of formats in the Save asType selector The formats above the separator line are clip per file formats meaning the entire clip gets saved as a single file while those below are frame per file formats meaning clips get saved as frame sequences Saving a clip in a clip per file format is quite straigh...

Страница 44: ...n use the and buttons to mark in and out points After trimming a clip press the Save to Flash button to save it to the CineMag or Save to File button to download it to the computer The same file save dialog famil iar from the PCC software will appear It is also possible to erase a CineMag from PVP by clicking the Erase All button PVP the Phantom Video Player can be opened directly from the desk to...

Страница 45: ...eStation is the availability of a 10G Ethernet connection on the CineStation To establish a 10G connection between a CineStation and a computer the devices must be put onto the same physical network and the 10G interface of the computer must be assigned an IP address on the same subnet as the CineStation The recommended IP address to use is 172 16 0 1 with subnet mask 255 255 0 0 The Phantom softw...

Страница 46: ...he format is a Vision Research proprietary file struc ture called a Cine file These Cine files can be converted to industry standard DPX TIFF JPEG DNG or CinemaDNG files with software provided by Vision Research IRIDAS Speedgrade and FrameCycler can also convert and color correct Cine files GlueTools Phantom CineToolkit can make Cine files avail able to any Mac program that uses QuickTime along wi...

Страница 47: ...on the CineMag with a Q tip alcohol Also check for any damage on the pogo spring loaded pins on the camera side First check all the Ethernet cables connections and then ensure the com puter is seeing a connection via Ethernet Check the IP address subnet mask are set correctly Also see if in the Phantom controller software that the con nect only to box does not have any IP addresses listed If you h...

Страница 48: ... res olution 2560x1600 in SQ mode the max frame rate is 1455fps In HQ mode it is 725fps At 1920x1080 in SQ mode it is 2570fps In HQ mode it is 1275fps The maximum frame rate when recording at 256x8 pixels is a whopping 280 000fps For a detailed list of all available frame rates go to insert link HQ mode is a new proprietary recording mode introduced by the Phantom Flex that greatly reduces the nee...

Страница 49: ...ost grading and effect work and offers the richest material for Digital Cinema production How can I view the shot What do I do with the material once it is captured on the camera information from the sensor between exposures and as such imposes some limitations on the camera s settings The maximum camera frame rate is re duced to about half of what it would be in SQ mode and there are limitations ...

Страница 50: ...ompressed RAW files To copy this material the files are downloaded from the cameraʼs internal RAM via Gigabit Ethernet through the laptop computer controller to a hard drive Downloading Uncompressed RAW is not a real time operation it takes more than 10 min to transfer the entire memory buffer from the camera However there are ways to make this process more efficient see below The third most commo...

Страница 51: ... for high frame rate photography in general Even with the great sensitivity of modern cam eras be prepared to use a considerable amount of light the Phantom Flex however has made this easier with its sensitivity of 1000ISO Beyond illumi nation the largest issue in high speed lighting is flicker Tungsten lights actu ally have a flicker rate When powered by alternating current AC electricity the pow...

Страница 52: ...94 Phantom Flex Manual ...

Страница 53: ......

Отзывы: