background image

47  Camera Settings

The Setup Menu

English

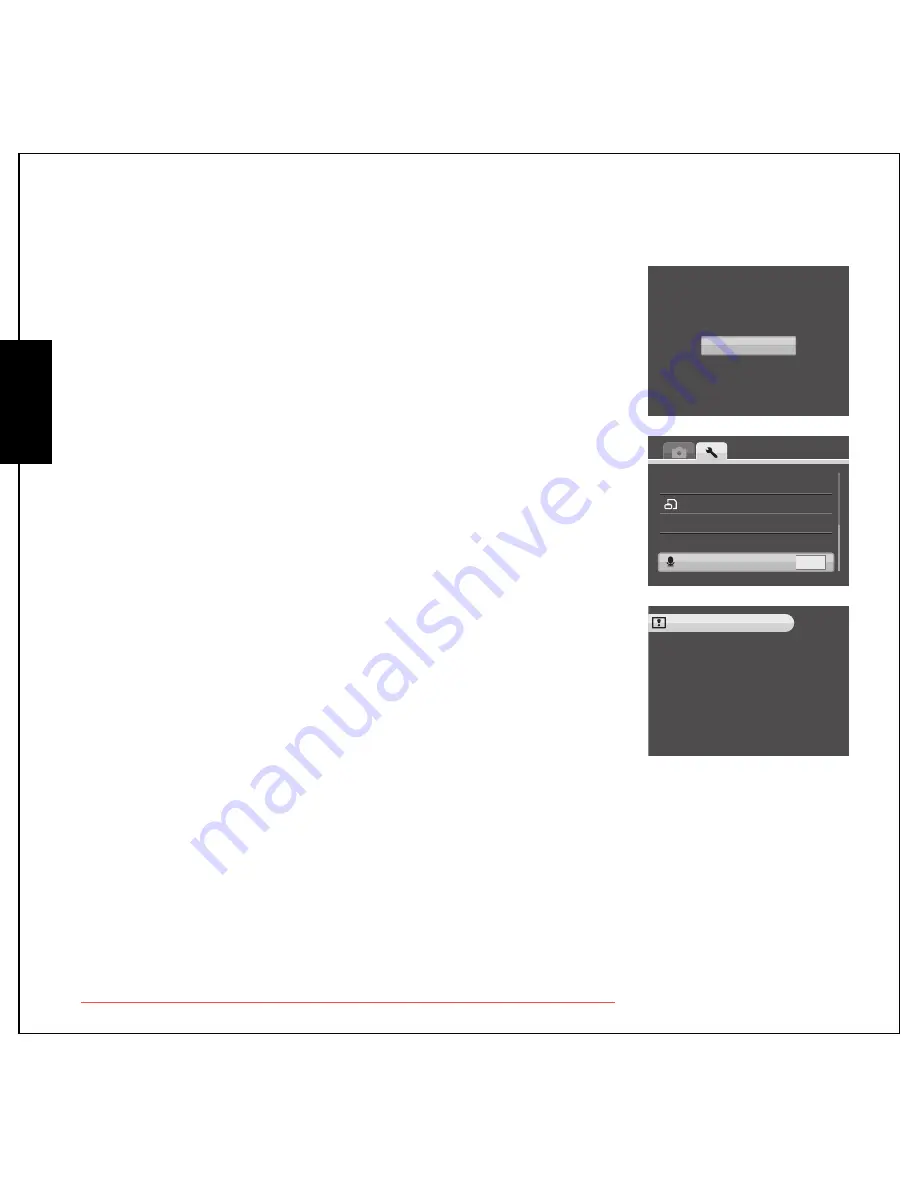
Reset

The 

Reset

 setting allows you to reset the camera to the original factory 

default settings except date&time, language, and video out format. This 

means all modifications you have made to the camera settings will be 

cleared.
Once selected, the 

Reset

 screen displays a confirmation message. 

Select 

YES

 (default) to proceed or 

NO

 to cancel.

Voice Memo

The 

Voice Memo

 setting allows you to record a voice memo when a 

photo is taken or in playback mode. Select 

ON

 to enable the Voice Memo 

function or 

OFF

 (default) to disable it.

About

The 

About

 screen allows you to check the current firmware version of 

the camera.

Reset to camera

default setting?

YES

NO

<             >

LANGUAGE

IMAGE STORAGE

FORMAT

RESET

VOICE MEMO

OFF

ABC

ABC

FMT

FMT

RES

RES

ABOUT

FW VERSION : 1.0000

Downloaded from ManualsCamera.com Manuals

Содержание OPTIO M90

Страница 1: ...To ensure the best performance from your camera please read the Operating Manual before using the camera EN Digital Camera Operating Manual Downloaded from ManualsCamera com Manuals...

Страница 2: ...Downloaded from ManualsCamera com Manuals...

Страница 3: ...the Battery charger iv Caution iv Care to be Taken During Handling iv Introduction 1 System Requirements 1 Package Contents 1 Main Features 1 Camera Views 2 LED Indicators 3 Camera Buttons 3 Navigati...

Страница 4: ...on 16 Face detection AF AE Function 17 Face Beautification Function 17 Setting the SCENE Mode 18 Using Auto scene Mode 19 Using the Smile Catch Mode 19 Using the Self Portrait Mode 19 Using Frame Comp...

Страница 5: ...31 Viewing M Burst Photos 31 Listening to Audio Files 31 Listening to Voice Memo 32 Viewing Photos Videos on your TV 32 Zooming In Out During Playback 32 Deleting Images Videos Audios 33 Using the Pl...

Страница 6: ...2 Digital Zoom 43 Quick View 43 Camera Sound 43 Power Saving 44 Auto Power Off 44 Video Out 44 Date Stamp 45 Date and Time 45 Language 45 Image Storage 46 Format 46 Reset 47 Voice Memo 47 About 47 Spe...

Страница 7: ...se of obtaining copyrights also cannot be used outside the scope of use of the copyright as laid out in the Copyright Act and care should be taken here also Trademark Recognition PENTAX and Optio are...

Страница 8: ...Strong static charges or the magnetic fields produced by equipment such as radio transmitters could interfere with the monitor damage the stored data or affect the product s internal circuitry and cau...

Страница 9: ...her than rechargeable lithium ion battery D LI108 The battery could explode or catch fire Do not place your finger on the flash when it is discharging as there is a risk of burns Do not discharge the...

Страница 10: ...uring traveling Contents of the recording cannot be guaranteed if recording playback or transferring your data to a computer etc is not possible due to a malfunction of your camera or recording media...

Страница 11: ...ce in temperature has subsided Be careful not to allow dirt mud sand dust water toxic gases or salt to enter the camera as this may damage the camera Wipe away any raindrops or water droplets and allo...

Страница 12: ...or above HDD space 500 MB or above USB port Package Contents Check the contents of your camera package It should contain Camera Optio M90 M900 USB AV 3 in 1 cable Wrist strap Rechargeable Li ion batt...

Страница 13: ...vigation buttons 4 Self timer LED 11 Playback button 5 Power button 12 Zoom button 6 Zoom Lens 13 SCENE button 7 Speaker 14 Tripod mount 15 Battery SD card compartment 16 Delete Face Beautification bu...

Страница 14: ...er LED Off Self timer off Red blinking 10 sec Timer count down flash after 10 seconds Red blinking 2 sec Timer count down flash after 2 seconds Icon Button Function OK OK Anti shake 1 Confirm a select...

Страница 15: ...zoom in mode Press to navigate to next image in single image display Press to move right in the thumbnail display Press to fast forward video playback during Pause mode Down Screen 1 Move down in the...

Страница 16: ...Capture mode Press to enable Macro mode Macro icon displays on the LCD screen 4 In Playback mode Press to pan left in zoom in mode Press to navigate to previous image in single image display Press to...

Страница 17: ...s Use the Left Right Up Down navigation buttons to scroll and use the OK button to select Use the SCENE button to Mode Type Icon Auto Auto Scene P Mode Program Mode Auto Panorama Smile Catch Sport Lan...

Страница 18: ...in the internal memory or on the memory card Delete Face Beautification button In Capture mode Press to enable disable the Face Beautification function Press to delete during mark appears on LCD QUIC...

Страница 19: ...deo 2 Image Resolution Capture Mode 12M 10 7M 3 2 9M 16 9 8M 5M 3M 2M VGA Video Mode 640X480 320X240 3 Flash Auto Flash Flash Off Fill Flash Red eye Reduction 4 Self Timer Burst Mode Self Timer 10 Sec...

Страница 20: ...ning 12 Zoom Bar 13 AF Frame 14 EV Compensation 2 0 EV 2 0 EV 15 Aperture Value F3 5 F5 9 16 Shutter Speed 2 1 1000 17 Date Stamp 18 Focus Zone Multi Zone Center Selected Area 19 Image Quality Best Be...

Страница 21: ...hrough the short loop and pull tight to attach the strap to the camera Inserting the Battery Follow these instructions to insert the Li ion battery into the battery compartment 1 Open the battery comp...

Страница 22: ...era 2 Insert the SD SDHC card into the memory card slot as shown Label side up 3 Close the battery compartment To remove the SD SDHC card gently push the card until it pops out Pull out the card caref...

Страница 23: ...shown Turning On Press and hold the Power button to turn on the camera To turn off the camera press the Power button again Note This charger is designed for the specified batteries Do not use the char...

Страница 24: ...avigation buttons then press the OK button to confirm After the desired language is selected the DATE TIME menu pops up Select each field and adjust the value using the navigation buttons Press the OK...

Страница 25: ...ss fully and hold the Shutter button to capture the image When a camera steady warning icon appears hold the camera as still as possible as a longer exposure time is required Anti Shake Function This...

Страница 26: ...pped with a self timer which allows you to take photos after a pre defined delay The burst photography feature allows you to take multiple consecutive photos by pressing and holding the Shutter button...

Страница 27: ...with 3 varying levels of exposure 0 EV 0 3 EV and 0 7 EV This function is only available in Auto and P Mode modes To set the AEB mode 1 Press the MENU button to display menu options 2 Press the Up Do...

Страница 28: ...res with detected face However when the camera fails to detect your subject s face a white focus frame will be displayed according to the selected focus mode Face Beautification Function Face beautifi...

Страница 29: ...ton to access the SCENE menu which displays the Scene menu options 1 Use the Left Right Up Down navigation buttons to scroll through the modes 2 Press OK to confirm your selection Auto Snow Auto scene...

Страница 30: ...ically fires 1 Press the SCENE button and select Smile Catch mode The Smile Catch icon displays on the LCD screen 2 The camera will automatically take a picture when a detected face smiles Using the S...

Страница 31: ...g three images into a single panoramic scene To take an auto panoramic picture 1 Press the SCENE button and select Auto Panoramic mode The Auto Panorama icon displays on the LCD screen 2 You can take...

Страница 32: ...loser camera s alert tone will be more rapid When the dynamic arrow is disappeared the camera catches the right position and will take picture automatically 5 You can press the delete face beautificat...

Страница 33: ...he OK button to playback the video Press the delete face beautification button to delete the recording if needed Recording Audio Files You can also record audio files with the camera To record an audi...

Страница 34: ...recording the captured image and the elapsed time are shown on the LCD screen 3 For the playback press the button and the playback of the voice memo automatically starts 4 Press the OK button once fo...

Страница 35: ...Press the MENU button to display menu options and use the Up Down navigation button to select the function you need and press OK to enter 3 Press the Up Down navigation buttons to highlight an option...

Страница 36: ...Focus Zone The Focus Zone setting allows you to select the number of zones the camera will focus on when taking a photo Three settings for focus zone are available MULTI ZONE default CENTER SELECTED A...

Страница 37: ...acketing Function on page 16 for more detailed information White Balance The White Balance setting allows you to adjust the camera setting according to the ambient white light when shooting White bala...

Страница 38: ...you to select the area of the subject or frame that the camera selects to measure light Three AE metering settings are available MATRIX default Camera metering is set for evaluating 16 zones of objec...

Страница 39: ...very sharp photos and a lower setting for a soft toned photo Three sharpness settings are available HIGH NORMAL default LOW Contrast The Contrast setting allows you to adjust the contrast of your phot...

Страница 40: ...ections for more detailed information about each setting Video Resolution The Video Resolution setting allows you to adjust the resolution at which your videos are recorded Two video size settings are...

Страница 41: ...1 12 00 00 13 White balance 14 Mode icons Please see Capture Video Mode Display on page 8 for detailed information 15 Color mode 16 Image quality 17 ISO Speed 18 Contrast 19 Sharpness 20 AE Metering 2...

Страница 42: ...Photos To view your multi burst photos on the LCD screen 1 Press the Playback button The most recent photo or video clip is displayed 2 Use the Left Right navigation buttons to scroll through photos...

Страница 43: ...ort on the camera 3 Connect the other end of the cable to the TV s AV input sockets 4 The LCD screen turns black and all images and video clips are displayed on the TV screen Follow the same steps des...

Страница 44: ...audio VOICE MEMO only available for image with voice memo attached Select to delete the voice memo CANCEL Select to cancel the action and exit to the main menu Using the Playback Menu Access the playb...

Страница 45: ...u can also select how many copies to print To set DPOF 1 Press the MENU button to select DPOF from the menu in the playback mode 2 Press the Up Down navigation buttons and the OK button to select from...

Страница 46: ...ction allows you to change the image resolution To resize a photo 1 Press the MENU button to select RESIZE from the menu 2 Press the Up Down navigation buttons and the OK button to select the resize r...

Страница 47: ...ton to confirm the one you needed Protect You can lock a photo or video to protect it from being accidentally erased To lock a photo or video 1 Press the MENU button to select PROTECT from the menu 2...

Страница 48: ...d return to the main menu Red Eye Removal The Red Eye Removal function allows you to perform red eye reduction on a saved photo To remove red eye from a photo 1 Press the MENU button to select RED EYE...

Страница 49: ...ine various decoration frame types to make your captured pictures more funny Please note the image resolution of the picture that you want apply the frame needs being higher than 3M To add a frame on...

Страница 50: ...button 5 Press OK button to save the picture as NEW FILE or OVERWRITE the original one or EXIT to main menu Note 1 The function is unavailable when the storage space is not enough 2 All images size w...

Страница 51: ...allows you to cut unnecessary portions of a video This feature is useful when the memory capacity is insufficient or when users want to trim video clips To divide a video 1 Press the MENU button to s...

Страница 52: ...ansferring Photos Videos to your PC To transfer photos and videos to your PC you need to set the USB mode as MSDC first Follow the on screen instructions to complete the installation Connect the camer...

Страница 53: ...unction from menu and press OK to enter LCD Brightness The LCD Brightness setting allows you to brighten or darken the LCD backlight Use the Up Down navigation buttons to increase or decrease the brig...

Страница 54: ...ble the function or OFF to disable it Camera Sound The Camera Sound setting allows you to adjust the camera sound level You can also set the start up and shutter sound when you turn on the camera and...

Страница 55: ...setting allows you to adjust the length of time after which the camera will power down when inactive Two options are available 5 MIN default 2 MIN Video Out The Video Out setting allows you to adjust...

Страница 56: ...nd Time setting allows you to set or adjust the date and time on your camera To set or adjust the date and time Press the Left Right navigation buttons to select the Year field Press the Up Down navig...

Страница 57: ...the camera all photos and videos are stored on the card If an external card is not detected all photos and videos are stored in the internal memory INTERNAL MEMORY All photos and videos are stored in...

Страница 58: ...firmation message Select YES default to proceed or NO to cancel Voice Memo The Voice Memo setting allows you to record a voice memo when a photo is taken or in playback mode Select ON to enable the Vo...

Страница 59: ...andscape 1 0 m infinity W 3 0 m infinity T Support seamless AF in Auto P mode Auto Panorama Shutter Speed 2 1 1000 Sec Viewfinder None Camera Features Auto Power Off Time Out Yes ISO Equivalent Auto I...

Страница 60: ...ase Protection Yes Exposure Compensation Selectable 2 0 EV with 0 3 EV steps Sharpness High Normal Low Color Vivid Color Black White Sepia AE Metering Matrix Center Weighted Spot Focus Multi Zone Cent...

Страница 61: ...format Power Battery D LI108 Battery Life CIPA 200 shots Connectivity Camera Interface USB 2 0 high speed Host Platform Windows XP Vista 7 Standards Operating Temperature 0 C 40 C Language English Ge...

Страница 62: ...ery LCD screen displays Card Requires Formatting Memory card format not recognized Reformat the memory card LCD screen displays Card is Full Memory card is full Replace the memory card with a new one...

Страница 63: ...hority for further details By disposing of this product correctly you will help ensure that the waste undergoes the necessary treatment recovery and recycling and thus prevent potential negative effec...

Отзывы: