background image

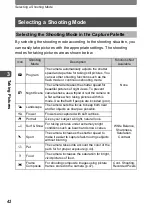
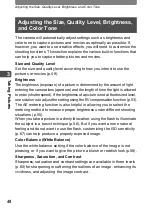
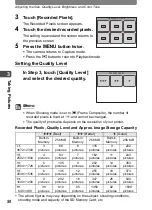
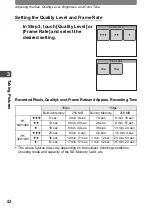
Adjusting the Size, Quality Level, Brightness, and Color Tone

54

3

Ta
kin
g Pic

tures

Using the Histogram

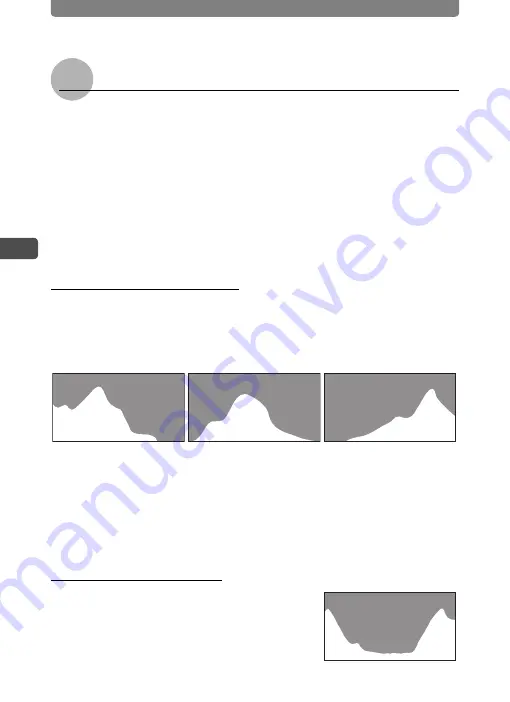
This camera has a function for displaying a graph (histogram) that shows 
the tonal range of your scene with the darkest areas on the left and the 
brightest ones to the right. The height of the points along the graph show 
the number of pixels at each brightness value.
The shape of the histogram, which can be viewed before and after 
shooting, shows the brightness and contrast of the picture so you can 
decide if you want to use EV compensation to improve it.

1

 “Displaying Shooting Information in Capture Mode” (p.40), “Displaying 

Shooting Information” (p.77)

Understanding Brightness

Usually, if the exposure is correct, the graph peaks in the middle. If the 
image is too dark, the peak is on the left side, and if it is too bright, the 
peak is on the right side.

When the image is too dark, the part to the left is cut off (dark portions) 
and when the image is too bright, the part to the right is cut off (bright 
portions).
With EV compensation, you can adjust the exposure so that the 
distribution is contained within the graph without the graph peaking on the 
left or right side, thereby preventing pictures that are too dark or too light.

Understanding Contrast

The graph peaks gradually for images in which 
contrast is balanced. The graph peaks on both 
sides but sinks in the middle for images with a 
large difference in contrast and low amounts of 
mid-level brightness.

Dark image

Correct image

Bright image

Содержание 19181 - Optio T20 7MP Digital Camera

Страница 1: ...icator green p 20 Flash p 56 Remote control receiver p 70 Shutter release button p 24 Lens Microphone p 30 Back Touch display LCD monitor p 34 p 74 p 134 Q button p 25 DC input terminal p 141 3 button p 34 p 120 Tripod socket Battery card compartment cover p 15 p 17 Names of Parts PC AV terminal p 87 p 132 Self timer lamp AF illuminator green p 69 p 66 Speaker p 125 Strap lug p 13 ...

Страница 2: ...nd other advanced shooting settings p 34 p 120 Touch the LCD monitor This displays the Capture Toolbar Playback Toolbar in Playback mode to set the flash self timer and other frequently used functions p 34 p 74 Using the touch display These are the indications on the monitor during Capture or Playback mode Capture Mode A1 Shooting mode 42 A2 Flash mode 56 A3 Drive mode 35 A4 Focus mode 63 A5 Focus...

Страница 3: ...ns how to print still images using PictBridge and the DPOF printing setting with a DPOF compatible printer or photo processing lab This chapter explains how to format the SD Memory Card or the built in memory set the date and time sound LCD monitor brightness and other camera related functions This section details optional accessories and troubleshooting tips For information on transferring images...

Страница 4: ...correctly when used in surroundings such as installations generating strong electromagnetic radiation or magnetic fields The liquid crystal panel used in the LCD display is manufactured using extremely high precision technology Although the level of functioning pixels is 99 99 or better you should be aware that 0 01 or fewer of the pixels may not illuminate or may illuminate when they should not H...

Страница 5: ...ge 12 Attaching the Strap 13 Installing the Battery 14 Charging the Battery 14 Installing the Battery 15 Removing the Battery 15 Installing the SD Memory Card 17 Removing the SD Memory Card 18 Turning the Camera On and Off 20 Checking the Memory Card 20 Initial Settings 21 Setting the Language and the Date and Time 21 2 Camera Features 24 Enjoy Taking Pictures 24 Enjoy Recording Movies 28 Enjoy Re...

Страница 6: ...to Frames 47 Adjusting the Size Quality Level Brightness and Color Tone 48 Setting the Recorded Pixels Quality Level and Frame Rate 49 Setting the Exposure EV Compensation 53 Selecting the AE Metering 55 Using the Flash 56 Adjusting the Color Balance White Balance 58 Adjusting the Sharpness Saturation and Contrast 60 Focusing 61 Selecting the Focus Mode 63 Setting the Autofocus Conditions 65 Setti...

Страница 7: ...eleting All Images and Sound Files 90 Deleting Selected Images and Sound Files 91 Protecting Images and Sound Files from Deletion 92 Editing Images and Movies 94 Changing the Image Size and Quality Resize 94 Deleting Unwanted Parts of an Image Cropping 95 Making Drawings and Adding Stamps 96 Rotating stamps 98 Adding a Frame to an Image Frame Composite 101 Changing the Image Color Tone Color Filte...

Страница 8: ...e and Time 123 Changing the Sound Settings 125 Setting the World Time 127 Changing the Display Language 130 Changing a Folder Name 131 Changing the USB Connection Mode 132 Changing the Video Output Format 133 Adjusting the Brightness of the LCD Monitor 134 Using the Power Saving Function 135 Setting Auto Power Off 136 Setting the Guide Display 137 Returning Changed Settings to Their Defaults Reset...

Страница 9: ...each of small children Seek medical attention immediately if a card is accidentally swallowed Keep the provided strap away from infants and children to prevent possible injury or suffocation Use an AC adapter that is of the power and voltage specified for exclusive use with this product The use of an AC adapter other than that specified exclusively for use with this product may cause fire or elect...

Страница 10: ...any battery leakage should come in contact with skin or clothes wash the affected areas thoroughly with water Remove the battery from the camera immediately if it becomes hot or begins to smoke Be careful not to burn yourself during removal Some portions of the camera heat up during use so please take care as there is a risk of low temperature burns if such portions are held for long periods of ti...

Страница 11: ...if it should become covered with dust This can cause a fire Caution Do not place heavy objects on the AC plug cord allow heavy objects to drop onto it or allow the AC plug cord to become damaged due to excessive bending If the AC plug cord becomes damaged consult a PENTAX Service Center Do not short or touch the output terminals of the product while it is still plugged in Do not plug in the AC plu...

Страница 12: ... be avoided Particular care should be taken regarding vehicles which can become very hot inside Storing the camera where pesticides and chemicals are handled should be avoided Remove from case and store in a well ventilated place to prevent the camera from becoming moldy during storage Do not use the camera where it may come in contact with rain water or any other liquid because the camera is not ...

Страница 13: ...n SD memory card or built in memory will delete all data however it may still be possible to recover that data using off the shelf data recovery software Please manage your camera s memory at your own risk Please do not press forcefully on the LCD monitor This could cause breakage or malfunction Be careful not to sit down with the camera in your back pocket as this may damage the exterior of the c...

Страница 14: ...e as optional accessories For other optional accessories refer to Optional Accessories p 143 Checking the Contents of the Package Camera Optio T20 Strap O ST20 Stylus pen O SP45 Software CD ROM S SW61 USB cable I USB17 AV cable I AVC7 Rechargeable lithium ion battery D LI 8 Battery charger D BC8 AC plug cord D CO2 Operating Manual this manual PC Connection Manual ...

Страница 15: ...ap as shown below 1 Pass the narrow end of the strap 1 through the strap lug on the camera 2 Pass the other end of the strap through the loop 1 and pull tight 2 Memo The stylus can be attached to the strap for your convenience if necessary Attaching the Strap 1 2 ...

Страница 16: ...green when charging is finished 4 Remove the battery from the battery charger when fully charged Memo The time required to fully charge the battery is about 100 minutes max The appropriate ambient temperature for charging the battery is 0 C to 40 C 32 F to 104 F The charging time may vary depending on the ambient temperature and other conditions The battery has reached the end of its service life ...

Страница 17: ... camera for the first time 1 Open the battery card compartment cover Slide the battery card compartment cover in the direction of 1 and flip the cover open in the direction of 2 2 Use the side of the battery to lift the battery lock lever upward 3 and insert the battery with the PENTAX logo as shown Push the battery in until it is locked in place 3 Close the battery card compartment cover 1 Open t...

Страница 18: ...mate number of shots recorded during CIPA compliant testing with LCD monitor on and flash used for 50 of the shots at an ambient temperature of 23 C Actual performance may vary depending on operating conditions 2 According to the results of PENTAX in house testing Memo Battery performance may be temporarily reduced at low temperatures Be sure to take a spare battery with you when traveling abroad ...

Страница 19: ...fer to Formatting an SD Memory Card and the Built in Memory p 122 for instructions on formatting 1 Open the battery card compartment cover Slide the battery card compartment cover in the direction of 1 and flip the cover open in the direction of 2 2 Insert the SD Memory Card into the SD Memory Card slot so that the back of the card the side without the label is facing up toward the lens Push the c...

Страница 20: ...while the SD Memory Card is being accessed data is being recorded or read 1 Open the battery card compartment cover 2 Push the card into the SD Memory Card slot to eject it Pull the card out 3 Close the battery card compartment cover Backing Up Data The camera may not be able to access data in the built in memory in the case of a malfunction Use a computer or other device to back up important data...

Страница 21: ...nd render it unusable The data on the SD Memory Card may be deleted in the following circumstances PENTAX does not accept any liability for data that is deleted 1 when the SD Memory Card is mishandled by the user 2 when the SD Memory Card is exposed to static electricity or electrical interference 3 when the card has not been used for a long time 4 when the card is ejected or the battery is remove...

Страница 22: ...n and an icon for the built in memory or SD Memory Card appears on the LCD monitor a appears on the LCD monitor when an SD Memory Card is inserted and appears when there is no SD Memory Card inserted When appears on the LCD monitor images and sound files will be saved in the built in memory The Card locked message appears when the write protect switch on the SD Memory Card is in the locked positio...

Страница 23: ...nguage does not appear touch the arrow icons to advance the screen and select the language The Initial Setting screen appears in the selected language Hometown and Video Out will appear in the selected language If Hometown or Video Out is not correctly displayed touch the flashing icon on the LCD monitor and change the setting Initial Settings Setting the Language and the Date and Time Power switc...

Страница 24: ...of the year month and day Select mm dd yy dd mm yy or yy mm dd 6 Touch the arrow icons qr to choose the time display style Select 24h 24 hour display or 12h 12 hour display 7 Touch OK The setting is saved and the screen returns to the Date Adjust screen Hometown Video Out and Date Style are automatically set according to the language selected on the Initial Setting screen To change these settings ...

Страница 25: ...ns to the Date Adjust screen 14Touch OK The camera returns to Capture mode Caution If the 3 button is pressed without touching OK on the Date Adjust screen the camera will return to Capture mode without setting the time In this case the Date Adjust screen will appear next time you turn the camera on The set language date and time can be changed Refer to the pages below for instructions To change t...

Страница 26: ...ld the camera steady with both hands Compose your shot using the LCD monitor You can use the zoom lever to choose the area you want to capture p 45 Lightly press the shutter release button to set the focus The focus frame on the LCD monitor turns green if the subject is in focus The focus frame does not appear if the subject is not in focus Memo Lightly pressing the shutter release button is refer...

Страница 27: ...flash is set to automatically fire when taking pictures in low light conditions You can change the flash mode setting p 56 to turn off the flash reduce the brightness of the picture prevent the subject from appearing with red eyes and perform other functions Setting the flash mode X Touch the LCD monitor J Capture Toolbar J After taking a picture press the Q button to switch to Playback mode The c...

Страница 28: ... flash has caused the subject to appear with red eyes p 106 and more Selecting the editing method X In Playback mode touch the LCD monitor J Playback Toolbar J n Various Editing Functions Digital Filters Use these to soften an image give the image the look of an illustration change the width of the subject to appear broader or more slender p 105 My Drawing Use the supplied stylus to draw pictures ...

Страница 29: ...ion Selecting the AE Metering p 55 X 3 button J Rec Mode 1 J AE Metering You can adjust the color balance of the picture Adjusting the Color Balance White Balance p 58 X 3 button J Rec Mode 1 J White Balance You can also adjust the sharpness saturation and contrast of the picture p 60 Selecting the Shooting Mode By selecting the shooting mode according to the shooting situation you can easily take...

Страница 30: ...oy Recording Movies To record movies use the Capture Palette to switch to Movie Recording mode Switching to Movie Recording mode X In Capture mode touch the LCD monitor J Capture Toolbar J A J double touch C Press the shutter release button fully to start movie recording Press the shutter release button fully again to stop movie recording The information on the left appears on the LCD monitor duri...

Страница 31: ...m when composing your shot but only the digital zoom is available when recording p 45 You can record movies by pressing and holding the shutter release button for more than one second You can adjust the recorded pixels frame rate and quality level p 51 You can set the white balance sharpness saturation and contrast p 58 p 60 You can correct the exposure before recording p 53 No Flash mode and cont...

Страница 32: ...Sounds To record sounds use the Capture Palette to switch to Voice Recording mode Switching to Voice Recording mode X In Capture mode touch the LCD monitor J Capture Toolbar J A J double touch O Press the shutter release button fully to start voice recording The self timer lamp blinks during recording Press the shutter release button fully again to stop voice recording The following information ap...

Страница 33: ...on during playback at any time Indexes cannot be added during playback After recording press the Q button to switch to Playback mode In Playback mode you can fast forward fast rewind and adjust the volume When indexes are added during recording you can fast forward or fast rewind to each index p 84 Adding a Voice Memo to a Picture You can add a voice memo of up to 60 seconds to a picture you have ...

Страница 34: ...s Choose the number of copies and if the date is to be superimposed on the pictures you want to print DPOF settings p 112 The pictures can then be printed using a DPOF compatible printer or photo processing lab To use a photo processing lab take the SD Memory Card containing the pictures with the print order data and ask to have them printed How to configure the DPOF settings X In Playback mode to...

Страница 35: ...print individual images p 116 or print all the images on an SD Memory Card or those stored in the built in memory p 118 When printing is completed turn off the camera and disconnect the USB cable from the camera and printer Inserting the Date on Prints By inserting the date on your prints you can easily determine when the picture was taken The setting for inserting the date can be made when making...

Страница 36: ...ack mode Press the 3 button to return to the previous screen Setting the Shooting Functions DISPLAY Capture Palette Capture Palette Capture Palette Menu Rec Mode 1 Rec Mode 2 Movie Setting Sound Common Rec Mode 1 Recorded Pixels Quality Level White Balance Sensi tivity AE Metering AF Setting 7 3 2 640 5 7 4 Recorded Pixels Touch the LCD monitor Continue with operations while following the on scree...

Страница 37: ...el Sets the quality level of pictures D Better p 49 White Balance Adjusts the color balance according to the light conditions F Auto p 58 Focusing Area Chooses the focusing area J Multiple p 65 Focus Limiter Limits the focus range On p 66 Aux AF Light For choosing whether to use the auxiliary AF light when shooting in dimly lit locations On p 66 AE Metering For choosing which area of the image to ...

Страница 38: ...frames per second 30fps p 51 Digital Zoom Activates the digital zoom function On p 46 Memory Retains your shooting settings or returns to the default values when the camera is turned off On only for Flash mode Digital Zoom and File No p 38 Fn Setting For quickly calling up frequently used functions l Off p 36 Calling Up Frequently Used Functions Item When Taking Pictures When Recording Movies Reco...

Страница 39: ...he l icon under C 5 Touch the icon of the function you want to assign to the Capture Toolbar The setting is saved and the screen returns to the previous screen If the function you want to assign does not appear touch w to advance the screen 6 Repeat Steps 4 to 5 to assign the necessary functions 7 Press the 3 button three times The camera returns to Capture mode Press the Q button to return to Pla...

Страница 40: ...Setting Flash Mode The selected flash mode other than Auto is saved O Drive Mode The selected drive mode setting Self timer Cont Shooting or Remote Control is saved P Focus Mode The selected focus mode other than Standard is saved P Zoom Position The optical zoom position set with the zoom lever is saved P MF Position The focusing distance chosen with manual focus is saved P White Balance The sele...

Страница 41: ...appears 4 Touch the setting you want to change The setting changes to O On or P Off If the function you want to change does not appear touch w to advance the screen 5 Touch OK 6 Press the 3 button twice The camera returns to Capture mode Press the Q button to return to Playback mode Memory Flash Mode White Balance Drive Mode Focus Mode Zoom Position MF Position OK ...

Страница 42: ...ikely to occur Refer to p 62 for information on how to prevent camera shake The shape of the histogram gives you information about the brightness and contrast of your picture p 54 When firing the flash b Flash icon appears even if the display mode is set to No info Display Displaying Shooting Information in Capture Mode F2 7 F2 7 1 250 1 250 10 25 2006 10 25 2006 1 0 1 0 38 38 F2 7 1 250 1 0 38 f ...

Страница 43: ...pture mode touch the LCD monitor The Capture Toolbar appears 2 Touch DISPLAY The DISPLAY Selection screen appears 3 Touch the desired setting The setting is saved and the camera returns to Capture mode DISPLAY Standard Standard Histogram No info Display LCD Off ...

Страница 44: ...shake use a tripod or rest the camera on a flat surface when taking pictures with this mode Use the flash if people are included p 44 q Landscape The camera sets the focus to keep both near and far objects as sharp as possible White Balance Sharpness Saturation Contrast Flower Flowers are captured with soft outlines I Portrait Gives your subject a bright natural look i Surf Snow For taking picture...

Страница 45: ...the desired shooting mode icon A guide display of the selected shooting mode appears To skip the guide display double touch the icon The shooting mode is selected and the camera returns to Capture mode Touch the arrow icons qr to advance to other shooting modes Touch Palette to return to the Capture Palette 4 Touch OK The shooting mode is selected and the camera returns to Capture mode 5 Press the...

Страница 46: ...ust stay open longer which contributes to camera shake When using a shutter speed at which camera shake is likely to occur f camera shake warning appears on the LCD monitor To prevent camera shake use a tripod and the self timer or remote control function You can also increase the ISO sensitivity setting to take pictures in dimly lit locations without using the flash When the sensitivity is increa...

Страница 47: ...res at up to three times magnification using the optical zoom When the digital zoom is on you can combine it with the optical zoom to enlarge the subject to a maximum magnification equivalent to 12 times Caution You cannot use the optical zoom when the focus mode is set to q Macro Only the digital zoom is available Memo Camera shake is likely to occur when taking pictures at telephoto settings To ...

Страница 48: ...sing only the optical zoom set Digital Zoom to Off 1 Press the 3 button The Menu appears 2 Touch Common The Common screen appears 3 Touch Digital Zoom The setting changes to O On or P Off 4 Press the 3 button twice The camera returns to Capture mode Press the Q button to return to Playback mode Fn Common Digital Zoom Memory Fn Setting ...

Страница 49: ...hutter release button halfway The focus frame on the LCD monitor turns green if the subject is in focus 6 Press the shutter release button fully The picture is taken Memo The frames used in this function are stored in the camera s built in memory They can be replaced with different frames that can be copied from an SD Memory Card by touching Change on the Frame Selection screen p 102 The number of...

Страница 50: ...desired level one solution is to adjust the setting using the EV compensation function p 53 The AE metering function is also helpful in allowing you to select the metering method to measure proper brightness under different shooting situations p 55 When you take a picture in a dimly lit location using the flash to illuminate the subject is a basic technique p 56 But if you want a more natural feel...

Страница 51: ...movies Set the Recorded Pixels Quality Level and Frame Rate settings according to how you intend to use your pictures and movies For Pictures Appropriate Number of Recorded Pixels According to Use Appropriate Quality Level According to Use 1 Press the 3 button The Menu appears 2 Touch Rec Mode 1 The Rec Mode 1 screen appears Setting the Recorded Pixels Quality Level and Frame Rate a 3072 2304 For ...

Страница 52: ...ded Pixels Quality Level and Approx Image Storage Capacity The above figures may vary depending on the subject shooting conditions shooting mode and capacity of the SD Memory Card etc C Best D Better E Good Built in Memory 256 MB Built in Memory 256 MB Built in Memory 256 MB a 3072 2304 3 pictures 69 pictures 6 pictures 135 pictures 9 pictures 202 pictures f 2592 1944 4 pictures 83 pictures 7 pict...

Страница 53: ...Pixels The Recorded Pixels screen appears 4 Touch the desired recorded pixels The setting is saved and the screen returns to the previous screen 5 Press the 3 button twice The camera returns to Capture mode Press the Q button to return to Playback mode m 640 480 Suitable for viewing the movie on a TV or PC D 320 240 Suitable for posting on a website or attaching to e mail C Best Clearer and more d...

Страница 54: ...y vary depending on the subject shooting conditions shooting mode and capacity of the SD Memory Card etc 30fps 15fps Built in Memory 256 MB Built in Memory 256 MB m 640 480 C 9 sec 3 min 8 sec 18 sec 6 min 16 sec D 13 sec 4 min 29 sec 26 sec 8 min 57 sec E 19 sec 6 min 43 sec 38 sec 13 min 24 sec D 320 240 C 23 sec 8 min 4 sec 46 sec 16 min 4 sec D 36 sec 12 min 31 sec 1 min 12 sec 24 min 54 sec E...

Страница 55: ...n bar to the desired setting The histogram is a graph that shows the brightness distribution of an image p 54 5 Touch OK The setting is saved and the screen returns to the previous screen 6 Press the 3 button twice The camera returns to Capture mode Press the Q button to return to Playback mode Memo The camera adjusts the proper exposure for the subject based on a neutral gray subject Therefore if...

Страница 56: ...p 77 Understanding Brightness Usually if the exposure is correct the graph peaks in the middle If the image is too dark the peak is on the left side and if it is too bright the peak is on the right side When the image is too dark the part to the left is cut off dark portions and when the image is too bright the part to the right is cut off bright portions With EV compensation you can adjust the ex...

Страница 57: ...on halfway to lock the exposure then compose your picture again and press the shutter release button fully When the shooting mode is set to C Movie the AE metering is fixed at Center weighted metering and cannot be changed Selecting the AE Metering L Multi segment metering The camera takes a detailed reading of the overall brightness of the picture and determines the correct exposure The camera ca...

Страница 58: ... in dimly lit locations without using the flash When the sensitivity is increased the shutter speed also increases making it easier to prevent camera shake and blurring of the subject However you may notice increased noise which looks like a grainy pattern in the picture p 67 Using the Flash Auto The flash discharges automatically depending on the light conditions a Flash Off The flash will not di...

Страница 59: ...lting picture This phenomenon occurs when the light from the flash is reflected in the subject s eyes Setting the flash mode to c Auto Red eye or d Flash On Red eye is an effective way of preventing red eyes It can be also reduced by illuminating the area around the subject or moving closer to the subject and zooming out If the subject s eyes still appear red despite such precautions they can be c...

Страница 60: ...ice The camera returns to Capture mode Press the Q button to return to Playback mode Memo Using the white balance H Shade when taking pictures of sunsets and sunrises emphasizes their reddish tones Adjusting the Color Balance White Balance F Auto The camera automatically adjusts the color balance G Daylight Use this mode when taking pictures outside in sunlight H Shade Use this mode when taking pi...

Страница 61: ...r other material so that it fills the middle of the adjustment frame 3 Touch Adj The white balance is adjusted and Complete appears when adjusting is finished 4 Touch OK The setting is saved and the screen returns to the previous screen 5 Press the 3 button twice The camera returns to Capture mode Press the Q button to return to Playback mode Memo When you touch OK before pressing Adj the previous...

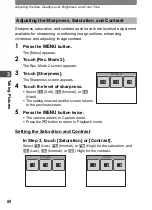
Страница 62: ...rs 3 Touch Sharpness The Sharpness screen appears 4 Touch the level of sharpness Select F Soft G Normal or H Hard The setting is saved and the screen returns to the previous screen 5 Press the 3 button twice The camera returns to Capture mode Press the Q button to return to Playback mode Setting the Saturation and Contrast In Step 3 touch Saturation or Contrast Select C Low D Normal or E High for ...

Страница 63: ...nt to focus manually p 63 Choosing the Focusing Area By default the camera focuses on the closest object in the middle of the focus frame Select another focusing option if you want the camera to focus on a different point p 65 Subjects Difficult to Focus On The camera may not be able to focus under the following conditions In this case lock the focus on an object the same distance away as the subj...

Страница 64: ...the flash p 56 is one solution as the camera then takes pictures at higher shutter speeds Higher shutter speeds are effective for preventing both camera shake and blurring of the subject You can check if camera shake is likely to occur when f camera shake warning appears on the LCD monitor Using a tripod and the self timer p 69 or remote control function p 70 is recommended especially when camera ...

Страница 65: ... Focus If focusing is not possible with q Macro pictures cannot be taken Selecting the Focus Mode Standard Use this mode when the distance to the subject is 40 cm 16 in or more The camera focuses on the subject in the focusing area when the shutter release button is pressed halfway q Macro Use this mode when the distance to the subject is approximately 15 cm 6 in to 40 cm 16 in The camera focuses ...

Страница 66: ...bar appears on the LCD monitor to indicate the approximate manual focus position Use this to adjust the focus q For closer focus r For distant focus 4 Press the shutter release button halfway The camera returns to Capture mode Press the Q button to return to Playback mode Memo The camera returns to Capture mode and the picture can be taken five seconds after you release your finger from either arr...

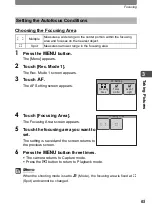
Страница 67: ... returns to the previous screen 6 Press the 3 button three times The camera returns to Capture mode Press the Q button to return to Playback mode Memo When the shooting mode is set to C Movie the focusing area is fixed at K Spot and cannot be changed Setting the Autofocus Conditions J Multiple Measures a wide range in the center portion within the focusing area and focuses on the nearest object K ...

Страница 68: ...the Q button to return to Playback mode O On Focuses on a subject within the range of approximately 40 cm 16 in to infinity P Off Focuses on a subject within the range of approximately 15 cm 6 in to infinity when the zoom is not used wide angle setting Focuses on a subject within the range of approximately 40 cm 16 in to infinity when the zoom is used telephoto setting O On When the autofocus does...

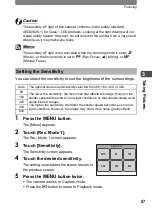
Страница 69: ...c Mode 1 The Rec Mode 1 screen appears 3 Touch Sensitivity The Sensitivity screen appears 4 Touch the desired sensitivity The setting is saved and the screen returns to the previous screen 5 Press the 3 button twice The camera returns to Capture mode Press the Q button to return to Playback mode Setting the Sensitivity Auto The optimal value is automatically selected from 80 160 320 or 400 80 The ...

Страница 70: ...the shutter release button on the camera you can use the self timer p 69 or remote control function p 70 to take pictures You can also take continuous pictures p 72 by keeping the shutter release button pressed The captured image appears on the LCD monitor for one second Instant Review and is saved The Instant Review time can be changed p 73 Taking Pictures ...

Страница 71: ...s can be switched at any time by touching the g or Z icon 4 Press the shutter release button halfway The focus frame on the LCD monitor turns green if the subject is in focus 5 Press the shutter release button fully A countdown of the time until the picture is taken appears on the LCD monitor and the picture is taken ten seconds or two seconds after the shutter release button is pressed Memo Press...

Страница 72: ...ed remote control mode appears in place of the i icon The h and i icons appear on the LCD monitor The remote control options can be switched at any time by touching the h or i icon The self timer lamp blinks in remote control mode 4 Press the shutter release button on the remote control i The self timer lamp flashes quickly and the picture is taken after approximately three seconds h The picture i...

Страница 73: ...use the zoom button on the remote control when the focus mode is set to q Macro You can only use the zoom button on the remote control to adjust the zoom magnification within the optical zoom range You cannot adjust the zoom magnification within the digital zoom range Memo All buttons on the camera are operable even when using the remote control function The remote control can be operated up to ap...

Страница 74: ...he 9 icon The Drive Mode screen appears 3 Touch the 1 icon The setting is saved and the camera returns to Capture mode 4 Press the shutter release button halfway The focus frame on the LCD monitor turns green if the subject is in focus 5 Press the shutter release button fully Pictures are taken continuously for as long as you keep the shutter release button pressed Caution The flash will not disch...

Страница 75: ...button The Menu appears 2 Touch Rec Mode 2 The Rec Mode 2 screen appears 3 Touch Instant Review The Instant Review screen appears 4 Touch the desired Instant Review time The setting is saved and the screen returns to the previous screen 5 Press the 3 button twice The camera returns to Capture mode Press the Q button to return to Playback mode Setting the Instant Review Time Instant Review 4sec 5se...

Страница 76: ...touch the icon If you press the Q button or no operation is performed for a certain period of time the camera returns to Playback mode Press the shutter release button fully or halfway to switch to Capture mode Press the 3 button to return to the previous screen Setting the Playback Functions DISPLAY Touch the LCD monitor Continue with operations while following the on screen guidance Touch the de...

Страница 77: ... stamp from part of the image and erasing part of the image p 96 Y Frame Composite Adds a decorative frame to an image p 101 W Information Display Sets the type of information displayed on the LCD monitor Standard p 77 Item Description Default Setting Page u Slideshow Plays back recorded images and movies one after another 3 sec Wipe On p 85 n Resize Changes the recorded pixels and quality level o...

Страница 78: ...ative frame to an image p 101 My Drawing For drawing pictures on an image adding stamps creating a stamp from part of the image and erasing part of the image p 96 Movie Edit Save as Still Img Saves movie frames as still pictures p 109 Z Red eye Compensation Corrects images when the flash has caused the subject to appear with red eyes p 106 Voice Memo Adds a voice memo to images p 107 Z Protect Pro...

Страница 79: ...determine if the image was properly exposed p 54 The histogram is not displayed for movie files 1 In Playback mode touch the LCD monitor The Playback Toolbar appears Displaying Shooting Information 10 25 2006 10 25 2006 100 0038 100 0038 30 30 100 0038 30 14 25 14 25 14 25 10 25 2006 100 0038 100 0038 30 30 1 250 1 250 F2 7 F2 7 100 0038 30 7M 1 250 F2 7 10 25 2006 10 25 2006 14 25 14 25 14 25 ISO...

Страница 80: ...ions 78 4 Playing Back and Editing Images 2 Touch DISPLAY The DISPLAY Selection screen appears 3 Touch the desired setting The setting is saved and the camera returns to Playback mode Standard Standard Histogram No info Display ...

Страница 81: ...n no operations have been performed more than 10 seconds in normal Playback mode or one of icons in the Playback Palette has been selected the lens retracts automatically to prevent damage If you press the Q button in Playback Only mode the camera switches to Capture mode and the lens is extended 1 In Playback mode touch the arrow icons qr to choose the image you want to rotate 2 Touch the LCD mon...

Страница 82: ... the display area on the guide at the top left of the screen Drag the displayed image in the direction you want to view Changing the magnification Turn the zoom lever toward y or touch the q icon to magnify the image max 12 Turn the zoom lever toward f or touch the p icon to demagnify the image min 1 Dragging your finger on the LCD monitor also enables you to enlarge an area of the image when it i...

Страница 83: ...t appear on the thumbnails indicate the following No icon Image without sound O with image Image with sound C Movie first frame appears O without image Sound only file Touch the arrow icons qr to change the nine thumbnail images to another nine images Touch the o icon to switch to the selection and deletion screen p 91 2 Touch a thumbnail in nine image display The selected file is displayed in sin...

Страница 84: ...on appears for images with a voice memo 2 Touch the w icon Playback of the voice memo starts The following operations can be performed during playback Zoom lever x Increases the volume Zoom lever w Decreases the volume n icon 3 button Stops playback Playing Back an Image with a Voice Memo 100 0038 100 0038 30 30 100 0038 30 10 25 2006 10 25 2006 14 25 14 25 14 25 10 25 2006 ...

Страница 85: ...ing operations can be performed during playback m Pauses playback n 3 button Stops playback z Reverse playback w Returns to normal playback from reverse playback Zoom lever y Increases the volume Zoom lever f Decreases the volume The following operations can be performed while playback is paused w Resumes playback n Stops playback o Frame reverse p Frame forward 3 Touch the n icon Playback stops P...

Страница 86: ...dexes k Plays back starting from the previous index l Plays back starting from the next index The following operations can be performed while playback is paused w Resumes playback n Stops playback o Rewinds approx 5 seconds p Advances approx 5 seconds Memo If a sound file contains recorded indexes the file is rapidly rewound or fast forwarded to the index Press and hold the o or p icon for more th...

Страница 87: ...he guide display single touch the icon 5 Touch Start The slideshow starts Touching the LCD monitor during the slideshow pauses the slideshow Touch Start again to resume playback 6 Press the shutter release button Q button or 3 button or turn the zoom lever The slideshow stops Memo The slideshow continues until it is stopped Movies or images with voice memos will be played through to the end before...

Страница 88: ...g effects Touch the icon of the desired effect to save the setting and return to the Slideshow screen Setting the Sound Effect Touch Sound Effect on the Slideshow screen to set the sound effect between images Except when the Screen Effect is set to Off you can choose O On or P Off for the sound that is played when one image changes to the next Memo If the screen effect is set to off then the sound...

Страница 89: ... to the AV device s video input terminal and audio input terminal When using stereo sound equipment insert the audio terminal into the L white terminal When viewing images or movies on AV equipment with multiple video input terminals such as a TV refer to the operation manual of the device and select the correct video input terminal to connect the camera to 3 Turn the AV device on If multiple AV d...

Страница 90: ...camera and AV equipment Memo It is recommended that you use the optional AC adapter kit K AC7 when connected to AV devices for long periods of time to avoid running down the camera s battery Depending on the country or region images and sound files may fail to play back if the video output format of the camera does not match the video format in use there If this happens change the video output for...

Страница 91: ...ck mode touch the arrow icons qr to choose an image or sound file you want to delete 2 Touch the LCD monitor The Playback Toolbar appears 3 Touch the i icon The Delete screen appears 4 Touch Del One img snd A confirmation dialog appears 5 Touch Delete The selected image or sound file is deleted Memo You can delete the image you have just taken by touching the i icon while the image is displayed De...

Страница 92: ...You can delete all the images and sound files saved in the camera at once Caution Protected images and sound files cannot be deleted p 92 1 In Playback mode touch the LCD monitor The Playback Toolbar appears 2 Touch the i icon The Delete screen appears 3 Touch Delete All A confirmation dialog appears 4 Touch Delete All All the images and sound files are deleted Deleting All Images and Sound Files ...

Страница 93: ... 3 Touch the files that you want to delete The P on the selected thumbnails turn to O If you turn the zoom lever toward y you can set the checkbox one by one in single image display mode The display returns to the nine image display when you turn the zoom lever toward f or no operations have been performed for more than two seconds 4 Touch Del A confirmation dialog appears 5 Touch Select Delete Th...

Страница 94: ... for choosing an image or sound file to protect appears 5 Touch the arrow icons qr to choose the image or sound file you want to protect 6 Touch Protect The selected image or sound file is protected Caution Protected images and sound files WILL be deleted when the SD Memory Card or built in memory is formatted Memo To cancel the Protect setting touch Unprotect in Step 6 Z appears below the file nu...

Страница 95: ...nd Sound Files 1 Touch All Images Sounds on the Protect screen A confirmation dialog appears 2 Touch Protect All the images and sound files are protected Memo To cancel the Protect setting on all your images and sound files select Unprotect in Step 2 Protect Unprotect Protect all images sounds ...

Страница 96: ...size screen appears To bring up the guide display single touch the icon By default the same Recorded Pixels setting and the Quality Level setting at one lower level appear To change the settings touch either Recorded Pixels or Quality Level 5 Touch OK A save dialog for selecting the save method appears 6 Touch Overwrite or Save as The resized image is saved Protected images are automatically saved...

Страница 97: ...con 5 Set the size of the cropping frame and the area to crop By default the cropping frame is displayed at its maximum size To change the size of the cropping frame use the zoom lever or touch ChangeSize You can move the cropping frame by dragging it 6 Touch OK The cropped image is saved with a new file name Caution Movies cannot be cropped Memo The cropped image will be saved at the same quality...

Страница 98: ... arrow icons qr to choose the image you want to edit 2 Touch the LCD monitor The Playback Toolbar appears 3 Touch the n icon The Playback Palette appears 4 Double touch the h icon The Special Effect screen appears To bring up the guide display single touch the icon 5 Touch My Drawing The My Drawing screen appears Making Drawings and Adding Stamps Special Effect Color Filter Digital Filter Frame Co...

Страница 99: ...returns to the Special Effect screen 8 Touch Exit A save dialog for selecting the save method appears 9 Touch Overwrite or Save as The edited image is saved Protected images are automatically saved as new images Caution You cannot make drawings on pictures that are m in size or movies h and larger images are resized to i when a drawing is made Choosing a Line Touch the P icon in Step 6 to display ...

Страница 100: ...ch the stamp you want to rotate The stamp is selected 3 Touch the icon which is centered below the screen The rotation selection screen appears 4 Touch the stamp in the orientation you want The stamp is displayed in the selected orientation 5 Touch OK The stamp is ready to be added to the image Touch the image where you want to add the stamp Memo You can also rotate My Stamp Rotating stamps OK ...

Страница 101: ...us over the area you want to cut Draw an unbroken line to select the area you want to cut To change the area to be cut press the 3 button and re select the area to be cut 3 Touch OK A confirmation dialog for creating the stamp appears 4 Touch Save The stamp is created Memo You can create up to four stamps Set the area to cut OK OK My Save Cancel Make stamp from the cut out image ...

Страница 102: ... The stamp is added to the image To delete a stamp touch Delete Memo My Stamp can also be rotated Using the Eraser Touch the S icon to display the Eraser Selection screen Touch the type of eraser you want to use and touch OK Memo To clear and reset the edits you made in Drawing mode touch CLS on the screen The stamps you have stored are not cleared My OK Delete OK CLS ...

Страница 103: ...e Selection screen appears 6 Touch the arrow icons qr to choose the frame to add 7 Touch OK The camera returns to the Special Effect screen 8 Touch Exit A save dialog for selecting the save method appears 9 Touch Overwrite or Save as The image with the added frame is saved Protected images are automatically saved as new files Caution Frames cannot be added to pictures that are m in size or movies ...

Страница 104: ... the built in memory it replaces one of the existing frames in the built in memory The replaced frame is deleted from the built in memory 1 In the Frame Selection screen choose the frame you want to replace and touch Change A message appears and the frames on the SD Memory Card appear 2 Touch the arrow icons qr to choose the frame to register 3 Touch OK The frame is added to the built in memory in...

Страница 105: ... n icon The Playback Palette appears 4 Double touch the h icon The Special Effect screen appears To bring up the guide display single touch the icon 5 Touch Color Filter The screen for changing the color tone appears 6 Touch the color filter you want to use You can preview the results of the selected color filter 7 Touch OK The screen returns to the Special Effect screen 8 Touch Exit A save dialog...

Страница 106: ...h the icon 5 Touch the Bright Filter icon The Brightness Adjustment screen appears 6 Touch the p or q icon to adjust the brightness You can preview the results of the brightness adjustment You can also drag the cursor along the brightness bar to the desired setting 7 Touch OK The screen returns to the Special Effect screen 8 Touch Exit A save dialog for selecting the save method appears 9 Touch Ov...

Страница 107: ...de display single touch the icon 5 Touch the i icon The Digital Filter Selection screen appears 6 Touch the digital filter you want to use You can preview the results of the selected digital filter L Softens the image M Makes the image look like an illustration N Gives the image artistic texture which looks like sprinkling star dust O Makes the subject appear broader or more slender 7 Touch OK The...

Страница 108: ...ter touching OK on the error screen In this case follow the steps below and select the area for red eye compensation manually To bring up the guide display single touch the icon 5 Touch the area you want to correct You can select multiple areas for red eye compensation before touching OK 6 Touch OK A save dialog for selecting the save method appears 7 Touch Overwrite or Save as The corrected image...

Страница 109: ... appears 4 Double touch the icon The camera starts recording You can record up to 60 seconds To bring up the guide display single touch the icon 5 Touch the n icon Recording stops Caution A voice memo cannot be added to an image that already has a voice memo Delete the old voice memo before recording a new one p 90 A voice memo cannot be added to a protected image Memo Refer to Deleting a Voice Me...

Страница 110: ...to select a new start up screen You can choose from the image displayed on the LCD monitor the current start up screen any of the three built in start up screens or a screen which is off Select the off screen to not display a start up screen 6 Touch OK The start up screen setting is saved Caution Once an image has been selected as the start up screen it will not be deleted even if the original ima...

Страница 111: ...yback Palette appears 4 Double touch the icon The Movie Edit screen appears To bring up the guide display single touch the icon 5 Touch the op icons to choose the frame you want to save as a still image Touch the w icon to play back the movie and touch the n icon to stop playback Touching the m icon during playback pauses the movie 6 Touch OK The selected frame is saved as a still image Saving a F...

Страница 112: ...ss the SD Memory Card has sufficient space Before copying the data make sure that there is enough space on the SD Memory Card 1 In Playback mode touch the LCD monitor The Playback Toolbar appears 2 Touch the n icon The Playback Palette appears 3 Double touch the p icon The Image Sound Copy screen appears To bring up the guide display single touch the icon To Copy Files from the Built in Memory to ...

Страница 113: ...e b icon 5 Touch the arrow icons qr to choose the file to copy 6 Touch OK The selected image movie or sound file is copied Memo If sound has been recorded with the image the sound file is copied with the image Protected images movies and sound files are still protected after they have been copied 10 25 2006 10 25 2006 14 25 14 25 14 25 100 0038 100 0038 100 0038 OK Copy this image sound Copy this ...

Страница 114: ...ppear on the print 1 In Playback mode touch the arrow icons qr to choose the first image you want to print 2 Touch the LCD monitor The Playback Toolbar appears 3 Touch the n icon The Playback Palette appears 4 Double touch the r icon The DPOF screen appears To bring up the guide display single touch the icon 5 Touch Print One The DPOF Setting screen appears Printing with DPOF Applying the DPOF Set...

Страница 115: ... to 99 copies 9 Touch OK The DPOF Setting screen in Step 5 appears 10Touch the arrow icons qr to choose the next image and then repeat Steps 6 to 9 11Touch OK The DPOF settings are saved Caution Depending on the printer or printing equipment at the photo processing lab the date may not be imprinted on the pictures even if you set the DPOF settings Memo You can set the number up to 99 copies To can...

Страница 116: ...rint All The DPOF screen appears 5 Specify the number of copies and if you want the date to appear on the print Refer to Steps 6 to 9 in Applying the DPOF Settings to Each Image p 113 for details of how to make the settings 6 Touch OK The DPOF settings are saved Caution When settings are made for all images the number of copies applies to all the images Before printing check that the number is cor...

Страница 117: ...er Do not disconnect the USB cable during data transfer Depending on the printer model not all the settings made on the camera such as date and DPOF settings may be executed Printing an index of images where multiple images appear on a single sheet may not be possible unless the printer supports index printing For index prints you may need to use a PC 1 Select PictBridge for the USB Connection mod...

Страница 118: ...ars 4 Touch the arrow icons su to specify the number of copies You can print up to 99 copies Touch OK The screen in Step 1 appears 5 Touch Print A confirmation dialog appears To change the print settings refer to Changing the Print Settings p 117 6 Touch Print Printing starts Touch Printing Cancel during printing to cancel printing Printing Single Image Date Copies 1 Print 100 0038 Print this imag...

Страница 119: ...f paper you can use When you touch Quality the more E the higher the print quality will be 9 Touch Print The image is printed according to the settings Touch Printing Cancel during printing to cancel printing Memo The power indicator lights while the camera is communicating with the printer and blinks while the card is being accessed and during printing Do not disconnect the USB cable while the po...

Страница 120: ...he print settings 4 Touch Print Printing starts Touch Printing Cancel during printing to cancel printing 1 In the Printing Mode Selection screen Step 5 on p 115 touch DPOF Setting The settings you have made appear Touch qr to check the settings for each image 2 Touch Print A confirmation dialog appears Refer to Changing the Print Settings for how to change the print settings p 117 3 Touch Print Pr...

Страница 121: ...PictBridge 119 5 Printing Images Disconnect the USB cable from the camera and printer when you have finished printing 1 Turn off the camera 2 Disconnect the USB cable from the camera and printer Disconnecting the USB Cable ...

Страница 122: ...atin Sound Shutter Sound Selftime Sound Playback Volume Operatin Volume Start up Sound 1 1 1 1 1 1 1 1 Operation Volume OK Continue with operations while following the on screen guidance Press the 3 button Touch the desired icon Touch the desired icon Touch the desired icon Menu Press the shutter release button to return to Capture mode Press the Q button to return to Playback mode Press the 3 but...

Страница 123: ...orld Time Sets the world time Off p 127 Language Sets the display language in which menus and messages appear Depends on the Initial Setting p 130 Folder Name Images and sound files can be saved to a separate folder by date Standard p 131 USB Connection Sets the USB cable connection PC p 132 Video Out For setting the video output format to match AV equipment Depends on the Initial Setting p 133 Br...

Страница 124: ...rmat the card with this camera If you are going to discard give away or sell your SD memory card you should ensure that the data on the card is completely deleted or the card itself is destroyed if it contains any personal or sensitive information Please note that formatting the SD card will not necessarily delete the data so that it cannot be recovered using off the shelf data recovery software T...

Страница 125: ...reen appears 4 Touch Date Style The Date Style screen appears 5 Touch the arrow icons qr to choose the display style of the year month and day Select mm dd yy dd mm yy or yy mm dd 6 Touch the arrow icons qr to choose the time display style Select 24h 24 hour display or 12h 12 hour display 7 Touch OK The setting is saved and the screen returns to the Date Adjust screen with the selected date style ...

Страница 126: ...te Adjust screen Setting the Time 1 Touch Time on the Date Adjust screen The Time screen appears 2 Touch the arrow icons su to set the time 3 Touch OK The setting is saved and the screen returns to the Date Adjust screen Memo When you finish the settings and touch OK the camera clock is reset to 00 seconds To set the exact time touch OK when the time signal on the TV radio etc reaches 00 seconds D...

Страница 127: ...creen appears Changing the Volume 1 Touch Operation Volume on the Sound screen The Operation Volume screen appears 2 Touch the icon of the operation volume you want to set Choose from six volume levels f 0 to g 5 Set the volume to f 0 to mute the sound 3 Touch OK The setting is saved and the screen returns to the Sound screen Changing the Sound Settings Sound Operatin Sound Shutter Sound Selftime ...

Страница 128: ...onds of a recorded sound file as the sound type 3 Touch OK The setting is saved and the screen returns to the Sound screen Setting the User Sound 1 In Step 2 above touch USER and then touch OK The Playback screen appears if there is a sound that can be used as the user sound in the camera 2 Touch the arrow icons qr to choose the sound w Plays back the first two seconds of the sound file n Stops pl...

Страница 129: ...n taking pictures in a different time zone Setting the Destination 1 Press the 3 button The Menu appears 2 Touch Setting The Setting screen appears 3 Touch World Time The World Time screen appears 4 Touch Destination The Destination screen appears The city that is currently selected turns green on the map 5 Touch the arrow icons qr to select the destination city on the map You can also pan the map...

Страница 130: ...ime screen appears Displaying the Destination Time 1 Touch Select Time on the World Time screen The Select Time screen appears 2 Touch Destination The time setting for the destination city is saved and the screen returns to the World Time screen 3 Press the 3 button three times The camera returns to Capture mode When World Time is set X appears on the LCD monitor Press the Q button to return to Pl...

Страница 131: ...onto Colombo New York Kathmandu Halifax Dacca Central and South America Mexico City East Asia Yangon Lima Bangkok Santiago Kuala Lumpur Caracas Vientiane Buenos Aires Singapore Sao Paulo Phnom Penh Rio de Janeiro Ho Chi Minh Europe Lisbon Jakarta Madrid Hong Kong London Beijing Paris Shanghai Amsterdam Manila Milan Taipei Rome Seoul Berlin Tokyo Stockholm Guam Athens Oceania Perth Helsinki Adelaid...

Страница 132: ...ppears 2 Touch Setting The Setting screen appears 3 Touch Language The Language screen appears 4 Touch the desired language The setting is saved and the screen returns to the previous screen If the desired language does not appear touch the arrow icons qr to advance the screen and select the language 5 Press the 3 button twice The camera returns to Capture mode Press the Q button to return to Play...

Страница 133: ...ard or y Date icon The setting is saved and the screen returns to the previous screen 5 Press the 3 button twice The camera returns to Capture mode Press the Q button to return to Playback mode Changing a Folder Name x Standard XXXPENTX where XXX is the 3 digit folder number Stores up to 500 files in the same folder However the maximum file number is 9999 y Date XXX_mmdd 3 digit folder number_mont...

Страница 134: ...and sound data to a PC B Uses to connect the camera to a PictBridge compatible printer The setting is saved and the screen returns to the previous screen 5 Press the 3 button twice The camera returns to Capture mode Press the Q button to return to Playback mode Caution Do not connect the camera to your printer while A PC is selected for the USB Connection mode and do not connect the camera to your...

Страница 135: ...ns change the video output format setting 1 Press the 3 button The Menu appears 2 Touch Setting The Setting screen appears 3 Touch w The next page of the Setting screen appears 4 Touch Video Out The Video Out screen appears 5 Touch NTSC or PAL Choose the video output format to match the output format of the AV equipment The setting is saved and the screen returns to the previous screen 6 Press the...

Страница 136: ... Touch the p or q icon to adjust the brightness Touch the p icon to make the monitor darker and the q icon to make the monitor brighter You can also drag the cursor along the bar to the desired setting 6 Touch OK The setting is saved and the screen returns to the previous screen 7 Press the 3 button twice The camera returns to Capture mode Press the Q button to return to Playback mode Adjusting th...

Страница 137: ...4 Touch Power Saving The Power Saving screen appears 5 Choose the duration time until the LCD monitor turns off Select 30sec 20sec 15sec 10sec 5sec or Off The setting is saved and the screen returns to the previous screen 6 Press the 3 button twice The camera returns to Capture mode Press the Q button to return to Playback mode Memo Power Saving does not function in the following situations when u...

Страница 138: ... 4 Touch Auto Power Off The Auto Power Off screen appears 5 Choose the duration time until the power turns off Select 5min 3min or Off do not turn off The setting is saved and the screen returns to the previous screen 6 Press the 3 button twice The camera returns to Capture mode Press the Q button to return to Playback mode Memo Even when set to 5min or 3min Auto Power Off will not function when t...

Страница 139: ...screen appears 3 Touch w The next page of the Setting screen appears 4 Touch Guide Display The setting changes to O On or P Off O Turns on the guide display P Turns off the guide display 5 Press the 3 button twice The camera returns to Capture mode Press the Q button to return to Playback mode Memo Even when Guide Display is set to On you can bypass it by double touching the icon Setting the Guide...

Страница 140: ...ut format are not affected 1 Press the 3 button The Menu appears 2 Touch Setting The Setting screen appears 3 Touch w The next page of the Setting screen appears 4 Touch Reset The Reset screen appears 5 Touch Reset The settings are reset and the camera returns to Capture mode Returning Changed Settings to Their Defaults Reset Reset Reset Cancel Reset to initial setting ...

Страница 141: ...cket shape used in the country of your destination see Main Socket Types in the Major Countries and Regions of the World and take an appropriately shaped adapter plug with you The socket shape does not affect battery charging Caution Use of battery charger components other than those specified for your camera may result in damage to the battery and improper camera operation Unplug the adapter plug...

Страница 142: ...c Asia Japan Taiwan c Sri Lanka Maldives c Nepal Bangladesh Mongolia c Vietnam c c India Indonesia Pakistan Macau c c Thailand c c c Korea c c c Philippines c c c Singapore Hong Kong c c China c c c c c Malaysia c c c Oceania Australia Tonga New Zealand Fiji c Guam c Tahiti c Central and South America Colombia Jamaica Haiti Panama Bahamas Puerto Rico Venezuela Mexico c Brazil Peru c c Chile c c Ar...

Страница 143: ... on for long periods of time 1 Make sure that the camera is turned off before opening the DC input terminal cover 2 Connect the DC terminal of the AC adapter to the DC input terminal on the camera 3 Connect the AC plug cord to the AC adapter 4 Plug the AC plug cord into a power outlet Using the AC Adapter 4 AC adapter AC plug cord DC terminal 2 3 1 ...

Страница 144: ...ta may be lost if either becomes disconnected while data is being recorded on the SD Memory Card or the built in memory Use the AC adapter with due care to avoid fire or electric shock Be sure to read USING YOUR CAMERA SAFELY p 7 before using the AC adapter Be sure to read the operation manual accompanying the AC adapter kit K AC7 before using it The battery inside the camera does not charge when ...

Страница 145: ... BC8 AC Plug cord D CO2 The ending of the AC plug cord D CO2 differs depending on the country Rechargeable lithium ion battery D LI 8 USB cable I USB17 AV cable I AVC7 Strap O ST20 Leather strap O ST24 Strap O ST8 Sports strap O ST30 Remote control E Zoom function Remote control F Camera case O CC45 Products marked with an asterisk are the same as those supplied with the camera Optional Accessorie...

Страница 146: ...ted The SD Memory Card you have inserted is unformatted or has been formatted on a computer or other device that is not compatible with this camera p 122 Card locked The SD Memory Card is write protected p 19 Compression error Compression of the image you captured has failed Change the quality size and try again p 49 p 94 No image sound There are no image sound files on the SD Memory Card to play ...

Страница 147: ...s when the camera takes more than five seconds to display an image due to image processing or when the SD Memory Card or built in memory is being formatted This image sound cannot be resized Appears when you try to resize an image or sound file that cannot be resized This image sound cannot be trimmed Appears when you try to crop an image or sound file that cannot be cropped No paper in the printe...

Страница 148: ...connected to a computer Camera is connected to a TV The LCD monitor turns off when the camera is connected to a TV Display mode is set to Off Touch the LCD monitor to change the display mode setting p 40 Power Saving function has activated Deactivate by pressing the shutter release button halfway in Capture mode or by touching the LCD monitor in Playback mode Image is displayed but is hard to see ...

Страница 149: ...q Macro Subjects at a distance of 40 cm or greater will be out of focus if taken with the focus mode set to q Macro p 63 Subject is too dark to focus on Set auxiliary AF light to On p 66 Flash does not discharge Flash mode is set to a Flash Off Set to Auto or b Flash On p 56 The shooting mode is set to C Movie the drive mode is set to 1 Cont Shooting or the focus mode is set to s Infinity Switch t...

Страница 150: ...the SD Memory Card p 18 Functions return to their original settings when camera is turned off Memory is set to Off Set Memory to On to save the settings of your functions when the camera is turned off p 38 Wrong date is displayed on images and or sound files Date and time are not set Set the date and time The date and time are not set at the time of purchase p 21 Camera was stored with exhausted b...

Страница 151: ...149 Memo ...

Страница 152: ...on JPEG streaming video approx 30fps 15fps PCM system monaural sound Sound Voice memo voice recording WAVE PCM system monaural Quality Level Picture C Best D Better E Good Movie C Best D Better E Good Storage Medium Built in memory approx 12 MB SD Memory Card C Best D Better E Good Built in Memory 256 MB Built in Memory 256 MB Built in Memory 256 MB a 3072 2304 3 pictures 69 pictures 6 pictures 13...

Страница 153: ...herical elements Zoom Type Electrically driven Picture Range Approx 148 mm 111 mm screen is filled Macro mode Digital Zoom Capture Mode Max 4 combines with 3 optical zoom to give zoom magnification equivalent to 12 LCD Monitor 3 0 inch TFT color LCD monitor touch display with backlight and brightness adjustment approx 230 000 pixels Playback Functions Single frame 9 frame index magnify max 12 scro...

Страница 154: ...or full wide angle setting Macro Approx 0 15 m 0 5 m full wide angle setting Pan Focus Approx 0 7 m full wide angle setting Approx 2 7 m full telephoto setting Landscape full zoom range Manual focus Approx 0 15 m full wide angle setting Approx 0 4 m except for full wide angle setting Focus Lock By pressing the shutter release button halfway Exposure Mechanism AE metering TTL metering by sensor mul...

Страница 155: ... 130 pictures Recording capacity shows approximate number of shots recorded during CIPA compliant testing with LCD monitor on flash used for 50 of the shots and at an ambient temperature of 23 C Actual performance may vary depending on operating conditions Playback Time Approx 100 min According to the result of PENTAX in house testing Max Charging Time Approx 100 min In Out Port PC USB 2 0 High Sp...

Страница 156: ... In some countries your local retailer may also take back your old product free of charge if you purchase a similar new one Please contact your local authority for further details By disposing of this product correctly you will help ensure that the waste undergoes the necessary treatment recovery and recycling and thus prevent potential negative effects on the environment and human health which co...

Страница 157: ...r If there is no representative of the manufacturer in your country send the equipment to the manufacturer with postage prepaid In this case it will take a considerable length of time before the equipment can be returned to you owing to the complicated customs procedures required If the equipment is covered by warranty repairs will be made and parts replaced free of charge and the equipment will b...

Страница 158: ...istributors in some countries can supersede this warranty policy Therefore we recommend that you review the warranty card supplied with your product at the time of purchase or contact the PENTAX distributor in your country for more information and to receive a copy of the warranty policy The CE Mark is a Directive conformity mark of the European Union ...

Страница 159: ...lled and used in accordance with the instructions may cause harmful interference to radio communications However there is no guarantee that interference will not occur in a particular installation If this equipment does cause harmful interference to radio or television reception which can be determined by turning the equipment off and on the user is encouraged to try to correct the interference by...

Страница 160: ...mpliant with the standards Records maintained continue to reflect the equipment being produced can be expected to be within the variation accepted due to quantity production and testing on the statistical basis as required by 47CFR 2 909 Operation is subject to the following two conditions 1 This device may not cause harmful interference and 2 This device must accept any interference received incl...

Страница 161: ...rring of subject 62 Bright Filter 104 Broader or More slender Digital Filter 105 C Camera shake 62 Capture Palette 43 Capture Toolbar 34 35 Center weighted metering 55 Charging the battery abroad 139 Checking the memory card 20 Color Filter 103 Computer 132 Continuous Shooting 72 Contrast 60 Copy 110 Cropping 95 D Date and Time 21 123 Daylight White Balance 58 Delete 89 Depth of field 62 Digital F...

Страница 162: ...focus 64 Memory 38 Menu 34 35 120 3 button 34 120 Movie 28 83 Multiple Focusing Area 65 Multi segment metering 55 My Drawing 96 N Nine image Display 81 NTSC format 133 O Optional Accessories 143 P PAL format 133 Pan Focus 63 PictBridge 115 Playback Only mode 79 Playback Palette 74 75 Playback Toolbar 74 75 Playing back sounds 84 Power Saving 135 Power switch 20 Press fully shutter release button 2...

Страница 163: ...hade White Balance 58 Sharpness 60 Shooting Information 40 77 Shooting Mode 42 Shutter release button 24 25 Slideshow 85 Soft Digital Filter 105 Sound 30 121 125 Spot Focusing Area 65 Spot AE metering 55 Stamp 96 Start up screen 108 Strap 13 Stylus 13 T Tungsten Light White Balance 58 TV 87 U USB Connection 132 V Video Output Format 133 Voice Memo 82 90 107 W White Balance 58 World Time 127 Z Zoom...

Страница 164: ...Memo ...

Страница 165: ...Memo ...

Страница 166: ...Memo ...

Страница 167: ...Memo ...

Страница 168: ...p www pentax co uk PENTAX France S A S 112 Quai de Bezons B P 204 95106 Argenteuil Cedex FRANCE http www pentax fr PENTAX Schweiz AG Widenholzstrasse 1 8304 Wallisellen Postfach 367 8305 Dietlikon SWITZERLAND http www pentax ch PENTAX Scandinavia AB P O Box 650 75127 Uppsala SWEDEN http www pentax se PENTAX Imaging Company A Division of PENTAX of America Inc Headquarters 600 12th Street Suite 300 ...

Отзывы: