Install Drivers for 9000 Boards
6
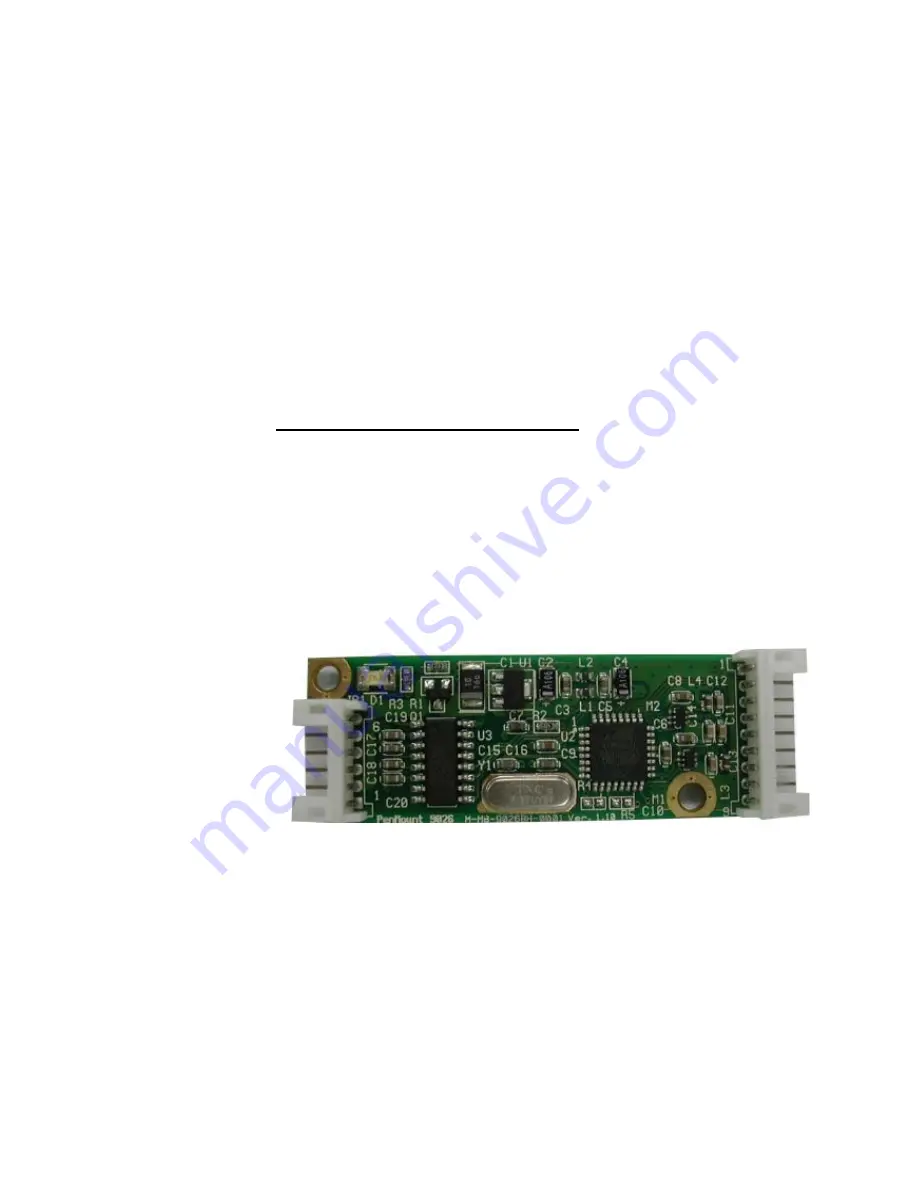
Find the white 6-pin right angle connector (on the left in the photo above).
The power cable is pin 1 and pin 2. Solder the power and ground wire to the
system. The RS-232 cable is for pins 3 to 6. Attach the RS-232 cable’s
D-sub connector to a COM port at the back of the computer.
Find the white 9-pin right angle connector (on the right in the photo above).
Attach the female end of the touch screen cable to this connector. If you
have a 4-wire touch screen attach the cable to pins 1~5. If you have a 5-wire
touch screen attach the cable to pins 1~6. If you have an 8-wire touch
screen attach the cable to pins 1~9. Attach the male end of the cable to the
touch screen tail.
Mount your touch screen to the display.
Turn on power to the computer and the display.
Install the software drivers and utilities, then calibrate the touch screen. See
Chapter 3. Install Drivers for 9000 Boards
on page 8.
2.3.2. PenMount
9026BH
The PenMount 9026BH control board is an RS-232 interface touch screen
control board that supports 4-wire and 8-wire touch screens. The size of the
board is 60 (L) x 20 (W) x 8.3 (H) mm and it has two connectors on-board.
Follow the steps below to install the 9026BH control board.
Cut off the power of your computer and display, then open the case of the
display or the system. Find the space on your system and attach the
control board to your system with screws. The control board has 3
φ
screw
holes in industrial standard.
PenMount 9026BH Touch screen Control Board Upside


