background image


1230B0002001 

Connectors and System Configuration Jumper


3-5

3

3

.

.

5

5


V

V

G

G

A

A


P

P

o

o

r

r

t

t


(

(

J

J

4

4

0

0

)

)


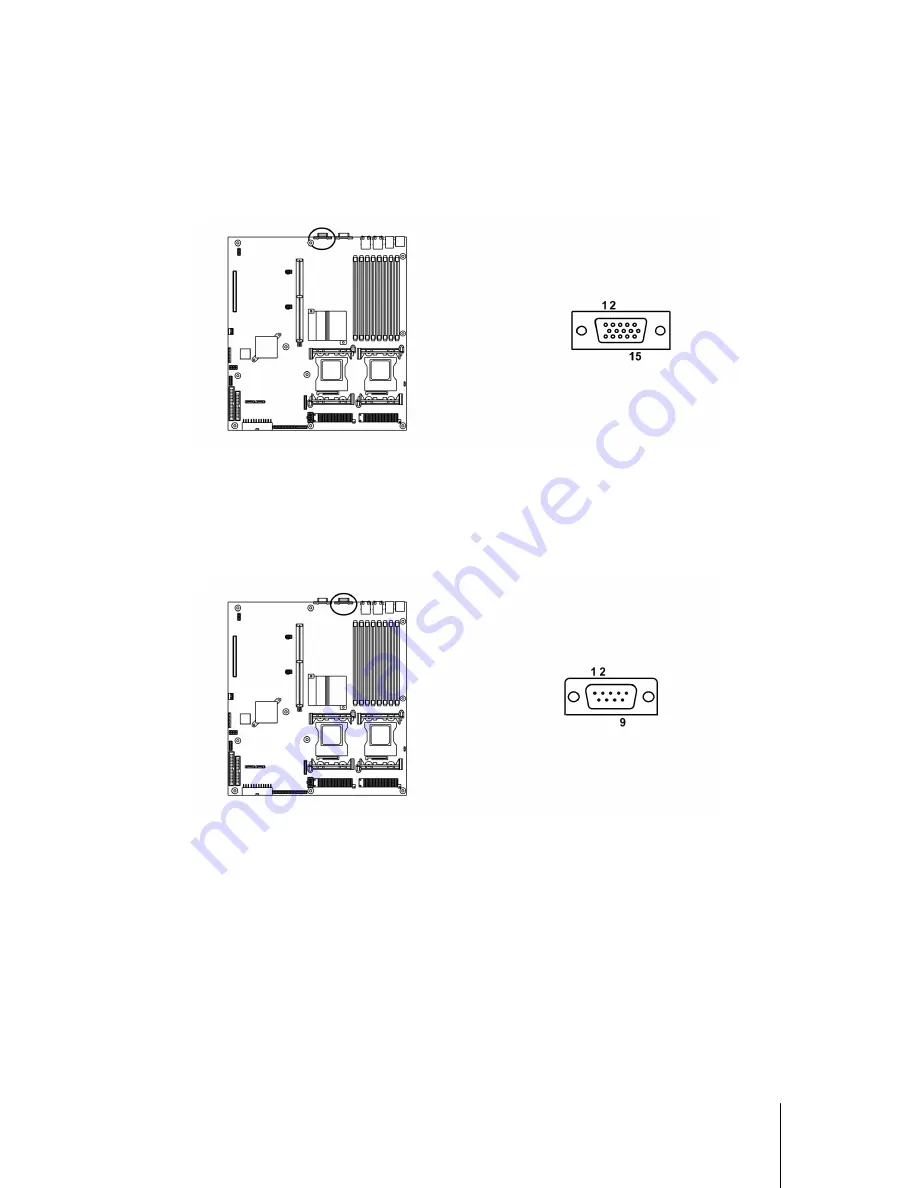
The 15-pin VGA port is shown as below: 


Figure 3-6  VGA Port 

3

3

.

.

6

6


S

S

e

e

r

r

i

i

a

a

l

l


P

P

o

o

r

r

t

t


(

(

J

J

3

3

9

9

)

)


The server board has one 9-pin serial port connector. The serial port is shown as below: 


Figure 3-7  Serial Port 

Содержание Relion 1400

Страница 1: ...Server Board User Manual Mar 2005 Revision A 6 P N 1230B0002001...

Страница 2: ...yr ri ig gh ht t N No ot ti ic ce e 2004 2005 Inventec Enterprise System Corporation IESC All rights reserved All product names or brands mentioned herein are the trademarks of IESC or their respecti...

Страница 3: ...Before You Start 2 1 2 2 Screw Holes 2 2 2 3 Battery 2 3 2 3 1 To install the battery 2 3 2 3 2 To remove the battery 2 3 2 4 Processor 2 4 2 4 1 To install the processor 2 5 2 4 2 To install the heat...

Страница 4: ...Connector and Component Locations 1 2 Figure 1 3 Back Panel Connectors 1 4 Figure 2 1 Screws Placement 2 2 Figure 2 2 Battery Location 2 3 Figure 2 3 Putting the battery into the holder 2 3 Figure 2...

Страница 5: ...3 12 14 Pin Fan Tach Connector 3 8 Figure 3 13 18 Pin Fan Power Connector 3 9 Figure 3 14 System Configuration Jumper 3 10 L Li is st t o of f T Ta ab bl le es s Table 2 1 DIMM Installation Option 2 7...

Страница 6: ...This manual provides general and specific information about the server board About This Manual About This Manual...

Страница 7: ...formation to prevent injury to yourself when trying to complete a task Caution Information to prevent damage to the components when trying to complete a task Important Information that you must follow...

Страница 8: ...ply is broken do not try to fix it by yourself Contact an authorized dealer It is recommended that you wear gloves when assembling or dissembling the server to protect from cuts and scrapes When the s...

Страница 9: ...ice Do not remove the device from the antistatic bag until you are ready to install the device in the system unit With the device still in its antistatic bag touch it to a metal frame of the system Gr...

Страница 10: ...Materials for Parts in Devices Appliances GB4943 Safety of Information Technology Equipment Worldwide Safety approvals can be supplied according to the requirements from Marketing or Customer Product...

Страница 11: ...elocate the receiving antenna Increase the separation between the equipment and receiver Connect the equipment into an outlet on a circuit different from that to which the receiver is connected Consul...

Страница 12: ...streated For more information about battery replacement or proper disposal contact an authorized reseller or your authorized service provider Warning This server contains an internal Lithium Manganese...

Страница 13: ...Product Introduction This chapter describes the general features of the server board Chapter 1 Product Introduction...

Страница 14: ...n the most complicated server tasks The following highlights are the server s main features For additional information refer to this user manual Processor Dual Intel Xeon processors 2 8GHz up to 3 6GH...

Страница 15: ...Mo ot th he er rb bo oa ar rd d L La ay yo ou ut t The layout of the server board is shown as below Each connector and major component is identified by the number 1 2 1 Connector and Component Locatio...

Страница 16: ...Socket B2 DIMM Socket A2 DIMM Socket B3 DIMM Socket A3 DIMM Socket B4 DIMM Socket A4 Processor 0 Processor 1 Processor Power Connector Battery 18 pin Fan Power Connector Front Panel Connector Main Po...

Страница 17: ...n nn ne ec ct to or rs s Figure 1 3 Back Panel Connectors Dual USB Port NIC2 Connector RJ45 PS 2 Keyboard Port Serial Port PS 2 Mouse Port D sub VGA Port NIC1 Connector RJ45 Note Only BMC server board...

Страница 18: ...Hardware Operation This chapter provides step by step instructions for installation and hardware information for 1U server board Chapter 2 Hardware Operation...

Страница 19: ...er between On and Standby In Standby the server removes power from most electronics and drives while portions of the power supply and some internal circuitry remain active To completely remove all pow...

Страница 20: ...2 2 2 2 S Sc cr re ew w H Ho ol le es s Place 10 screws in the holes indicated by circles to secure the motherboard to the chassis Figure 2 1 Screws Placement Caution Do not over tighten the screws D...

Страница 21: ...attery please see 2 1 Before You Start 2 3 1 To install the battery Pull the battery retaining clip away Put the battery into the holder Figure 2 3 Putting the battery into the holder 2 3 2 To remove...

Страница 22: ...ont Side Bus FSB The location of the processors on the motherboard is shown as below Figure 2 5 Processor Location Processor 0 Processor 1 You can install single or dual processors on the board accord...

Страница 23: ...hat the processor is parallel to the socket Lock the socket by pushing down the lever Figure 2 7 Inserting the processor into the socket Notes When the processor is in place press it firmly on the soc...

Страница 24: ...vers Rotate them back until the clips click on the heat sink indicating that it is locked Figure 2 9 Placing the heat sink on the top of the processor Important Before you put the heat sink on top of...

Страница 25: ...Connector and Component Locations and the following table DIMM A4 B4 A3 B3 A2 B2 A1 B1 2 S S 2 D D 4 S S S S 4 S S D D 4 D D D D 6 S S S S S S 6 S S S S D D 8 S S S S S S S S Table 2 1 DIMM Installat...

Страница 26: ...see 2 1 Before You Start 2 5 1 To install a DIMM Unlock a DIMM socket by pressing the retaining clips outward Figure 2 11 Pressing the retaining clips outward Carefully insert the DIMM into the socke...

Страница 27: ...on 2 9 2 5 2 To remove a DIMM Unlock a DIMM socket by pressing the retaining clips outward This action releases the module and partially lifts it out of the socket Lift out the DIMM Figure 2 13 Liftin...

Страница 28: ...implements a daughter card designed for its SATA controller The location of the SATA daughter card is shown as below Figure 2 14 SATA Daughter Card 2 6 2 1CH SCSI Daughter Card The system implements a...

Страница 29: ...SCSI daughter card is shown as below Figure 2 16 2CH SCSI Daughter Card 2 6 4 SCSI RAID Daughter Card The system implements a daughter card designed for its SCSI controller with Hardware RAID The loca...

Страница 30: ...the board surface and aim the hole at the plastic pole 2 Carefully insert the SCSI daughter card until it fits completely the space Figure 2 18 Inserting the 1CH SCSI daughter card into the slot 2 6...

Страница 31: ...is divided into five pin groups refer to 3 12 System Configuration Jumper Setting These five pin groups are connected to GPIs of SIO The system BIOS reads these GPIs status and decides whether execut...

Страница 32: ...iguration Jumper This chapter provides information about connectors the system configuration jumper and pin definition for a Direct Connection configuration of server board Chapter 3 Connectors and Sy...

Страница 33: ...pin connector only the first 20 pins are populated when using an ATX12V power supply 12V processor power is obtained using the 8 pin connector only the first 4 pins are populated when using an ATX12V...

Страница 34: ...ctor and the pin definition are shown as below Figure 3 2 Processor Power Connector Signal Name Pin Pin Signal Name 12V 5 1 Ground 12V 6 2 Ground 12V 7 3 Ground 12V 8 4 Ground Table 3 2 Processor Powe...

Страница 35: ...Connector Signal Name Pin Pin Signal Name Power LED 1 2 5VSB Key 3 4 Cooling Fault LED Power LED 5 6 Cooling Fault LED HDD Activity LED 7 8 System Fault LED HDD Activity LED 9 10 System Fault LED Pow...

Страница 36: ...ct to or r J J5 54 4 The server board provides one 40 pin low density 6300ESB ICH IDE connector The IDE connector is shown as below Figure 3 4 IDE Connector 3 3 4 4 F Fl lo op pp py y C Co on nn ne ec...

Страница 37: ...3 3 5 5 V VG GA A P Po or rt t J J4 40 0 The 15 pin VGA port is shown as below Figure 3 6 VGA Port 3 3 6 6 S Se er ri ia al l P Po or rt t J J3 39 9 The server board has one 9 pin serial port connect...

Страница 38: ...nd Mouse Ports The keyboard is supported in the bottom PS 2 port and the mouse is supported in the top PS 2 port Power to the server should be turned off before a keyboard or mouse is connected or dis...

Страница 39: ...tion to support one additional 10 pin USB connector The front panel USB connector and the pin definition are shown as below Figure 3 10 Front Panel USB Connector Signal Name Pin NC 10 Key 9 Ground 8 G...

Страница 40: ...ctors NIC The RJ45 connectors are shown as below Figure 3 11 RJ45 Connectors 3 3 1 11 1 F Fa an n C Co on nn ne ec ct to or rs s J J1 1 J J6 6 The rack mount server board provides one 14 pin and one 1...

Страница 41: ...9 FAN4_TACH FAN1_TACH 1 8 FAN2_TACH Table 3 5 Fan Tach Connector Pin Definition 18 Pin Fan Power Connector J6 The 18 pin fan power connector is shown as below Figure 3 13 18 Pin Fan Power Connector S...

Страница 42: ...d on mainboard is shown as below Figure 3 14 System Configuration Jumper Jumper Function Pin A B Pin B C 1 Clear Password Disable Enable 2 Clear CMOS Disable Enable 3 BIOS Write Protected Disable Enab...

Страница 43: ...BIOS Setup This chapter provides information about BIOS Setup Chapter 4 BIOS Setup...

Страница 44: ...the user reconfigure the system and reboot Note Because the BIOS code is the most often changed part of the motherboard design the BIOS information described in this section may be a little different...

Страница 45: ...ser The Server Setup utility major menus are Main Menu Advanced Menu Boot Menu Security Menu and Exit Menu Options Menu Each Option Menu occupies the left and center sections of the screen Each menu c...

Страница 46: ...out of any field This key will undo the pressing of the Enter key When the ESC key is pressed while editing any field or selecting features of a menu the parent menu is re entered When the ESC key is...

Страница 47: ...us key on the other keyboard but will have the same effect F9 Setup Defaults Pressing F9 causes the following to appear Setup Confirmation Load default configuration now Yes No If Yes is selected and...

Страница 48: ...U Up pd da at te es s 4 4 1 BIOS Requirements Utilities File Name Description Flash BIOS Image Under DOS AFUDOS EXE ROM image file FBB BAT AMIBIOS Flash Utility ROM image Recovery Mode AMIBOOT ROM RO...

Страница 49: ...fault value Recovery Mode Prepare USB disk on key or Floppy disk for recovery 1 Format USB Disk on Key or Floppy disk with fat12 fat16 format 2 Copy ROM image and rename it to AMIBOOT ROM Recovery met...

Отзывы: