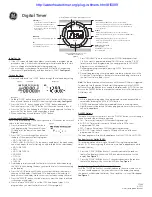
291 Z (Rev01_080728)
GB - 1
Paul Hochköpper GmbH & Co. KG
Postfach 1727 • D-58467 Lüdenscheid • Tel.: +49 (0)2351 185-0 • Fax: +49 (0)2351 27666 • e-mail: [email protected] • Internet: www.peha.de
31060000-143
Installation and operating instructions
Upper section Timer
for FM relay inset 293/2 and 293/6
Art. No.:
291 Z
GB
1. General
1.1 Application
The timer (291 Z) is used in combination with relay in-
set 293/2 and 293/6. The timer can be used to switch
consumers on/off automatically at programmed times or
manually. It can also be switched using two relay inset
remote stations.
– Manual operation
– Minimum switching time 1 minute
– Day/Week programming
– 24 programmable switch times
– 30 minutes reserve power in case of power failure,
no loss of programming.
Note:
Read through the operating instructions carefully
before putting the device into service.
1.2 Warranty conditions
These operating instructions are an integral part of both
the device and our terms of warranty. They must be
handed over to the user. The technical design of the
device is subject to change without prior notification.
PEHA
products are manufactured and quality-checked
using the latest technology and according to applicable
national and international regulations. Nevertheless, if a
product should exhibit a defect,
PEHA
warrants to make
remedy as follows (regardless of any claims against the
dealer to which the end-user may be entitled as a result
of the sales transaction):
In the event of a justified and properly-established claim,
PEHA
shall exercise its prerogative to either repair or
replace the defective device. Further claims or liability
for consequential damage are explicitly excluded. A jus-
tifiable deficiency is one in which the device exhibits a
structural, manufacturing, or material defect that makes
it unusable or substantially impairs its utility at the time
it is turned over to the end-user. The warranty does
not apply to natural wear, unintended usage, incorrect
connection, device tampering or the effects of external
influences. The warranty period is for 24 months from
the date of purchase by the end-user from a dealer and
ends not later than 36 months after the device’s date
of manufacture. German law shall be applicable for the
settlement of warranty claims.
1.3 Disposal of the device
The device must be disposed of in compliance with the
laws and standards of the country in which it is ope-
rated!
2. Safety
This device is only intended to be used for its stated
application. Unauthorised conversions, modifications or
changes are not permissible! This device may not be
used in conjunction with other devices whose operation
could present a hazard to persons, animals or property.
The following must be observed:
• The operating instructions for the device and the relay
insets.
• Operating instructions can only cite general stipula-
tions. These are to be viewed in the context of a spe-
cific system.
3. Technical specifications
4. Structure and description
4.1 View and accessories
4.2 Display and operating buttons
5. Installation and commissioning
5.1 Important installation information!!
– Only remove or plug the timer into the jack when the
power is turned off.
– Only use indoors.
5.2 Installation
• Assemble and install the relay inset in accordance
with the instructions (should only be performed by a
qualified electrician).
• Carefully plug the timer into the jack.
5.3 Start-up
• Switch on the power supply following installation.
• Programme the basic setting (see 6.1).
• Programme the switch times (see 6.2).
293/2
230V~/µ4A 50Hz
L
�
�
1
08:15
�
�
day
prg
ch
293/6
230V~/µ10A 50Hz
Timer
(291 Z)
Relay inset
293/2
Jack for upper section
Jack for upper section
Relay inset
293/6
Art. no.
291 Z
Installation height
0,8 – 1,5 m
Minimum transit time
1 minute
Ambient temperature
0° to + 40
q
C
Storage temperature
- 25° to + 75°C
Identification
CE
Type of protection
IP20
Complete setting
press
press briefly
CH:02 = 2 outputs
CH:01 = 1 output
p
p
Set the number
of outputs
CH:01
Time flashes
press for about 3s
1
00:00
1
15:45
Set the time
press briefly:
Set the minutes
press longer:
Set the hours
p
p
1 2
3
4 5 6 7
15:45
Set the day of the week
press
1 = Mon, 2 = Tues, 3 = Wed,
4 = Thur, 5 = Fri ...........
day
Complete setting
press
00:00
C1
C2
1
6. Functions
6.1 Basic settings
The basic setting must be programmed prior to first use
or following a reset.
Step 1:
Set the number of outputs
The timer is used in combination with relay inset 293/6
(1 output) or 293/2 (2 outputs). The number of outputs
to be used must be set.
The setting is maintained in case of a power outage and
only needs to be programmed once.
Note:
The setting is activated automatically when the
system is commissioned for the first time.
Step 2:
Set time and day
Notes:
– The setting for time and day of the week is activated
automatically if no time is stored.
– The device returns automatically to basic display if no
buttons are pressed for 30s.
Switch output 1 on/off
Switch output 2 on/off
Select part of week / day
Activate programming mode
Set output / outputs
Set time and day
Reset
Note:
The
day
and
prg
buttons are only used when the timer
is commissioned for the first time or programmed.
p
p
day
prg
ch
-ENà
0ROGRAMMIERUNG
!NGABE DES !USGANGSKANALS
-ANUELLE"EDIENUNG
-ENà
:EITEINSTELLUNG
Anzeige Ausgang 1 u. 2
(EIN/AUS, automatisch)
.POUBH
4QFJDIFSQMBU[
Manual operation
1 = Monday
Display output channel
(ON/OFF and automatic)
Menu
programming
Memory
capacity
Menu
time setting


