24
2 Setting up the Mobotix T25 door intercom
6.
After the auto-configuration, Mobotix own SIP server is already entered here.
7.
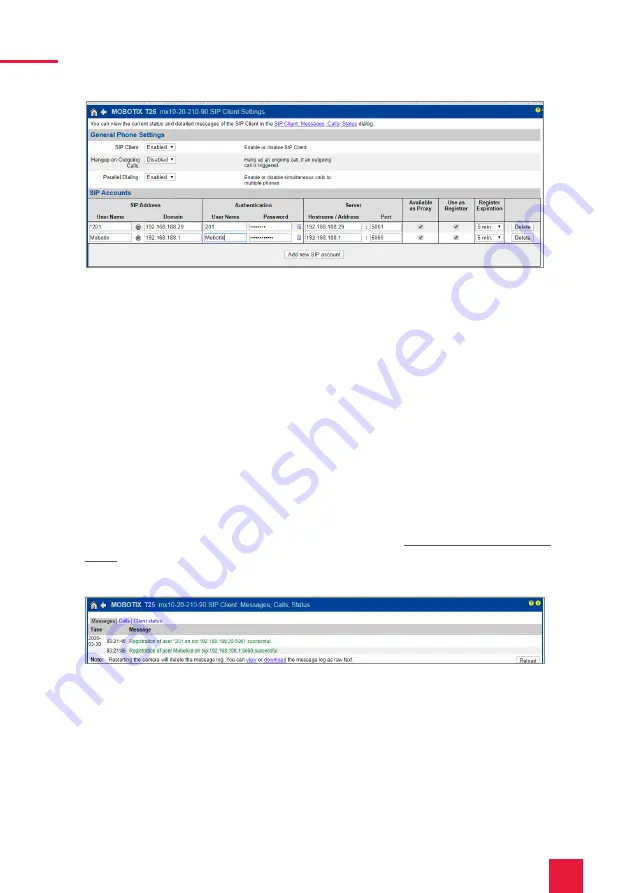
Click on “Add new SIP account”.
8.
Under SIP Address “User Name”, enter the name for the door intercom system that you
have assigned to the system in the Fritzbox.
9.
Under “Domain”, enter the IP address of the Fritzbox (registrar).
−
You can also find your login data and registrar (Registration server) under fritz.box >
Telephony devices, if you edit the created door intercom system and switch to the “Login
data” tab.
10.
Under Authentication “User Name” and “Password”, enter the authentication name and the
password which you have assigned for the Mobotix door station in the Fritzbox.
11.
Under “Host-Name / Address” enter the IP address of the Fritzbox (registrar).
12.
For the “Port” the 5060 is assigned by default in the Fritzbox.
13.
Check “Available as Proxy” and “Use as Registrar”.
14.
Save the settings with “Set”.
15.
When the window has loaded, click the link at the top of the page: “You can view the
current status and detailed messages of the SIP Client in the SIP Client: Messages, Calls,
Status dialog.
16.
The second registration status should now show “successful”.
17.
Return via the “Back Arrow” in the upper left corner
18.
To use the door opening via DTMF, scroll down the page to the „Remote control settings“
item. Select for the „Signal out Function A“. „Device Out: ~Door“.
Содержание Mobotix T25
Страница 1: ...Mobotix T25 Kurzanleitung Getting started Notice abr g e DE EN FR V 2 1 1...
Страница 19: ...EN Mobotix T25 Mobotix T25 Getting started EN...
Страница 37: ...FR Mobotix T25 Mobotix T25 Notice abr g e FR...
Страница 55: ...www peaknx com...


