background image


Infinity 9000

 User Manual 

Page 7  

2014 © Peak Scientific - Rev. 2 - 28/05/14 


Introduction 

The Peak 

S

cientific 

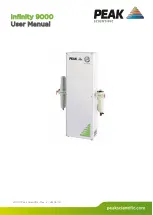
Infinity 9000

 Nitrogen Generator is designed specifically for 

use with LCMSMS applications, but has also been used successfully for 
Turbovap or ELSD applications. The generator has been designed to produce 
Nitrogen from an existing source of dry, oil free, compressed air in the 
laboratory.  

Unpacking and Installation 


Although Peak Scientific take every precaution with safe transit and packaging, 
it is advisable to fully inspect the unit for any sign of transit damage. 

Check ‘SHOCKWATCH’ label for signs of rough handling prior to un-packing – 


Any damage should be reported immediately to the carrier and Peak Scientific 
or the Peak Partner from where the unit was purchased. 

Follow the unpacking instructions posted on the side of the crate. It will require 
two people to remove the unit from the shipping crate and to manoeuvre the 
Generator onto the floor. 

Please save the product packaging for storage or future shipment of the 
Generator. 

After unpacking and a visual inspection, the unit should be 
placed in a ventilated area away from direct sunlight. Care 
should be taken not to obstruct the ventilation holes on the 
side of the unit. The Generator should be placed on a steady 
and level base. The 

Infinity 9000

 has been designed to fit 

under most workbenches. Alternatively, the unit may be wall 
mounted using the fixing slots provided.  

Performance of the Generator (like all sophisticated 
equipment) is affected by ambient temperatures. Prolonged 
operation in temperatures exceeding 30

°

C will shorten the 

life of the unit.  


Содержание Infinity 9000

Страница 1: ...Infinity 9000 User Manual 2014 Peak Scientific Rev 2 28 05 14...

Страница 2: ...Safety Notices 5 Symbols 5 Safety Notice to Users 5 Technical Specifications 6 Environment 6 Inlet Conditions 6 Outlet Gas 6 General 6 Introduction 7 Unpacking and Installation 7 General Dimensions 8...

Страница 3: ...users and has been written so that it can either be read as a step by step guide to installation and usage or as a reference document where you can skip to the relevant information Please review each...

Страница 4: ...without prejudice to the generality of the foregoing that any defect is not the direct or indirect result of lack of repair and or servicing incorrect repair and or servicing use of wrong materials a...

Страница 5: ...nd regulations The attention of UK users is drawn to the Health and Safety at Work Act 1974 and the Institute of Electrical Engineers regulations Nitrogen is not a poisonous gas but if the concentrati...

Страница 6: ...dity 70 Inlet Conditions Min Max Air Inlet Pressure 8 3 10 bar 120 145 psi Minimum Air inlet Flow 70 l min Outlet Gas Maximum Gas output Pressure 100 psig Maximum Pressure Drop Outlet Inlet 8 psig Max...

Страница 7: ...cientific or the Peak Partner from where the unit was purchased Follow the unpacking instructions posted on the side of the crate It will require two people to remove the unit from the shipping crate...

Страница 8: ...tific Rev 2 28 05 14 General Dimensions In addition to being floor or bench free standing the generator may be fixed to a wall in the upright position shown below The diagram shows the clearances and...

Страница 9: ...y should be connected here This filter will drain moisture and is equipped with an automatic drain The drain should be led to a convenient place Nitrogen outlet is via an Activated Carbon reverse acti...

Страница 10: ...will deliver up to the rated output flow of Nitrogen at 100 psig 6 7 barg Flow at any time is determined by demand of the consuming equipment In circumstances of no demand the generator remains operat...

Страница 11: ...art number This contains all the filters required for this Generator Safely Isolated Condition The unit is in a safely isolated condition when it is disconnected from its application and fully de pres...

Страница 12: ...Isolated Condition 1 Remove 6mm drain tubing from push fit stud situated on under side of the bowl 2 Remove the top and bottom filter bowls by turning the bowl clockwise and anti clockwise respectivel...

Страница 13: ...Open the filter bowl valve to ensure it is depressurised 2 Remove the filter bowl by turning it as shown to reveal the RAC filter element Part number 00 0041 a For easier access the filter assembly c...

Страница 14: ...1 Lane 2277 Zuchongzhi Road Pudong New Area Shanghai 201203 China Peak Scientific Mexico Solon 352 Col Los Morales Polanco 11530 Mexico D F Mexico Peak Scientific Australia PO Box 65 Belmont Victoria...

Отзывы: