OPERATION
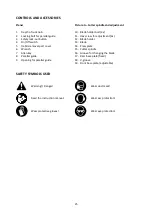
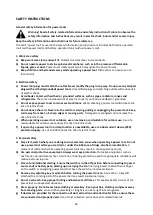
Personal protective equipment
•
Wear protective gloves.
•
Wear protective goggles
.
Flying shavings can cause injury
.
•
Wear hearing protection for protection from continuous noise in the work place.
•
Wear dust mask for protection from airborne dust.
Check whether the type of the plug corresponds with the type of the socket
.
Th
e data on the nameplate must correspond with the actual power supply voltage.
Switching on
P
ush the safety lock
-
out button (
3
) and keep it pressed.
P
ress the on
-
off switch (
4
)
to turn on the planer
.
Once the planer is running you can release the safety lock
-
out
.
Switching off
Release the
on/off
switch
(
4
).
Planing
Workpiece must be fixed onto a solid base.
•
Set the required planing depth with the knob (1) and place the front
part of the
base plate (
19
)
against the workpiece.
•
Switch the machine on
and
let the cutter spindle
reach full speed before feeding
the machine over
the workpiece
.
•
To achieve high
-
grade surfaces, work only with low feed and apply pressure on the centre of the
planer shoe.
Excessive feed reduces the surface quality and can lead to rapid clogging of the debris
removal port.
•
When machining hard wood as well as when utilising the maximum planer width, set only low
planing depths and reduce planer feed, as required.
Beveling Edges
The V
-
groove
(
18
)
in the middle of the front planer
shoe (
19
) allows easy beveling of workpiece edges.
For this, place the planer with the V
-
groove onto the edge of the workpiece and guide along the edge.
Parallel guide adjustment
Parallel guide
(
8
)
allows guiding the planer more precisely along the workpiece
at a chosen distance.
Guide can be used from both sides of the machine
.
•
Slide the parallel guide (
8
) through the
opening (9), set the desired distance and tighten the bolt (
2
)
to lock the guide into position.
•
Exert some slight sideways pressure when guiding the planer with the parallel guide.
31
Содержание EH0650
Страница 2: ...2...
Страница 3: ...A B 3...

