Console Replacement Instructions
CENTRAL UNIT, DS350G ( 24 350 06 0700, 24 350 06 0701, 24 350 06 0721, 24 350 06 2766)
SYSTEM SOFTWARE REPLACEMENT FOR DS350G
1. Remove cover, from central unit.
CAUTION: Before handling the EPROM, discharge any static electricity from your body by touching a
grounded point. The EPROM could be damaged by static electricity.
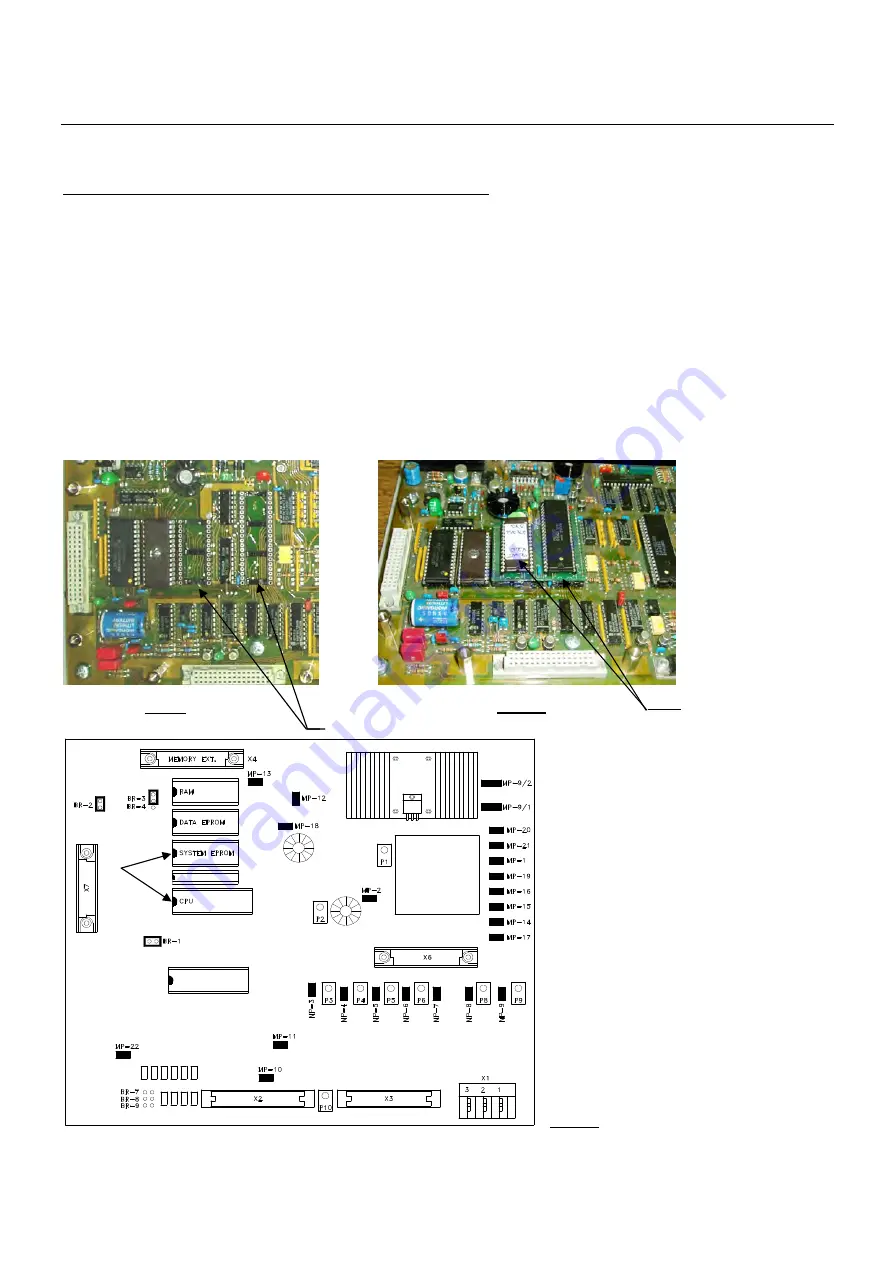
2. Remove the existing system and CPU eproms from the main board. (Fig. 7) Be careful to pull the
EPROM out, without bending the legs.
3. Install eprom module 024-350-300-172 into the CPU and system software sockets. (Fig. 7a)
Replace the CPU and new system software (MGWT) eprom into the eprom module.
NOTE: The notch on the EPROM and in the socket determines the correct orientation of the EPROM.
Refer to the drawing below for correct EPROM locations.
4. Carefully align the new EPROM legs with the socket and push the EPROM into place. Be careful not
to bend any of the legs.
3,4
2
Fig. 7
Fig. 7a
Fig. 7b
SkyAzúl, Equipment Solutions
7
www.skyazul.com
Содержание DS 350
Страница 1: ...CONSOLE REPLACEMENT INSTRUCTIONS DS350 Graphic On Dash Graphic Console Replacement...
Страница 2: ......
Страница 4: ......
Страница 22: ......
Страница 23: ......


