Console Replacement Instructions
Serial Interface installation
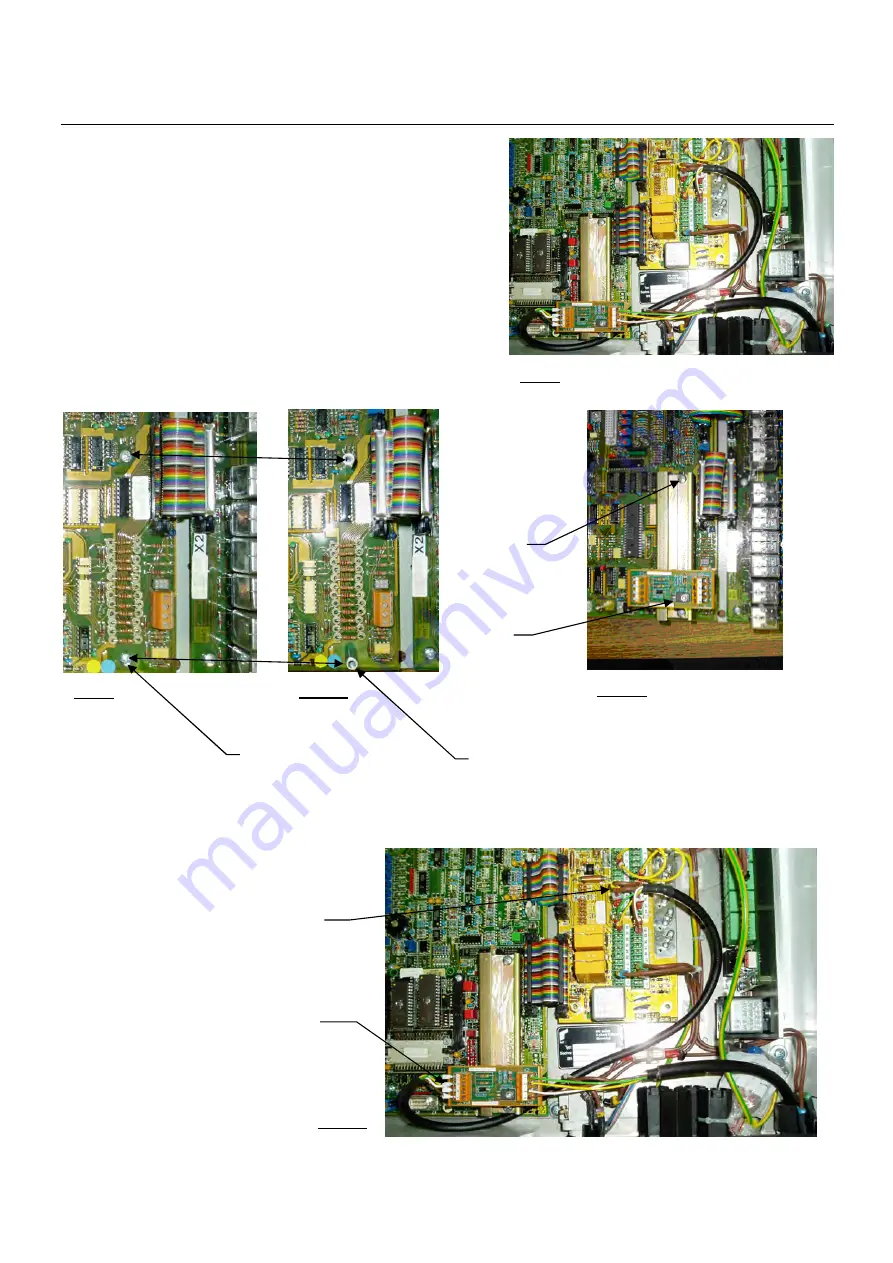
1. Locate position of installation. (Fig. 8)
2. Remove two screws and lock washers
from the main board. (Fig. 9)
3. Install two 4mm x 20mm standoffs where
the screws were removed. (Fig. 10)
4. Attach mounting rail 031-300-050-721 on top
of the standoffs using the screws and lock washers
removed from the main board. (Fig. 11)
5. Install (snap) serial interface board 024-350-300-147
on the mounting rail. (Fig. 11)
6. Wire cable assy 031-300-060-610 (crimp ferrule end) to terminal X1 on the serial interface board per
the electrical schematic. (Fig. 12 and 15, 15a)
7. Wire the other end of the cable (1/8” female terminal end) to the connection board per the electrical
schematic. (Fig. 12 and 15, 15a, 15b)
7
4
5
2
3
Fig. 9
Fig. 10
Fig. 11
6
Fig. 12
Fig. 8
SkyAzúl, Equipment Solutions
8
www.skyazul.com
Содержание DS 350
Страница 1: ...CONSOLE REPLACEMENT INSTRUCTIONS DS350 Graphic On Dash Graphic Console Replacement...
Страница 2: ......
Страница 4: ......
Страница 22: ......
Страница 23: ......


