background image

DOC-0017-04-EN: AC20 Series - Hardware Installation Manual 


DOC-0017-04-EN-A   22.03.2023 


107 (154)


10 Routine Maintenance & Repair 

10.1  Routine Maintenance 

Periodic inspection of the inverter should check: 

1.  For build up of dust obstructions that may obstruct the ventilation of the product. This should be 

removed using dry air. 

2.  Tightness of power connections are at the recommended terminal tightening torque as specified in 

this manual.  


10.2  Preventative Maintenance 

 Main Duct Cooling Fans 

The Main Duct Cooling fans are designed to be field replaceable by a competent person. 
For preventative maintenance, replace the fan cassettes every 5 years of operation, or whenever the 
inverter trips on “10 Heatsink Temp” during normal operation.  
 

 DC Link Capacitors 

For preventative maintenance, the DC link capacitors should be replaced every 10 years of operation, or 
when the inverter trips on “20 VDC Ripple” under normal operating conditions.  
The unit must be returned to your local Parker Repair Centre for replacement. 
 

10.3  Repair 

In the event of a drive failure, the inverter should be returned to a local Parker Repair Centre. No attempt 
should be made by the user to repair the unit themselves. Only Parker trained personnel are permitted to 
repair this product in order to maintain certifications, reliability, and quality levels. 
 
When returning a faulty product, the user should: 

1.  Where possible, save the application data onto either a µSD card using the ‘Clone’ feature, or onto 

a PC by performing a configuration ‘Extraction’ using the DSE configuration tool.   

2.  Contact the local Repair Centre, who will arrange the return of the unit and assign an Authorisation 

To Return (ATR) number. This is used as a reference on all paperwork returned with the faulty 
item. 
Customers should be ready with the following information: 

-  Product model and serial number (found on the product rating label) 
-  Detailed information on the nature of the fault (Trip messages, user application and 

history). 

3.  Pack and dispatch the unit using original packaging materials where retained, or in suitable 

packaging materials that ensure that no additional damage is caused to the unit during transit. 
Please ensure that if used, packing chips do not enter the unit.  


Содержание AC20 Series

Страница 1: ...DOC 0017 04 EN AC20 Series Hardware Installation Manual 1 154 DOC 0017 04 EN A 22 03 2023 DOC 0017 04 EN A 22 03 2023 AC20 Series Variable Speed Drive Hardware Installation Manual...

Страница 2: ...quipment 1 2 Application Area The equipment described is intended for industrial motor speed control utilising AC induction motors or PMAC motors 1 3 Personnel Installation operation and maintenance o...

Страница 3: ...re may still be dangerous voltages present at power terminals motor output supply input phases DC bus and the brake where fitted when the motor is at standstill or is stopped For measurements use only...

Страница 4: ...wiring is rated for the highest system voltage Thermal sensors contained within the motor must have at least basic insulation All exposed metalwork in the Inverter is protected by basic insulation an...

Страница 5: ...ault conditions power loss or unintended operating conditions the inverter may not operate as intended In particular o Stored energy might not discharge to safe levels as quickly as suggested and can...

Страница 6: ...any Tel 49 0781 509 0 Fax 49 0781 509 98176 Internet www parker com eme E mail EM Motion parker com Certified according to ISO 9001 2015 Parker Hannifin Manufacturing Germany GmbH Co KG Sitz Bielefeld...

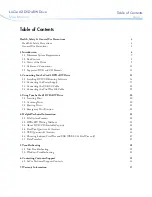
Страница 7: ...1 5 Product Overview 12 6 Installation 15 6 1 Mechanical 15 Product Dimensions Weights 15 Product Fixing Dimensions 17 Lifting the Inverter 18 Mounting the Inverter 19 Ventilation Clearance Requiremen...

Страница 8: ...arnings Limitations 77 8 6 STO Functional Checks 79 Comprehensive Checks 80 Test Protocol Specimen 82 Regular Checks 82 8 7 STO Troubleshooting 83 9 Basic Drive Operation 84 9 1 Local Operation 84 Min...

Страница 9: ...2 AC Line Fed Power Stack Ratings 138 1 230V Products 138 3 230V Products 138 3 400V Products 138 13 3 Internal Brake Switch Ratings 139 1 230V Products 139 3 230V Products 139 3 400V Products 140 13...

Страница 10: ...in the basic operation of the drive Information for the full AC20 product is referred to as the Inverter or drive throughout the manual Product coding Any x within a product code indicates there are...

Страница 11: ...verter duty The rated current of the motor used with the Inverter is not less than 25 of the Inverter current rating It this is the case poor motor control or autotune problems may occur Unpacking the...

Страница 12: ...5 2 2kW 3 220 240Vac 10 Frames 2 5 1 5 11kW 3 380 480Vac 10 Frames 2 10 1 5 180kW Input Frequency 50 60Hz 10 Output Frequency 0 5 590Hz Safe Torque Off STO SIL2 PLd Environment Temperature 0 40 C der...

Страница 13: ...Features Trip Conditions Output Short Circuit Overcurrent 220 Rated Output Current Motor Stall Overvoltage Undervoltage 230V products 420Vdc 220Vdc 400V products 840Vdc 420Vdc Heatsink Overtemperature...

Страница 14: ...pull ups for active low operation Digital Outputs Up to 3x Configurable 24Vdc Outputs Relay Outputs 2x Configurable Relay Outputs User 24V Output 1x User 24V Reference Voltage Output External 24V Aux...

Страница 15: ...Frames 2 6 Frame Size Product Dimensions Weight H H1 H2 W D 2 180 0 7 09 193 0 7 60 227 5 8 96 108 4 4 27 185 0 7 28 2 0 4 41 3 237 5 9 35 248 0 9 76 281 9 11 10 141 6 5 57 184 0 7 24 3 3 7 28 4 265...

Страница 16: ...H1 H2 W D 7 630 0 24 80 623 5 24 55 n a 355 0 13 98 265 0 10 43 36 0 79 37 8 765 0 30 12 755 0 29 72 n a 406 0 15 98 300 0 11 81 52 0 114 64 9 765 0 30 12 778 0 30 63 n a 510 0 20 08 326 0 12 83 83 0...

Страница 17: ...146 0 5 75 7 5 0 30 5 0 0 20 2 5 0 10 4 6 0 18 M5 5 329 0 12 95 5 5 0 22 194 0 7 64 8 0 0 31 6 0 0 24 3 0 0 12 5 5 0 22 M5 6 412 0 16 22 11 5 0 45 235 0 9 25 13 5 0 53 8 0 0 31 3 3 0 13 6 0 0 24 M6 7...

Страница 18: ...ame 7 A forklift or two people are required when handling this frame size Again care must be taken to avoid injury This product will stand up vertically on a flat surface Frames 8 10 A forklift is req...

Страница 19: ...s per the Fixing Dimensions listed in the table above 2 Drill the fixing holes as per the Slot Size and required Fixing as listed in the table above 3 Screw the fixings part way into the cubicle back...

Страница 20: ...wn clearance requirements When mounting two or more inverters together these clearances are additive Ensure that the mounting surface is normally cool The inverter must be mounted in a suitable cubicl...

Страница 21: ...uct Frame 7 is shown for illustration only Frame Size Product Clearances A B C D 7 10 0 0 39 200 0 7 87 200 0 7 87 50 0 1 97 8 10 0 0 39 200 0 7 87 200 0 7 87 50 0 1 97 9 10 0 0 39 200 0 7 87 200 0 7...

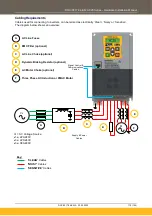
Страница 22: ...20 Wiring Bracket Kit Frame 4 230V ASP 0039 08 AC20 Wiring Bracket Kit Frame 5 230V ASP 0039 02 ASP 0039 03 ASP 0039 04 ASP 0039 05 ASP 0039 06 ASP 0039 07 ASP 0039 08 Installation The Wiring Brackets...

Страница 23: ...no power to the inverter If the drive has been powered up ensure enough time has elapsed that the inverter has discharged its residual energy Always check that the voltages on the user terminals are a...

Страница 24: ...DC Dynamic Brake Resistor Connection DBR Dynamic Brake Resistor Connection U Motor Output Phase U V Motor Output Phase V W Motor Output Phase W Frame 5 Label Description PE Protective Earth L1 Supply...

Страница 25: ...amic Brake Resistor Connection DC DC DBR Dynamic Brake Resistor Connection U Motor Output Phase U V Motor Output Phase V W Motor Output Phase W Frames 7 8 Label Description PE Protective Earth DC DC D...

Страница 26: ...otor Output Connections Output motor supply connections should be wired into terminals U V W Phase rotation is critical to ensure consistency between the inverter motor control direction and motor sha...

Страница 27: ...10 the lower terminal cover must be removed to gain access to the power terminals for wiring Frame 6 1 Remove the two fixing screws from the bottom edge of the lower terminal cover 2 Push the two cli...

Страница 28: ...EN AC20 Series Hardware Installation Manual 28 154 DOC 0017 04 EN A 22 03 2023 Frames 7 10 1 Unscrew the 2x Fr 7 9 4x Fr 10 lower panel fixings 2 Lift the panel away from the product to access the pow...

Страница 29: ...sizes for Europe should be chosen with respect to the inverter operating conditions in addition to local National Electrical Safety Installation Requirements Local wiring regulations always take prece...

Страница 30: ...es AWG are based on NEC NFPA 70 for ampacities of thermoplastic insulated 75 C copper conductors The wire sizes allow for an ampacity of 125 of the rated input and output amperes for motor branch circ...

Страница 31: ...0440 22 6 10 6 20G 45 0600 30 3 10 4 6 Terminal Block Wire Range 1 26 AWG 20G 46 0750 37 3 8 3 20G 46 0900 45 1 6 2 7 Terminal Block Wire Range 4 0 20 AWG 20G 47 1100 55 1 0 6 1 0 20G 47 1500 75 3 0...

Страница 32: ...or Output Terminals U V W Earth Terminal PE Chassis Earth Clamp PE 2 1 13 10 0 1 13 10 0 1 8 16 0 3 1 26 11 2 1 26 11 2 1 8 16 0 4 2 15 19 0 2 15 19 0 1 8 16 0 5 4 10 36 5 4 10 36 5 3 6 32 0 6 2 82 25...

Страница 33: ...through them On Frames 7 10 where screened cable is used for example as recommended for the motor connections it is recommended that the rubber plastic grommet is replaced with a metal gland to achie...

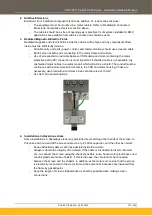
Страница 34: ...positions on the Fan Voltage Selection PCB By default the fan supply jumper links are fitted in the 380V Jumper positions as shown in the image above For 480V line supplies the links should be moved f...

Страница 35: ...evices connected between live AC Line circuits to earth These suppression devices are referred to as VDRs In some system applications where the product is exposed to large transient voltage events on...

Страница 36: ...00 90 20G 48 2200 110 20G 48 2650 132 9 20G 49 3200 160 x 10 20G 410 3600 180 x Approximate Link Locations Note Link positions vary slightly between products Images show approximate link locations Fra...

Страница 37: ...d attached just enough to adjust the link position Note All power cables must be removed from the product to access this link Frames 7 10 To access the AC Line Y Cap VDR links 1 Remove the Lower Termi...

Страница 38: ...DC link capacitors has been discharged Terminal Cover Removal Frames 2 5 only On the Frames 2 5 the control module terminal cover must be removed to gain access to the control terminals for wiring To...

Страница 39: ...0 10V 0 20mA 4 20mA AO1 Analogue Output 1 0 10V 0 20mA 4 20mA AO2 Analogue Output 2 0 10V 0 20mA 4 20mA AO3 Analogue Output 3 10V 0 10V 0V 0V Reference For Analogue Digital I O 0V 0V Reference For An...

Страница 40: ...Output 1 0 10V 0 20mA 4 20mA AO2 Analogue Output 2 0 10V 0 20mA 4 20mA AO3 Analogue Output 3 10V 0 10V 0V 0V Reference For Analogue Digital I O 0V 0V Reference For Analogue Digital I O External 0V Au...

Страница 41: ...iable output to voltmeter AO2 0 10V variable output 10V fixed reference voltage DX1 24V digital input DX2 24V digital input DX3 24V digital input DI4 24V digital input DI5 24V digital input STO STO DI...

Страница 42: ...AWG None Fitted 5mm 0 20 2x 0 5mm2 2x 21 AWG None Fitted Stranded 1x 0 75mm2 1x 19 AWG White Collar 1 5mm OD 6mm 0 24 1x 0 5mm2 1x 21AWG Orange Collar 1 3mm OD Terminal Block Tightening Torque The con...

Страница 43: ...custom applications and firmware updates etc Recommended Ethernet Cables The following Ethernet cables are recommended for connecting to the control board RJ45 socket Ethernet Cable Category Screened...

Страница 44: ...Frames 6 10 the lower terminal cover will need to be removed prior to connecting the Ethernet cable into the RJ45 socket on the control PCB To remove the cable push the connector clip down towards th...

Страница 45: ...pply to the unit and or system has been disconnected and the residual energy in the DC link capacitors has been discharged CAUTION ESD SENSITIVE EQUIPMENT Take ESD precautions when handling the Option...

Страница 46: ...e lower terminal cover will need to be removed prior to option card installation 1 Remove the option card from its packaging 2 Use the alignment rib in the control module housing and the option card f...

Страница 47: ...oder 1 2 Channel A Input B Encoder B Encoder 2 B Encoder 1 2 Channel B Input B Encoder B Encoder 2 B Encoder 1 2 Channel B Input V Encoder V Encoder 2 V Encoder 1 2 Encoder Supply 5V 12V 15V or 20V V...

Страница 48: ...4 Anout 4 Anout 5 Analogue Output 4 5 10V 0 10V DX11 Digin Digout 11 Digin Digout 12 Digital Input Output 11 12 24V Configurable 10V 10V 10V 10V Reference Voltage 10V 10V 10V 10V Reference Voltage 0V...

Страница 49: ...nd your local National Electrical Safety Installation Requirements Local wiring regulations always take precedence Recommended Wire Ferrule Sizes The following wire sizes and ferrules are recommended...

Страница 50: ...inal covers main covers and cover fixings must remain in place while the drive is energised These should only ever be removed once the supply to the unit and or system has been disconnected and the re...

Страница 51: ...ontrol module housing from the power stack 4 Gently turn the control module upside down so it rests to the right of the power stack with the interface cables still connected 5 Remove and discard the C...

Страница 52: ...tion card from its packaging 7 Slide the Comms Card along the PCB using the connector features for alignment Note The front facia of the Option should be loose at this point 8 Now fully tighten the tw...

Страница 53: ...steps 2 3 in reverse 1 Remove the Comms Interface Option card from its packaging 2 Slide the Comms Card along the PCB using the connector features for alignment Note The front facia of the Option sho...

Страница 54: ...rmatted This implies a 32GB limitation of MS Windows OS If a different type of SD card is used then a partition tool may be required Installation WARNING RISK OF DATA CORRUPTION Do not remove the SD c...

Страница 55: ...rames 6 10 On Frames 6 10 the lower terminal cover will need to be removed prior to SD card installation in the control PCB To remove the card pull it out the slot 1 Insert the SD Card label side up i...

Страница 56: ...ing a remote mounted 6901 MMI This 6901 can be useful when performing commissioning functions or when a 6901 MMI is to be mounted remotely i e on the door of a control cubicle Order Codes Order Code D...

Страница 57: ...es 2 5 On Frames 2 5 the control module terminal cover will need to be removed prior to connecting the remote 6901 MMI cable To remove the cable push the connector clip up towards the cable and pull a...

Страница 58: ...Frames 6 10 the lower terminal cover will need to be removed prior to connecting the remote 6901 MMI cable into the control PCB To remove the cable push the connector clip up towards the cable and pul...

Страница 59: ...as optional components that may be specific to the installation i e Input Chokes EMC Filters Output Chokes as shown in the diagram below Key Mandatory Component Optional Component A B C D E AC Line Fu...

Страница 60: ...nput Fuse Rating A Input Fuse Type 2 20G 32 0070 1 5 800 10 10 A60Q Series 20G 32 0100 2 2 800 16 25 A60Q Series 3 20G 33 0170 4 0 390 25 25 A60Q Series 4 20G 34 0210 5 5 1800 32 50 A50QS Series 5 20G...

Страница 61: ...tings 1 230V Products Frame Size Product Code Motor Power kW Inductance mH phase Rated Current A Peak Current 150 HD Rating A 2 20G 12 0070 1 5 1 569 14 30 20G 12 0100 2 2 1 098 20 42 Notes AC Line Ch...

Страница 62: ...75 0 138 160 339 8 20G 48 1800 90 0 116 190 403 20G 48 2200 110 0 098 225 477 20G 48 2650 132 0 080 275 583 9 20G 49 3200 160 0 067 330 700 10 20G 410 3600 180 0 060 370 785 Notes AC Line Choke induc...

Страница 63: ...e Dynamic Brake Resistor must be rated to absorb peak braking power during deceleration as well as the average power over the complete cycle These values can be calculated using the formulas below Pea...

Страница 64: ...commends the addition of a thermal overload switch motor starter or fuse of aM type or equivalent to be fitted in series with the resistor This is to provide protection to the component Thermal Overlo...

Страница 65: ...tput can be as high as 10 000V s Adding an AC Motor Choke between the inverter output and motor 1 Reduces the dv dt and peak voltages present at the motor which in turn reduces the stress applied to t...

Страница 66: ...Inductance mH phase Rated Current A Peak Output Current A 2 20G 42 0040 1 5 3 676 4 0 7 6 20G 42 0065 2 2 2 262 6 5 12 20G 42 0090 4 0 1 634 9 0 17 3 20G 43 0120 5 5 1 225 12 23 20G 43 0170 7 5 0 865...

Страница 67: ...Calculation The choke ratings listed above are for guidance only Customers may want to calculate their own ratings using the formula below 3 100 2 Where L Inductance phase H Vout Line to Line Output...

Страница 68: ...1 an external safety control unit should be used To implement Safe Stop 1 SS1 the external safety control unit causes the drive to decelerate to rest Once at rest it invokes STO in the inverter Please...

Страница 69: ...correct motor cable and correct STO input wiring STO always overrides any attempt to start the drive If one or both STO control inputs is requesting the STO function the drive will not start even if f...

Страница 70: ...lectrical power drive systems EN61508 2010 Functional safety of electrical electronic programmable electronic safety related systems STO aligns to the following aspects of this standard Safety Integri...

Страница 71: ...escription STOA STO Input Channel A 0V or not connected STO is Active on channel A Drive will not run 24V STO is Disabled on channel A Drive will run providing 24V is present on STO input channel B to...

Страница 72: ...cled both mains power and any auxiliary 24V supply 0V 24V 24V 24V STO INACTIVE Inverter is enabled to run and supply power to the connected motor under software control X X INVERTER UNPOWERED Inverter...

Страница 73: ...r to running the drive Configuration Setup TH1 Motor Thermistor connection TH2 Motor Thermistor connection DX1 Run Forward 24V digital input STOA 24V input connected via STO Request contacts STOB 24V...

Страница 74: ...sed circuit STOA STOB inputs are supplied with 24V 2 Close the Run Forward contact To stop the drive 1 Open the Run Forward contact and wait for the motor to come to a standstill To invoke STO 1 When...

Страница 75: ...ermistor connection DX1 Run Forward 24V digital input DI4 Stop 24V digital input STOA 24V input connected via Safety Control Unit DODE o p signal STOB 24V input connected via Safety Control Unit DODE...

Страница 76: ...s Q3 Q4 the outputs will de energise and hence STO will now be Active on the drive for as long as required Timing diagram Typical Operation Stop Speed Emergency Stop Drive STO input Ch A B No torque a...

Страница 77: ...itations WARNING Ignoring the following may result in serious injury or death Only competent personnel are permitted to install the STO function and commission it They must disseminate and make availa...

Страница 78: ...ation of the STO function may lead to overspeed and destructive overvoltages as well as explosions in the drive Therefore the STO function must NEVER be used with synchronous drives in the field weake...

Страница 79: ...peed Any external forces must also be considered e g effects due to gravity During the active braking phase of SS1 or Stop category 1 controlled stop with safely monitored time delay according to EN60...

Страница 80: ...n should be logged WARNING Potential loss of Safety Function During this test the safety function must not be relied on because at times only one channel will be activated and therefore the intended s...

Страница 81: ...proximately 5 seconds must exceed 3 seconds Motor must immediately coast to a rest Inverter must report a STO trip immediately 11 The STO function has latched in hardware to disable the drive Re apply...

Страница 82: ...r check is recommended once per week Where a regular check coincides with the timing of a comprehensive check the comprehensive check must take precedence The following steps must be performed and rec...

Страница 83: ...on Inverter will not run when given a start command Tripped 31 Safe Torque Off 15 0V 15 0V STO is invoked When safe to do so connect STOA and STOB to a 24Vdc supply Tripped 31 Safe Torque Off 15 0V 25...

Страница 84: ...ation instructions Minimum Connections The minimum control connections required to run the drive in Local mode are shown below Note that if Vector Control Encoder Feedback control mode is selected the...

Страница 85: ...Decrements the value of the displayed parameter Press at the same time as the STOP key to select reverse direction when in Local mode ESCAPE Key Navigation Displays the previous level s Menu Parameter...

Страница 86: ...atus Indicator LEDs REV LED RUN LED Inverter Status Inverter RUNNING in FORWARDS direction Inverter STOPPING from FORWARDS direction Inverter RUNNING in REVERSE direction Inverter STOPPING from REVERS...

Страница 87: ...u level or the first parameter of the current Menu Parameter Allows a writable parameter to be modified this is indicated by appearing on the left of the bottom line PROGRAM Key No Function LOCAL REMO...

Страница 88: ...and FWD REV keys Speed Control Ref is controlled from the inverter terminals Start Stop Seq is controlled from the terminals Speed Control Ref is controlled using the up and down keys OK LED HEALTH I...

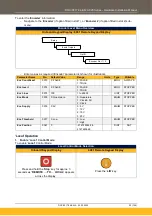
Страница 89: ...avigate through the sub menu lists Navigate to Top Level Menu on Power Up Onboard Keypad Display 6901 Remote Keypad Display Navigate to Control and Type Setup Menu Onboard Keypad Display 6901 Remote K...

Страница 90: ...ed Run the drive set a speed setpoint and issue a drive run command to rotate the motor Stop the drive bring the motor back to a standstill Change the motor direction to run the motor in reverse Note...

Страница 91: ...coder Feedback 0033 0 SLOT1 0 SLOT1 1 SLOT2 ENUM STOPPED 2 Motor Nameplate Settings a Induction Motor To enter the Motor Nameplate information for an Induction Motor Navigate to the Motor Nameplate su...

Страница 92: ...m REAL ALWAYS PMAC Therm TC 0289 62 1 to 10000 s TIME ALWAYS PMAC Torque KT 0287 1 00 0 01 to 10000 0 Nm A REAL ALWAYS PMAC Winding Ind 0286 20 00 0 01 to 1000 0 mH REAL ALWAYS PMAC Winding Res 0285 6...

Страница 93: ...E 1 TRUE BOOL ALWAYS Enc Invert 0074 0 FALSE 0 FALSE 1 TRUE BOOL STOPPED Enc Lines 0075 100 1 to 65535 UINT STOPPED Enc Mode 0078 0 Quadrature 0 Quadrature 1 Clock Dir 2 Clock ENUM STOPPED Enc Supply...

Страница 94: ...oor motor control or most likely spurious drive trips when enabled There are two types of Autotune routine 1 Rotating 2 Stationary A Rotating autotune on an uncoupled motor is always the preferred aut...

Страница 95: ...ate to a stop and the drive will disable Drive Stopped Indication Onboard Keypad Display 6901 Remote Keypad Display RUN LED will flash until the motor has come to a stop When the motor has come to a s...

Страница 96: ...s If the REV LED is also illuminated motor is running in the reverse direction Motor Running LED Illuminated motor Stopped LED off The shaft will rotate in the direction indicated by the direction LED...

Страница 97: ...oard Keypad Display 6901 Remote Keypad Display Forward Reverse The direction is indicated by Motor Direction Indication Onboard Keypad Display 6901 Remote Keypad Display If Forward direction is active...

Страница 98: ...tion Onboard Keypad Display 6901 Remote Keypad Display Press and hold the Stop key for approx 3 seconds as LOCAL TO REMOTE appears across the display Press the L R key Once Remote Control Mode is enab...

Страница 99: ...Auto Manual 3 Presets 4 Raise Lower 5 PID 6 Aux Comms 9 Saved ENUM STOPPED Application Lock 1152 FALSE BOOL ALWAYS Load Application 1151 FALSE BOOL STOPPED To lock the application so it can not be ac...

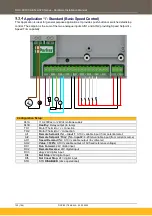
Страница 100: ...30Vac or 24Vdc voltage supply RL1B Healthy Relay output to lamp TH1 Motor Thermistor connection TH2 Motor Thermistor connection AI1 Remote Setpoint input 1 0 10V variable input from potentiometer AI2...

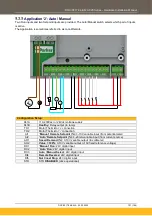
Страница 101: ...thy Relay output to lamp TH1 Motor Thermistor connection TH2 Motor Thermistor connection AI1 Manual Remote Setpoint 0 10V variable input from potentiometer AI2 Auto Remote Setpoint 4 20mA variable inp...

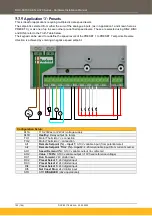
Страница 102: ...points Reverse direction is achieved by entering a negative speed setpoint Configuration Setup RL1A 110 230Vac or 24Vdc voltage supply RL1B Healthy Relay output to lamp TH1 Motor Thermistor connection...

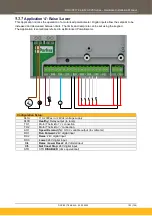
Страница 103: ...sing the keypad The Application is sometimes referred to as Motorised Potentiometer Configuration Setup RL1A 110 230Vac or 24Vdc voltage supply RL1B Healthy Relay output to lamp TH1 Motor Thermistor c...

Страница 104: ...block is then used as the drive setpoint Configuration Setup RL1A 110 230Vac or 24Vdc voltage supply RL1B Healthy Relay output to lamp TH1 Motor Thermistor connection TH2 Motor Thermistor connection...

Страница 105: ...lamp TH1 Motor Thermistor connection TH2 Motor Thermistor connection AI1 Remote Setpoint input 1 0 10V variable input from potentiometer AI2 Remote Setpoint Trim input 2 4 20mA variable input from cur...

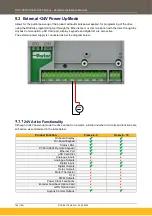
Страница 106: ...e external power supply is connected as per the diagram below 24V Active Functionality Although in 24V power up mode the drive cannot run a motor a limited number of circuits and functions are still a...

Страница 107: ...10 3 Repair In the event of a drive failure the inverter should be returned to a local Parker Repair Centre No attempt should be made by the user to repair the unit themselves Only Parker trained pers...

Страница 108: ...ms with input currents 16A and 575A per phase BS EN IEC 61000 6 2 2019 Electromagnetic compatibility EMC Part 6 2 General standards Immunity for industrial environments BS EN IEC 61000 6 3 2021 Electr...

Страница 109: ...connection using a conductor of the same cross sectional area as the original must be added This is due to the current flowing in the Y Caps being 3 5mA EMC Directive When installed in accordance with...

Страница 110: ...ther a plug in device nor a movable device and when used in the first environment is intended to be installed and commissioned only by a professional Note A professional is a person or an organisation...

Страница 111: ...mall size and at frequencies near 30MHz When multiple drives are used 3dB attenuation per drive needs to be added Conducted Emissions Standards The Conducted Emissions standards have common roots CISP...

Страница 112: ...tions true for default switching frequency of inverter Operation at higher switching frequencies will require extra filtering WARNING The drive is suitable for use on TN supplies when fitted with the...

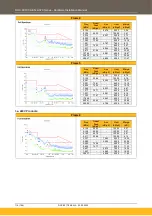
Страница 113: ...Frame 2 Freq MHz Quasi Peak dB V Ave dB V Limit dB V Margin dB V 0 178 84 46 100 00 15 54 0 537 70 52 86 00 15 48 17 921 54 68 65 75 11 07 21 457 51 24 63 74 12 51 21 533 53 19 63 70 10 51 23 969 50...

Страница 114: ...k dB V Ave dB V Limit dB V Margin dB V 0 150 81 21 90 00 8 79 0 150 93 84 100 00 6 16 0 501 65 53 76 00 10 47 0 501 73 81 86 00 12 19 0 869 70 24 86 00 15 76 1 269 69 33 76 00 6 67 1 277 76 71 86 00 9...

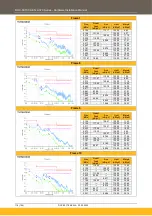
Страница 115: ...2 90 1 287 75 40 76 00 0 60 1 289 82 78 86 00 3 22 1 293 82 60 86 00 3 40 1 333 75 83 76 00 0 17 29 805 50 14 60 07 9 94 29 873 53 26 70 05 16 79 Frame 5 Freq MHz Quasi Peak dB V Ave dB V Limit dB V M...

Страница 116: ...87 99 125 00 37 01 0 889 89 94 125 00 35 06 1 285 85 22 115 00 29 78 1 467 94 95 125 00 30 05 1 545 86 40 115 00 28 60 2 105 79 48 115 00 35 52 Frame 9 Freq MHz Quasi Peak dB V Ave dB V Limit dB V Ma...

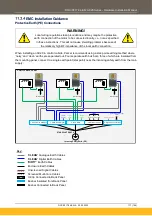
Страница 117: ...rated out Four separate earth bus bars three of which are insulated from the mounting panel connect to a single earth point star point near the incoming safety earth from the main supply CUBICLE BACK...

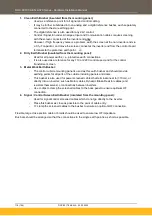
Страница 118: ...used as a reference for any 110 or 220V control used and for the control transformer screen 3 Metal Work Earth Busbar The control cubicle mounting panel is used as this earth busbar and should provid...

Страница 119: ...sy or Sensitive The diagram below shows an overview Key CLEAN Cables NOISY Cables SENSITIVE Cables Signal Control Communications Cables Supply Power Cables A B C D E AC Line Fuses EMC Filter optional...

Страница 120: ...filter AC Line Supply Cable Cable Type Unscreened Segregation From all other wiring clean Length Limit Unlimited External EMC Filter to Inverter Input Cable Cable Type Screened Armoured Segregation Fr...

Страница 121: ...is not available lay unshielded motor cables in a metal conduit which will act as a shield The conduit must be continuous with a direct electrical contact to the VSD and motor housing If links are nec...

Страница 122: ...t trip events as the cable capacitance is charged and discharged at the switching frequency Increased conducted emissions that degrade the performance of the internal EMC filter due to common mode cho...

Страница 123: ...EN61000 3 2 Frame Size 2 Product Code 20G 12 0070 20G 12 0100 Power Rating kW 1 5 2 2 Current Rating A 7 10 Harmonic No RMS Current A 1 10 37 15 48 3 5 98 7 32 5 1 18 0 41 7 0 91 1 19 9 0 38 0 32 11...

Страница 124: ...0 Power Rating kW 1 5 2 2 4 Current Rating A 7 10 17 Harmonic No RMS Current A 1 6 01 9 21 16 09 3 0 01 0 01 0 01 5 3 25 4 07 5 40 7 1 49 1 22 0 35 9 0 00 0 01 0 01 11 0 48 0 80 1 33 13 0 47 0 33 0 20...

Страница 125: ...40 Harmonic No RMS Current A 1 20 04 29 14 39 02 3 0 01 0 02 0 02 5 6 08 7 40 8 42 7 0 42 1 65 2 88 9 0 01 0 02 0 02 11 1 53 1 72 1 47 13 0 49 1 03 1 24 15 0 01 0 02 0 01 17 0 68 0 53 0 08 19 0 39 0...

Страница 126: ...90 Power Rating kW 1 5 2 2 4 Current Rating A 4 6 5 9 Harmonic No RMS Current A 1 3 74 5 99 8 21 3 0 00 0 00 0 00 5 2 62 3 90 5 26 7 1 77 2 39 3 14 9 0 00 0 00 0 00 11 0 38 0 39 0 36 13 0 30 0 54 0 68...

Страница 127: ...ting kW 5 5 7 5 11 Current Rating A 12 17 23 Harmonic No RMS Current A 1 10 76 14 89 20 72 3 0 00 0 00 0 00 5 6 23 7 70 9 33 7 3 22 3 30 3 00 9 0 00 0 00 0 00 11 0 76 1 28 1 80 13 0 93 1 02 0 81 15 0...

Страница 128: ...44 Harmonic No RMS Current A 1 29 15 35 14 41 08 3 0 00 0 00 0 00 5 12 44 13 81 15 11 7 3 45 2 85 2 22 9 0 00 0 00 0 00 11 2 42 2 87 3 27 13 0 77 0 41 0 05 15 0 00 0 00 0 00 17 1 00 1 24 1 42 19 0 23...

Страница 129: ...0 Harmonic No RMS Current A 1 56 17 70 92 85 37 3 0 00 0 00 0 01 5 19 19 23 53 25 76 7 1 53 1 28 1 00 9 0 00 0 01 0 01 11 4 21 5 06 5 55 13 0 57 1 01 1 93 15 0 00 0 01 0 00 17 1 77 2 05 2 00 19 0 70 1...

Страница 130: ...Harmonic No RMS Current A 1 107 92 147 18 171 52 3 0 02 0 01 0 01 5 30 92 39 07 52 83 7 0 90 0 70 9 99 9 0 01 0 00 0 01 11 6 52 7 08 10 63 13 2 54 3 52 5 18 15 0 01 0 00 0 00 17 2 98 3 89 4 18 19 1 85...

Страница 131: ...armonic No RMS Current A 1 210 98 254 93 310 15 3 0 02 0 01 0 00 5 59 43 68 62 74 99 7 11 83 13 41 19 22 9 0 01 0 02 0 01 11 11 96 12 82 13 05 13 6 72 7 78 9 16 15 0 00 0 02 0 01 17 4 13 3 84 3 49 19...

Страница 132: ...tance 146 H PSCC 5kA Frame Size 10 Product Code 20G 410 3600 Power Rating kW 180 Current Rating A 360 Harmonic No RMS Current A 1 350 04 3 0 02 5 79 71 7 22 93 9 0 00 11 12 78 13 9 62 15 0 00 17 3 59...

Страница 133: ...0 9 50 000 10 50 000 Where inverters are to be used on higher rated supplies refer to Chapter 7 Associated Equipment for recommended AC line chokes Branch Circuit Protection It is recommended that UL...

Страница 134: ...input on the control board Recommended Wire Sizes North American wire sizes AWG are based on NEC NFPA 70 for ampacities of thermoplastic insulated 75 C copper conductors The wire sizes allow for an am...

Страница 135: ...h our customers according to the requirement above RoHS Restriction of Hazardous Substances This product is in full compliance with RoHS Directive 2011 65 EU including Commission Delegated Directive E...

Страница 136: ...2 7A 1 5kW 2 0100 Frame 2 10A 2 2kW 3 0170 Frame 3 17A 4 0kW 4 0210 Frame 4 21A 5 5kW 5 0300 Frame 5 30A 7 5kW 5 0400 Frame 5 40A 11kW 400Vac Three Phase Supply Voltage 2 0040 Frame 2 4A 1 5kW 2 0065...

Страница 137: ...Control Module User Relay terminals RL1A RL1B RL2A RL2B are category II 230V TN Pollution Degree II non conductive pollution except for temporary condensation North America Canada Complies with the re...

Страница 138: ...z nom max AC Current Derate kHz 2 20G 32 0070 1 5 7 7 8 95 4 10 6 0 20G 32 0100 2 2 10 11 95 4 10 6 2 3 20G 33 0170 4 17 18 5 96 4 10 4 8 4 20G 34 0210 5 5 21 22 97 4 10 2 2 5 20G 35 0300 7 5 30 31 97...

Страница 139: ...Link Brake Switch Threshold 382V Frame Size Product Code Motor Power kW Continuous Peak Instant Min Resistor Value Brake Current A Power Diss kW Brake Current A Power Diss kW 2 20G 12 0070 1 5 3 9 1 5...

Страница 140: ...3 30 6 23 3 25 6 20G 46 0750 37 48 4 37 0 54 6 41 7 14 20G 46 0900 45 54 6 41 7 54 6 41 7 14 7 20G 47 1100 55 54 6 41 7 54 6 41 7 14 20G 47 1500 75 69 5 53 1 69 5 53 1 11 8 20G 48 1800 90 109 1 83 3...

Страница 141: ...ferenced to 0V Type Voltage Mode 10V 0 10V Maximum Output Current 10mA Typical Settling Time 2 5msec 0 to 90 Resolution 11 Bit Isolated No Short Circuit Protection Yes Sample Update Rate 1msec Digital...

Страница 142: ...ct Voltage 230Vac Overvoltage Category II TN 30Vdc Maximum Contact Current 2Arms Motor Thermistor Input Terminal Idents TH1 TH2 Compatible Thermistors PTC NTC Trip Threshold Rising resistance 2500 to...

Страница 143: ...omms option fitted only 85mA Isolated No Over Voltage Protection No Reverse Voltage Protection No STO Inputs Terminal Idents STOA STOB referenced to 0V Nominal Input Voltage 24V PELV with energy sourc...

Страница 144: ...Modes Quadrature Clock Direction Clock Maximum Count Frequency 250kHz Duty Cycle 50 10 Quadrature Angle 90 45 Isolated Galvanic isolation from Input terminals to inverter 0V Input to input terminals A...

Страница 145: ...ate 1msec Analogue Outputs Terminal Idents AO4 referenced to 0V Type Voltage Mode 10V 0 10V Maximum Output Current 10mA Typical Settling Time 2 5msec 0 to 90 Resolution 14 Bit Isolated No Short Circui...

Страница 146: ...Isolated No Short Circuit Protection Yes 10V Reference Voltage Output Terminal Idents 10V referenced to 0V Maximum Output Current 10mA Accuracy 10V 360mV Typically 150mV Isolated No Over Current Prot...

Страница 147: ...DOC 0017 04 EN AC20 Series Hardware Installation Manual DOC 0017 04 EN A 22 03 2023 147 154 Appendix A Power Stack Circuit Overview 1 230V Products Frame 2 3 230V Products Frame 2...

Страница 148: ...DOC 0017 04 EN AC20 Series Hardware Installation Manual 148 154 DOC 0017 04 EN A 22 03 2023 Frame 3 Frame 4...

Страница 149: ...DOC 0017 04 EN AC20 Series Hardware Installation Manual DOC 0017 04 EN A 22 03 2023 149 154 Frame 5 3 400V Products Frame 2...

Страница 150: ...DOC 0017 04 EN AC20 Series Hardware Installation Manual 150 154 DOC 0017 04 EN A 22 03 2023 Frame 3...

Страница 151: ...DOC 0017 04 EN AC20 Series Hardware Installation Manual DOC 0017 04 EN A 22 03 2023 151 154 Frame 4 Frame 5...

Страница 152: ...DOC 0017 04 EN AC20 Series Hardware Installation Manual 152 154 DOC 0017 04 EN A 22 03 2023 Frame 6 Frames 7 8...

Страница 153: ...DOC 0017 04 EN AC20 Series Hardware Installation Manual DOC 0017 04 EN A 22 03 2023 153 154 Frame 9 Frame 10...

Страница 154: ...DOC 0017 04 EN AC20 Series Hardware Installation Manual 154 154 DOC 0017 04 EN A 22 03 2023...

Отзывы: