background image

12

CONNECTING YOUR D 3 continued

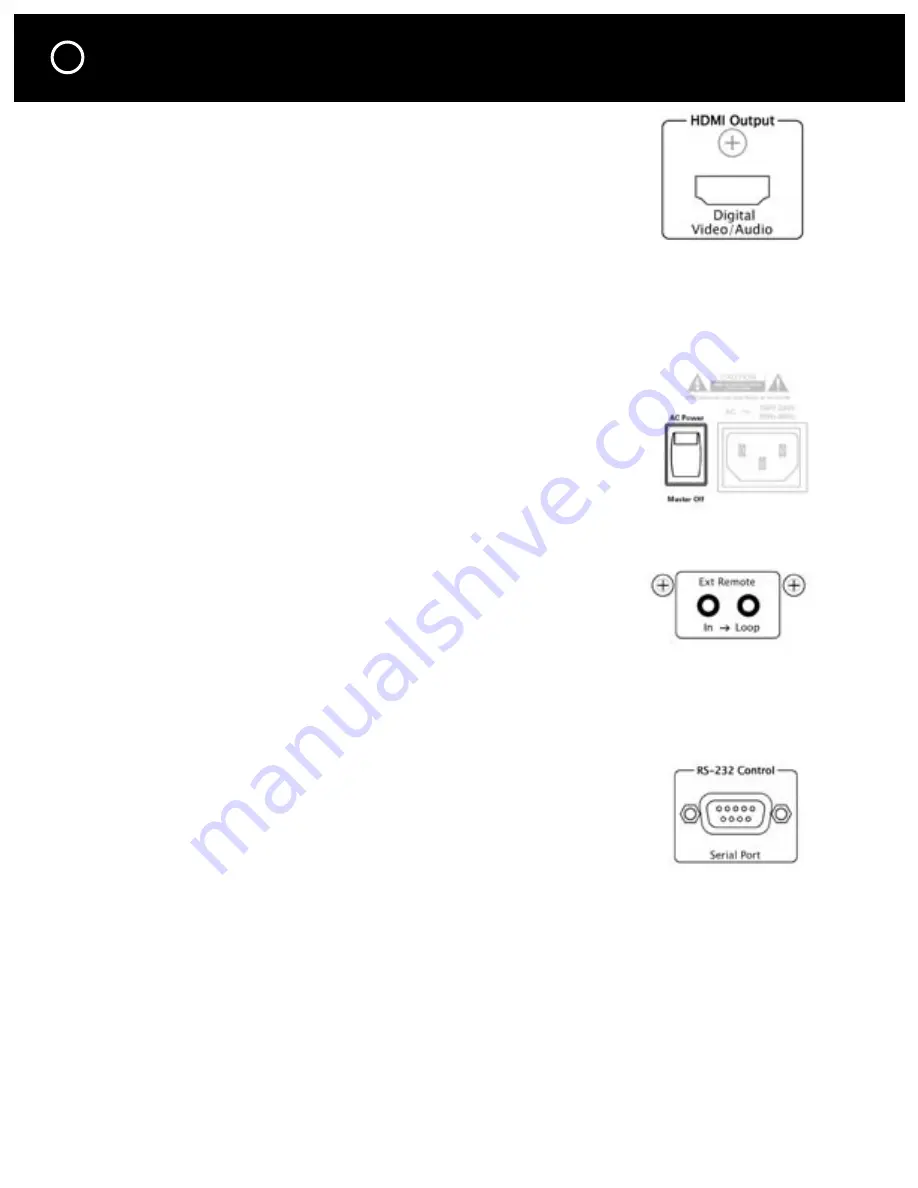
HDMI Audio Connection

A small number of surround controllers and receivers can decode the 
audio in the HDMI signal and therefore no other audio connection is  
necessary for your main zone. If your surround controller or receiver 
does not have an HDMI input or does not decode HDMI audio you  
will need to use the Digital Coaxial or Optical connections and the  
5.1 channel analog audio inputs.

Note:

 Some TVs with HDMI inputs do not accept HDMI audio signals. For these TV sets you’ll need 

to make separate audio connections from the D 3’s Digital or Analog Audio Output jacks. If you’re 
using a TV’s DVI input you will need to make an analog audio connection because DVI cables do not 
carry audio signals. High-Resolution SACD audio is not available through the HDMI connection.

AC Connection and Rear Panel Power Switch

The D 3 operates on 100 - 240 volts, so no AC voltage selector switch is 
necessary. Plug its AC power cord into an AC outlet that is always live (not 
switched). The D 3 will not operate properly if it’s plugged into an AC outlet  
that might be switched off. When the rear panel AC Power switch is switched  
on you can turn the D 3 on and off with its front panel On-Off button or  
remote control On and Off buttons. The only time you will be likely to turn  
off the AC Power switch is when you will be away for an extended time.

IR Remote Repeater Input

The 

IR input jack

 is a 

1

/

8

” (3.5mm) mini jack that connects to an  

IR (infrared) repeater system. An IR repeater system includes an IR 
receiver that relays or “repeats” the IR commands from your remote 
control handset to extend its range. This enables you to control your  
D 3 from another room, or when it is located behind closed cabinet doors. 
The 

Loop Out jack

 will relay the same IR information present at the  

input jack making it easy to connect a second IR-controlled component.

Note:

 Position the IR repeater receiver so that the IR beam from your remote control handset cannot  

also reach the D 3, otherwise, the D 3 may not respond correctly to the remote’s commands. When 
positioning the IR repeater’s receiver remember that infrared can be reflected like visible light.

RS-232 Serial Port

This 9-pin female DB9 connector is a full-duplex serial port. This permits 
the D 3 to communicate in two directions with software-based home 
automation and control systems such as Crestron, AMX, Control4, and 
Elan. The RS-232 write (command) and read (display feedback) codes 
may be found at: 

www.parasound.com

.

When the D 3 is connected to such a controller, it can be controlled and its status monitored 
from keypads and hand-held remotes or touch-screen panels throughout your house. The 
capabilities of such connections, and the programming and interfacing needed will depend on 
the automation system you select; consult your Parasound dealer or custom installer for more 
information regarding interfacing an external control system to your D 3.

Video & Audio Connections for a Remote Zone 

Parasound surround controllers and many AV receivers include input jacks so you can watch  
your movies in another room (usually called the remote zone, or Zone B). 
-  Connect one of the D 3’s Composite Video Out jacks to the Zone Video Input jack on  

your surround controller. 

-  Connect the D 3’s audio Stereo jacks to the Zone audio input jacks on your surround controller. 
These are independent from the video and audio connections you used for your home theater.

Содержание Halo D 3

Страница 1: ......

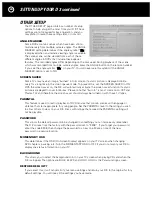
Страница 2: ...will only fit into a grounding power outlet If you are unable to insert the plug into the outlet contact your electrician to replace your obsolete outlet Do not defeat the safety purpose of the ground...

Страница 3: ...inal purchase receipt bill of sale and store the original and the copy in a safe place Your purchase receipt bill of sale is required to determine if your D 3 is eligible for Parasound warranty servic...

Страница 4: ...12 IR Remote Repeater Input 12 RS 232 Serial Port 12 Video and Audio connections for a Remote Zone 12 Power Up Your D 3 13 Navigating The Setup Menus 15 Video Setup 17 HDMI Output 17 HDMI Format 17 Vi...

Страница 5: ...Parental 24 Password 24 Momentary OSD 24 Background 24 Restore Defualt 24 Advanced Video 25 Custom Video Setup 25 Preset Select 26 Remote Control Functions 27 Typical Problems and Remedies 29 If You...

Страница 6: ...me If you re installing the D 3 yourself use cables that are long enough to leave at least two feet of slack that will enable you to pull the D 3 out of the cabinet to check or change connections with...

Страница 7: ...selections in your D 3 s Setup Menu to match your D 3 to your TV and your loudspeakers You will also learn how to set up each channel to play at the correct volume level and so that the sound from ea...

Страница 8: ...make sure you are identifying the correct jacks by the names we use on the D 3 and in this manual Jacks on the units and the plugs on your video and audio cables are usually color coded to simplify ho...

Страница 9: ...smission of uncompressed wide bandwidth digital video and stereo or multi channel digital audio signals HDMI data transmission is usually superior because it avoids degradation from video digital to a...

Страница 10: ...robust BNC jacks S Video Connections If your TV doesn t have an input for HDMI DVI or Component Video Connect either the S Video 1 or 2 Out jack on your D 3 to the S VIDEO input jack of your surround...

Страница 11: ...NONE for the center speaker in the Audio setup menu For information on the Audio setup menu see page 19 Balanced Stereo Outputs Recording and broadcast studios use balanced connections almost exclusiv...

Страница 12: ...extend its range This enables you to control your D 3 from another room or when it is located behind closed cabinet doors The Loop Out jack will relay the same IR information present at the input jac...

Страница 13: ...glow around all the buttons and the front panel display will light up You can now press the LOAD button and insert a DVD into the exposed loading tray A few seconds after you press the PLAY button yo...

Страница 14: ...er Size 19 Subwoofer 19 Front L R 19 Center Speaker 20 Surround L R 20 Crossover 20 Distance Setup 20 Level Setup 21 Test Tone 21 Audio Output 22 Audio Out 22 Late Night 22 DVD Audio Area 22 SACD Area...

Страница 15: ...rong video type NTSC or PAL or if there is no output from the HDMI jack please see the FAQ section of this manual If your D 3 is connected to your TV only by an HDMI cable and you cannot see the setup...

Страница 16: ...cursor buttons to select the item in the left column which you wish to adjust When you select a menu item it will be highlighted Then press the cursor button to highlight the right column Use the and...

Страница 17: ...sing a TV with a DVI input with a DVI to HDMI adapter RGB NORMAL outputs the video signals from the HDMI OUTPUT con nector with a digital RGB video level data range of 16 black to 235 white Select RGB...

Страница 18: ...t of the image so that the remaining picture completely lls your 4 3 TV screen 4 3 LETTERBOX preserves the full 16 9 or widescreen picture width but it leaves black bars at the top and bottom of the s...

Страница 19: ...not sure if you should classify your speakers as Small or Large watch a few movies scenes at SMALL and again at LARGE to determine which sounds better SUBWOOFER Select YES if your system includes a s...

Страница 20: ...er lter adjust it to its highest frequency setting to minimize redundant ltering If your sub has a xed lter and no bypass set the D 3 Sub lter to 160 Hz DISTANCE SETUP Use the DISTANCE SETUP menu to c...

Страница 21: ...speaker reproducing the test tone is identi ed at the bottom left corner of the setup screen As the test tone cycles through each speaker you can adjust each speaker setting so that all speakers will...

Страница 22: ...effects get loud LATE NIGHT can be set from 0 to 8 the higher numbers represent greater limit of dynamic range Note This feature only works with DVD movies recorded in Dolby Digital and it only affect...

Страница 23: ...ENUS will set the default DVD movie menu language Setting up Other languages not listed If the language you desire is not listed you can select the OTHER menu option and enter the 4 digit language cod...

Страница 24: ...ease note that burn in is most common on CRT and Plasma TVs and therefore the screen saver should always be turned on with these TV types PARENTAL This feature is used to restrict playback of DVD movi...

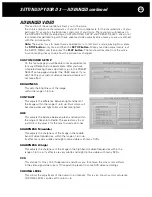
Страница 25: ...custom video setup adjustments will not take effect BRIGHTNESS This sets the brightness of the image within the range of 6 to 6 CONTRAST This adjusts the difference between light and dark of the imag...

Страница 26: ...e without snow The settings are OFF AUTO LOW MID and HIGH We encourage you to experiment with the settings In many cases the image quality will be clear enough without Digital NR DEFAULT This will res...

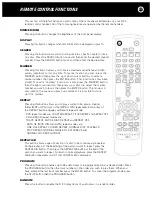
Страница 27: ...possible to store up to 14 markers REPEAT Pressing this button allows you to play a current title group chapter folder MP3 or JPG track or le MP3 or JPG repeatedly Each press of the REPEAT button eng...

Страница 28: ...er The different SACD layers can only be selected when an SACD disc is in the tray and the D 3 is stopped Pressing the SACD button will override the setting for SACD AREA in the AUDIO SETUP menu VID D...

Страница 29: ...s will not play and the TV shows NO MULTI CH This will occur when you are trying to play a stereo SACD and the D 3 is setup for Multi channel SACD playback In this case you must select 2CHANNEL for th...

Страница 30: ...e will vary signi cantly between cable brands Not all brands are HDMI certi ed and some may use inferior materials making long runs impossible When an HDMI cable run is too long you may see pixels dro...

Страница 31: ...4 Unit was shipped collect for shipping charges We do not accept collect shipments 5 Unit was shipped via the US Postal Service 6 Unit was sent to an address other than the address instructed by our...

Страница 32: ...32 LANGUAGE CODE CHART...

Страница 33: ...2 0 V Coaxial 75 0 5 Vp p Optical 660 nm 21dBm 15dBm Audio Digital to Analog Converters 192 kHz 24 Bit Video Speci cations General Video Video Compression MPEG 2 Video Signal Format NTSC PAL HDMI Spec...

Страница 34: ...34 CONNECTION AND SETUP NOTES Notes...

Страница 35: ...35 CONNECTION AND SETUP NOTES Notes...

Страница 36: ......

Отзывы: