2
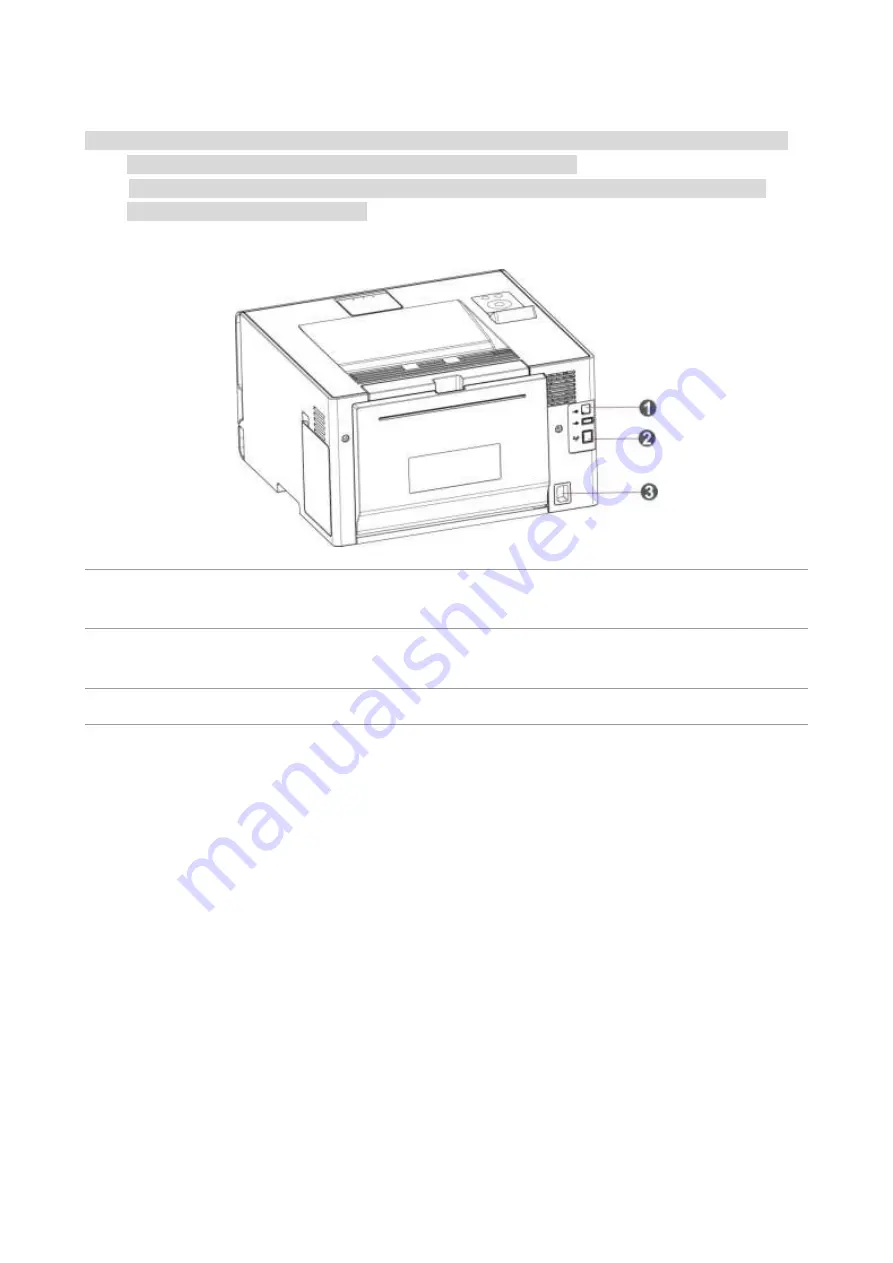
Rear View
Note:
• To avoid loss of data or printer malfunction, do not touch the USB cable, any wireless network
adapter, or the printer in the areas shown in the printing process.
• Printer appearance may differ because of various models and functions, so the schematic
diagram is only for your reference.
1
USB Interface
For connecting product to computer with USB
cable.
2
Network Interface(applicable to models
supporting network function)
For connecting product to network with network
cable.
3
Power Interface
For connecting product to power with power cord.
Содержание PT14C1A Series
Страница 1: ...Color Laser Printer Pantum PT14C1A Series CP2100 Series...
Страница 39: ...26 Note You can also set transfer print parameters through buttons on control panel...
Страница 44: ...31 2 Pull out the toner cartridge tray 3 Remove the used toner cartridge...
Страница 46: ...33 6 Insert the toner cartridge tray and then close the cover...
Страница 48: ...35 Replace the tray 1 Remove the used tray 2 Unpack the new tray 3 Insert a new tray...
Страница 56: ...43 3 Press and push up the metal plate to return it to its original position 4 Push the standard feed tray in...
Страница 59: ...46 Fuser area...
Страница 60: ...47 Below the fuser area Duplex unit 3 Close the cover...
Страница 71: ...1...


