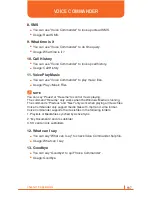
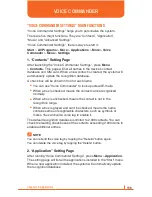
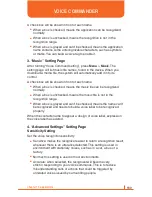
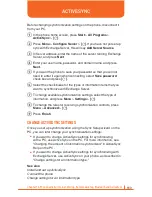
background image

 CAMERA

 FILE EXPLORER

 GET NAVIGATOR

 JAVA

 JETCET PDF

 MOBILE BANKING

 MY-CAST WEATHER

 SPEED DIAL

 SYSTEM INFO

 TASK MANAGER

 VOICE COMMANDER

• • • • • • • • • • • • • • • • 

• • •

 • 

• • •


• • •


• • •

 •

• • • • • • • • • • • • • • • 

• • • •

 • 

• • •


• • •


• • •

 •

• • • • • • • • • • • • • • 

• • • • •

 • 

• • •


• • •


• • •

 •

• • • • • • • • • • • • • • • • 

• • •

 • • • • • • • 

• • •

 •

• • • • • • • • • • • • • • • • 

• • •

 • • • • • • • 

• • •

 •

• • • • • • • • • • • • • • • • 

• • •

 • 

• • •


• • •


• • •

 •

• • • • • • • • • • • • • • • • 

• • •

 • 

• • •


• • •


• • •

 •

• • • • • • • • • • • • • • • • 

• • •

 • 

• • •


• • •


• • •

 •

• • • • • • • • • • • • • • • • 

• • •

 • • • • • • • 

• • •

 •

• • • • • • • • • • • • • • • • 

• • •

 • • • • • • • 

• • •

 •

• • • • • • • • • • • • • • • • 

• • •

 • 

• • •


• • •


• • •

 •

• • • • • • • • • • • • • • • • 

• • •

 • 

• • •


• • •


• • •

 •

• • • • • • • • • • • • • • • • 

• • •

 • 

• • •


• • •


• • •

 •

CHAPTER 13

APPLICATIONS

Содержание Matrix Pro

Страница 1: ...in this manual may differ from your phone depending on the software of the phone or your service provider 2008 AT T Knowledge Ventures All rights reserved Subsidiaries and affiliates of AT T Inc provide products and services under the AT T brand ...

Страница 2: ...However the AT T privacy tools do not apply to applications available outside of AT T Please review the terms and conditions and the associated privacy policy for each location based service to learn how location information will be used and protected In addition your AT T phone may be used to access the Internet and to download and or purchase goods applications and services from AT T or elsewher...

Страница 3: ...FT 262K Color LCD 240 x 320 pixels Full QWERTY keyboard CMOS Camera 2 0 megapixels Built in Bluetooth Technology Advanced Voice Command Technology 2 Way Text Messaging Multimedia Messaging Service E mail Messaging Service microSD Card for External Memory SDIO Support Voice Memo Easy text entry using the XT9 text input mode Internet Access Video Share Calling IMPORTANT INFORMATION This Pantech Matr...

Страница 4: ...e list of available games Menu Outline The following list shows the menu structure and indicates the number assigned to each option 1 Messaging 1 1 Messages 1 2 New E mail Account 2 Calendar 3 Contacts 4 ActiveSync MENU TREE 5 AT T Music 5 1 Windows Media Player 5 2 Shop Music 5 3 MusicID 5 4 XM Radio Mobile 5 5 Music Videos 5 6 Pandora 5 7 Community 6 Cellular Video 7 MEdia Net 8 Media Mall 8 1 S...

Страница 5: ... Task Manager 17 10 Voice Commander 18 Settings 18 1 Phone 18 2 Sounds 18 3 Profiles 18 4 Home Screen 18 5 Clock Alarm 18 6 Connections 18 7 Security 18 8 Remove Programs 18 9 Power Management MENU TREE More 1 Video Share 2 Accessibility 3 Regional Settings 4 Owner Information 5 About 6 Device Name 7 Error Reporting 8 Customer Feedback 9 Windows Update More 1 Setup E mail 2 Managed Programs 19 Cal...

Страница 6: ...F 29 CALL FUNCTIONS 30 MAKE A CALL BY ENTERING A CONTACT NAME 30 MAKE A CALL BY ENTERING A PHONE NUMBER 30 MAKE A CALL FROM AN OPEN CONTACT 30 MAKE A CALL FROM THE CALL HISTORY LIST 31 MAKE A CALL FROM A HYPERLINK PHONE NUMBER 31 ANSWER A CALL BY PRESSING ANY KEY 31 ANSWER OR IGNORE A CALL 32 ANSWER A SECOND CALL 32 INSERT A MANUAL PAUSE IN A DIALING SEQUENCE 32 INSERT A THREE SECOND PAUSE IN A DI...

Страница 7: ...POINTMENT 49 VIEW AN APPOINTMENT 49 VIEW APPOINTMENTS FOR THE WEEK 49 VIEW TODAY S AGENDA 50 VIEW YOUR AGENDA FOR A SPECIFIC DATE 50 VIEW YOUR SCHEDULE FOR THE MONTH 50 MAKE AN APPOINTMENT RECURRING 51 SHOW WEEK NUMBERS 51 CHANGE THE WORK WEEK DISPLAY 52 CHANGE THE REMINDER TIME 52 CONTACTS 53 CREATE A NEW CONTACT 53 SEND CONTACT 53 CALL A CONTACT FROM CONTACT INFORMATION 54 CALL A CONTACT FROM TH...

Страница 8: ...EDIA MESSAGE MENU OPTIONS 71 VIEW MULTIMEDIA MESSAGE 73 SELECT MULTIMEDIA MESSAGE IN THE LIST OF MESSAGE TYPE 74 CHANGE MESSAGING ACCOUNT OPTIONS 74 CHANGE HOW THE MESSAGE LIST DISPLAYS 75 CREATE A MESSAGE FROM A CONTACT CARD 75 E MAIL 76 SYNCHRONIZING E MAIL MESSAGES 76 DURING SYNCHRONIZATION 76 CONNECTING DIRECTLY TO AN E MAIL SERVER 76 FOLDER BEHAVIOR WITH A DIRECT CONNECTION TO AN E MAIL SERVE...

Страница 9: ...HE INBOX MESSAGE LIST 89 VIEW THE LIST OF ACCOUNTS 90 WHAT IS SSL 90 CHAPTER 5 ORGANIZER 91 ALARM 92 USING THE ALARM 92 VOICE NOTE 93 CREATE A VOICE NOTE 93 LISTEN TO A VOICE NOTE 93 DELETE A VOICE NOTE 94 RENAME A VOICE NOTE 94 SET AS RINGTONE A VOICE NOTE 94 NOTEPAD 95 TO ACCESS NOTEPAD 95 CREATING A MEMO 95 VIEWING A MEMO 95 SENDING A MEMO 95 DELETING A MEMO 95 CALCULATOR 96 USING THE CALCULATO...

Страница 10: ...119 MEDIA NET HOME 120 CHAPTER 8 CELLULAR VIDEO 121 CELLULAR VIDEO 122 MEDIA CLIP OPTIONS 123 LIBRARY 123 PLAY PAUSE 123 STOP 123 SHUFFLE REPEAT 123 FULL SCREEN 123 OPTIONS 123 PROPERTIES 124 SETTINGS 124 USING THE VIDEO CATEGORIES 125 VIEWING A VIDEO CLIP 125 CUSTOMIZING CELLULAR VIDEO 126 UPDATING THE FAVORITES LIST 126 ADDING A VIDEO ALERT 126 MY PURCHASES 127 PARENTAL CONTROLS 128 SETTING UP P...

Страница 11: ... A COPY OF A PICTURE 139 VIEW PICTURES ON YOUR PHONE 139 CAMERA CAMCORDER OPERATIONS 140 CAMERA 140 VIDEO 140 RECORD A VIDEO 140 PLAY RECORDED FILE 140 TAKE A PICTURE 141 TAKE A PICTURE MULTISHOT 141 SNAPSHOT 141 VIEWING SAVED FILE 141 VIDEO SHARE 142 CAMERA CAMCORDER CONTROLS 143 CAMERA MENU 143 CAMCORDER MENU 144 GENERAL SETTINGS 145 CAMERA SETTINGS 146 VIDEO SETTINGS 147 CHAPTER 11 INTERNET EXP...

Страница 12: ...0 SCHEDULE SYNCHRONIZATION AS ITEMS ARRIVE 161 CHANGE THE SYNCHRONIZATION SCHEDULE 161 START AND STOP SYNCHRONIZATION 162 VIEW INFORMATION ABOUT SYNC STATUS 162 CHANGE SETTINGS FOR AN INFORMATION TYPE 163 CONNECT THE PHONE 163 DEACTIVATE THE USB MODEM 164 CONNECT TO A PC USING CHARGEABLE USB CABLE 164 CONNECT TO A PC USING BLUETOOTH 164 CHANGE E MAIL SECURITY OPTIONS 165 EXCLUDE AN E MAIL ADDRESS ...

Страница 13: ...OUNDS ON OR OFF 196 DELETE A SOUND 196 COPY A SOUND FROM YOUR PC TO YOUR PHONE 197 PROFILES 198 VIEW THE LIST OF PROFILES 198 EDIT A PROFILE 198 CHANGE THE CURRENT PROFILE 198 HOME SCREEN 199 CLOCK ALARM 200 SET THE DATE AND TIME 200 ALARM 200 CONNECTIONS 201 WIRELESS MANAGER 201 CREATE A DIAL UP CONNECTION 201 CREATE A GPRS CONNECTION 202 CREATE A PROXY CONNECTION 203 CREATE A VPN CONNECTION 203 ...

Страница 14: ...22 MANAGED PROGRAMS 223 CHAPTER 15 GAMES 224 BRAIN CHALLENGE V2 DEMO 225 START A GAME OF BRAIN CHALLENGE 225 BUBBLE BREAKER 226 OVERVIEW OF BUBBLE BREAKER 226 BREAKER BONUS 226 UNDO 226 START A GAME OF BUBBLE BREAKER 226 SET BUBBLE BREAKER OPTIONS 226 VIEW BUBBLE BREAKER STATISTICS 227 GUITAR HERO 3 MOBILE 228 START A GAME OF GUITAR HERO 3 MOBILE 228 JEWEL QUEST II 229 START A GAME OF JEWEL QUEST ...

Страница 15: ...RE 237 DRIVING SAFETY 238 ELECTRONIC DEVICES 239 PRECAUTIONS 241 SAFETY INFORMATION FORFCC RF EXPOSURE 243 SAR INFORMATION 244 SAFETY INFORMATION FOR BATTERY USAGE 245 FCC INDUSTRY COMPLIANCE 246 FCC HEARING AID COMPATIBILITY REGULATIONS FOR WIRELESS DEVICES 248 FDA CONSUMER UPDATE 250 PROTECT YOUR WARRANTY 257 MANUFACTURER S WARRANTY 258 12 MONTH LIMITED WARRANTY 258 CONTENTS ...

Страница 16: ...This chapter addresses and explains the basic features of your phone including INSIDE THE PACKAGE HANDSET DESCRIPTION ACTIVATING YOUR PHONE HOME SCREEN BATTERY USAGE CHAPTER 1 BEFORE USINGYOUR PHONE ...

Страница 17: ...r phone Handset Battery User Manual AC Travel Charger INSIDE THE PACKAGE This package should include all items pictured below If any are missing or different you should immediately contact the retailer where you purchased the phone ...

Страница 18: ...rpiece Left Right Soft Keys End Key Navigation Keys Send Key Home Key Voicemail Clear key HANDSET DESCRIPTION The Pantech Matrix Pro weight is about 151 4g 5 34oz The dimensions are 106x51x21 6 mm 4 17 x2 x0 85 NUMBER PAD VIEW Display OK Key ...

Страница 19: ... press the corresponding key CAPS Shift key To type a single uppercase letter press this key then a letter Space key Press to enter a space Clear Back key Return to previous screen or delete characters in text mode Enter key Press to create new line while writing a message Delete key Press to delete a number or letter HANDSET DESCRIPTION NOTE To use the QWERTY keyboard ensure that the Number pad i...

Страница 20: ...an use it To activate your phone follow these steps 1 Visit an AT T Store and have your phone activated and place your cursor on the MY ACCOUNT tab available on the home page 2 When the drop down menu HOW To Wireless Guide displays select ACTIVATE YOUR NEW PHONE and press GO to display instructions needed to activate your phone online 3 After gathering the required materials select the Activated N...

Страница 21: ...e It can be used to display a variety of information such as phone specific status information from over the air services and information from personal information manager PIM applications You can fully customize the home screen by installing new plug ins and schemes HOME SCREEN ICONS Status icons appear at the top of the screen and in the home screen The following table lists common status icons a...

Страница 22: ...ynchronization error Phone off Silent Multipress text input mode lowercase Multipress text input mode uppercase first character only Multipress text input mode uppercase XT9 text input mode lowercase XT9 text input mode uppercase first character only XT9 text input mode uppercase Numeric input mode GPRS connection available EDGE connection available 3G connection available Bluetooth ON HOME SCREEN...

Страница 23: ...oo Conversation Yahoo Online Available Busy Yahoo Invisible Yahoo Offline AOL Conversaton AOL Available AOL Away AOL Invisible AOL Offline Windows Live Messenger Conversation Windows Live Messenger Online Windows Live Messenger Busy Windows Live Messenger Appear Offline Windows Live Messenger Offline Windows Live Messenger Away HOME SCREEN ...

Страница 24: ...to the previous page A short press changes to capital letters or symbols during text entry mode A long press shows menu for changing letters or symbols 0 Press and hold to insert a for international call Press to insert a space and long press to enter choosing symbols during text entry mode H Press to return to the home screen V v Press to adjust voice volume during a call and adjust audio volume ...

Страница 25: ...Shift key Once the CAPS LOCK mode is set you can type upper case letters only To deactivate double tap the Shift key again To type an upper case letter for the first letter of a word only simply press the Shift key once Then the first letter you type will be upper case while the rest will be lower case To type a special character or numbers press the applicable key while holding down the FN key To...

Страница 26: ...ies that have been provided with the phone Installation is easier if you have placed the phone on a flat surface 1 Place the battery on the back of the handset and slide into place 2 Push the battery down until it locks into place BATTERY REMOVAL Again place the battery on a flat surface and use an even steady pressure when removing the battery 1 Pull the release latch upwards lift up the battery 2 ...

Страница 27: ...ttery must be installed in the phone Make sure you align the connector as the image If not it will damage the charging connector on the phone and will not charge Power Off Charging The Pantech Matrix Pro will enter power off charging mode automatically if you try to charge it with the device powered off Charging state will be displayed according to the current state complete 0 95 and error Backlig...

Страница 28: ...E TIMES The operating time is subject to your handset usage and configuration Battery Capacity Talk Time STD 1320 mAh Up to 360 minutes BATTERY STANDBY TIMES The operating time is subject to your handset usage and configuration Battery Capacity Standby Time STD 1320 mAh Up to 290 hours NOTE These times are for a new battery Usage and Standby times may decrease over time BATTERY HANDLING INFORMATION ...

Страница 29: ...y drain Store the discharged battery in a cool dark and dry place Purchase a new battery when its operating time gradually decreases after fully charging Dispose of and recycle used batteries in accordance with local regulations DON Ts Don t use a damaged battery or charger Don t attempt to disassemble the battery it is a sealed unit with no serviceable parts Don t accidentally short circuit the b...

Страница 30: ...r addresses and explains the basic features of your phone including TURNING THE PHONE ON OFF CALL FUNCTIONS VIDEO SHARE BASIC FUNCTIONS MAKING AN EMERGENCY CALL ENTERING TEXT AND NUMBERS CHAPTER 2 BASIC OPERATION ...

Страница 31: ...f the SIM card should go against the metal contacts of the phone TURNING THE PHONE ON Press and hold the E key on the lower right of the phone until the Power On logo appears If Password appears on the display enter your 4 digit password to unlock your phone If the battery does not have enough charge to turn on the phone the keypad will not light up You should charge your phone before turning it o...

Страница 32: ... If you see the number or contact name to call select it and press Call If you do not see the number or contact name finish entering the number and press O or S MAKE A CALL FROM AN OPEN CONTACT You can open contacts from the main screen and make a call from that contact 1 On the home screen press Contacts 2 Select the contact to call and press O 3 Select the phone number to call and press O Call o...

Страница 33: ... recent calls 2 Select a name or phone number to make a call 3 Press S MAKE A CALL FROM A HYPERLINK PHONE NUMBER You can quickly dial a phone number from an e mail or text message that contains a hyperlink phone number A hyperlink phone number is underlined in the same manner as a Web site address 1 From a message containing a hyperlink phone number select the phone number and press O ANSWER A CAL...

Страница 34: ...d call and go back to the first press E INSERT A MANUAL PAUSE IN A DIALING SEQUENCE This function will only active when the contact information is saved in the phone s memory 1 On the home screen press Contacts 2 Press the contact in whose phone number you want to insert a pause 3 Select the phone number and press Menu Edit 4 Place the cursor where you want to insert the pause 5 Press Menu Insert ...

Страница 35: ...etween selecting a contact to call and when the phone actually dials 1 On the home screen press Contacts 2 Press the contact in whose phone number you want to insert a pause 3 Select the phone number and press Menu Edit 4 Place the cursor where you want to insert the pause 5 Press Menu Insert Pause The letter p appears where the three second pause will occur in the dialing sequence 6 Press Done CA...

Страница 36: ...can share a real time video stream with the other party while having a conversation Recorded You can share a pre recorded video clip with the other party while having a conversation Note that you can share video files recorded in Video Share mode or in Video Share Call NOTE The Speakerphone will be automatically activated when a Video Share session begins unless a hands free device Bluetooth or st...

Страница 37: ...When trying to make a conference call second call during a call When the voice call is placed on hold When moving out of a AT T 3G service area During a Video Share session the following features are available for the session You can come back quickly to the Video Share session from anywhere by pressing the camera key Hands free On Off You can turn on off the hands free feature when the bluetooth ...

Страница 38: ... Share session There will be a prompt asking if you would like to save or discard the video at the end of a recording session If you choose to save the video it will be saved in either the My Stuff or Storage Card folder depending on the setting MAKING A VIDEO SHARE CALL IN CAMERA RECORDING MODE When you are in Camera Recording mode you can easily make a Video Share Call to a person in your Contac...

Страница 39: ... to the 1 key Voicemail can be acessed by pressing and holding the 1 key Check Voicemail When checking your voicemail all unanswered calls will be played back in the order they were received After you have entered your voicemail you will hear options to save delete replay or skip each message 1 Press and hold 1 to call your voicemail box 2 Follow the instructions to retrieve it LOCK THE KEYPAD On ...

Страница 40: ... will become locked when the slide is lowered and the screen is turned off You can unlock the setting in this condition by pressing the Unlock key or simply open the slide SET THE DATE AND TIME Your phone is not preset with current date and time You will need to select the time zone and the date and time 1 On the home screen press Start All Programs More Settings or select Settings and press All S...

Страница 41: ...ings 2 Select Home Screen 3 Select Time out use the L R to set the amount of time for the phone to be idle before the home screen automatically appears 4 Press Done CHANGE THE HOME SCREEN APPEARANCE The Pantech Matrix Pro allows you to choose from many color schemes and layouts and allows you to use a background image for the main screen 1 On the home screen press Start All Programs More Settings ...

Страница 42: ...More About NOTE To see About and more settings press More ENTER OWNER INFORMATION Entering and displaying owner information allow someone to return the phone to you in case it is lost 1 On the home screen press Start All Programs More Settings More Owner Information Complete the following Name Enter your name Telephone number Enter a number where you can be reached E mail address Enter your e mail...

Страница 43: ...rs among others 1 On the home screen press Start All Programs More Applications File Explorer The My Documents folder and its subfolders are listed 2 To find the folder you want do the following 3 Select one of the folders listed in the main window 4 Press Menu and navigate through the folders listed there 5 Select the item you want to open SILENCE THE RING TONE OF AN INCOMING CALL Press Volume dow...

Страница 44: ... network in your area The emergency number will work independently of the network area you are in with or without a SIM card inserted Dial 911 or 112 and press O NOTE You can make calls to emergency service numbers under any circumstances even if you have locked the phone MAKING AN EMERGENCY CALL ...

Страница 45: ...y screen shows the input mode that you are currently using CHANGE BETWEEN UPPERCASE LOWERCASE AND CAPS LOCK Press the to change between uppercase lowercase and caps lock within a text input mode TIP In both Multipress and XT9 modes the first letter of a sentence is automatically capitalized CHANGE THE MULTIPRESS TIMEOUT The Multipress timeout setting controls the amount of time you have to press a ...

Страница 46: ...mbols are available by accessing a separate page 1 Press and hold the 2 In the menu that appears press Symbols to display the Symbols page 3 Select the symbol you want 4 Press O ENTER NUMBERS IN TEXT BOXES To enter numbers use numeric mode If you need to enter a number within a line of text change to numeric mode to enter the number and then change back to multipress or XT9 mode to finish entering ...

Страница 47: ...enu select XT9 and press O 3 The XT9 indicator appears at the top of the screen 4 Enter letters by pressing the keys on which the letters appear Press a key only once for each letter If there is more than one choice in the XT9 dictionary for your entry a list of available words is displayed 5 Press the to enter a space after the word is entered or press one of the available words and the space is ...

Страница 48: ...ialing an international call you must insert the plus sign in the number The 0 functions as the plus sign 1 In a numeric entry field press and hold 0 CHANGE THE INPUT MODE There are several input modes available on your phone depending on whether you are entering contact information phone numbers symbols or text Be sure you are in the input mode you desire 1 In text input mode press and hold the 2 ...

Страница 49: ...This chapter discusses using calendar and contacts menu on your phone CALENDAR CONTACTS CALL HISTORY MY STUFF CHAPTER 3 CALENDAR CONTACTS CALL HISTORY MY STUFF ...

Страница 50: ...at the top of the calendar See also Change the remainder time TIP On the home screen press U D to select Appointments and press L R to select the options DELETE AN APPOINTMENT To delete an existing appointment you will have the option of deleting just one appointment or the entire series if it is a recurring appointment 1 On the home screen press Start All Programs 2 Select Calendar O 3 In Agenda ...

Страница 51: ... Calendar O 3 Select the appointment and press O Menu Edit O 4 Make your changes and press Done VIEW AN APPOINTMENT Your appointments should be easily viewable from the main calendar menu The Calendar menu is accessible with the Start from the home screen 1 On the home screen press Start All Programs 2 Select Calendar O 3 Select the appointment to view and press O VIEW APPOINTMENTS FOR THE WEEK Ea...

Страница 52: ...ght or press Menu Go to Date To quickly view today s agenda on the home screen press an upcoming appointment if one is present VIEW YOUR AGENDA FOR A SPECIFIC DATE You can also select a specific date to check that day s schedule 1 On the home screen press the Start All Programs 2 Select Calendar O 3 Press Menu Go to Date O 4 Enter the date to view and press Done VIEW YOUR SCHEDULE FOR THE MONTH The...

Страница 53: ...s and use L R to select one of the recurrence options 5 Press Done SHOW WEEK NUMBERS In many cases the weeks of the year are referred to by number the calendar function allows you the option of displaying the number of the week between 1 and 52 1 On the home screen press Start All Programs 2 Select Calendar O 3 Press Menu Tools O or press R to view options menu then press O 4 Scroll to Month view ...

Страница 54: ...ndar O 3 Press Menu Tools O or R Options Do one of the following To specify the first day of the week in First day of week press Sunday or Monday To specify the number of days you want to appear in a week in Week view press 5 day week 6 day week or 7 day week 4 Press Done CHANGE THE REMINDER TIME By default the reminder time is set 15 minutes prior to an appointment 1 In Calendar press Menu Tools ...

Страница 55: ... press Start All Programs 2 Select Contacts O 3 Press New 4 Enter information for the new contact 5 Press Done TIP If someone who isn t in your list of contacts calls you or sends you a message you can create a contact from Call History or from the message by pressing Menu Save to Contacts SEND CONTACT It is possible to use your phone to send a contact to another device 1 On the home screen press ...

Страница 56: ...n press Start All Programs Contacts or directly press Contacts 2 Select the contact to call 3 Press S The contact s default phone number is dialed TIP To call a phone number other than the default press the contact press O and scroll to the number you want to dial then press S CHANGE THE DEFAULT NUMBER FOR A CONTACT The default number for the contact will be the first number displayed If you need t...

Страница 57: ...y selected contacts in Device or SIM to other areas Device SIM SIM Device 1 On the home screen press Start All Programs 2 Select Contacts O 3 Scroll to the contact to duplicate 4 Press Menu 5 To select SIM Contact press Copy to Device O 6 To select Device Contact press Copy to SIM O COPY ALL TO DEVICE SIM This feature allows you to copy all contacts in Device or SIM to other areas Device SIM SIM D...

Страница 58: ...all contacts in Device or SIM 1 On the home screen press Start All Programs 2 Select Contacts and press O 3 Press Menu 4 To select SIM Contact press Delete All SIM O 5 To select Device Contact press Delete All Device O CREATE A CONTACT FOR A CALLER Creating a contact for a caller makes their information easier to retrieve when the call is done The contact can be added to the Contact list during th...

Страница 59: ...tacts 2 Select phone number in the list and press Menu 3 Select Video Share FIND A CONTACT The contact section of your phone has an auto fill feature that will allow you to find contacts more quickly While entering the number or name of the contact the phone will auto fill the rest of the information as you press the keys until you find the right contact 1 On the home screen press Start All Programs 2...

Страница 60: ...ress Send SEND A TEXT MESSAGE TO A CONTACT You can send text message from within the contact list after selecting the contact and pressing the Menu 1 On the home screen press Start All Programs 2 Select Contacts O 3 Select a contact and press O 4 Press Menu Send Text Message 5 Compose your message and press Send VIEW AND EDIT CONTACT INFORMATION You may want to change or update contact information...

Страница 61: ...elect a contact and press O 4 Press Menu Edit O 5 Using the navigation key scroll down to Picture Do one of the following Select the picture you want to add Press Camera and take a picture REMOVE A PICTURE FROM A CONTACT Once a picture is attached to a contact it can easily be removed or changed from the Contacts menu by using the soft key and editing the field 1 On the home screen press Start All ...

Страница 62: ...O 4 Press Menu Edit O 5 Press Categories 6 Use the U D to select the category you want 7 Press Done NOTE Categories are shared between your contacts and tasks A category will remain in the list of shared categories as long as it is assigned to at least one contact or task ASSIGN A RING TONE TO A CONTACT To easily identify who is calling you by the ring tone you can assign a custom ring tone to eac...

Страница 63: ...nu Add to Speed Dial O 6 In keypad assignment select the speed dial number to use 7 Press Done NOTE The number 1 is reserved for calling your voicemail box USING SPEED DIALS Set up speed dial codes to allow you to call contacts by pressing only one or two buttons from the home screen 1 On the home screen press and hold the number on the keypad that you have assigned as a speed dial for the phone n...

Страница 64: ...L Deleting a speed dial can be done at any time by following these instructions 1 On the home screen press Start All Programs 2 Select Applications Speed Dial O 3 Select the speed dial to delete 4 Press Menu Delete from the popup menu SEND AS VCARD Allows you to send the selected contact to your business information 1 On the home screen press Start All Programs 2 Select Contacts O 3 Select the con...

Страница 65: ...ly to Call History VIEW CALL TIMERS You can time each call that is received or made and the time and length of each call can be reviewed 1 On the home screen press Start All Programs More 2 Select Call History O 3 Press Menu View Timers from the popup menu RESET CALL TIMERS When call information is no longer required the call timers can be set to zero 1 On the home screen press Start All Programs ...

Страница 66: ...press Start All Programs More 2 Select Call History O 3 Select the phone number for which to create a contact and press Menu Save to Contacts in the popup menu and press O 4 Select New Contact O 5 Enter the remainder of the contact information and press Save The new contact appears in your contact list DELETE AN ITEM FROM CALL HISTORY Any entry in the Call History can be deleted by selecting an en...

Страница 67: ...d 0 until a plus sign appears enter the country code and then enter the rest of the phone number NOTE You can insert a plus sign into a contact s phone number or dial it directly from the keypad SEND AN E MAIL MESSAGE FROM CALL HISTORY To use this function the E mail address of the person you are sending an E mail to must be included in their contact information card 1 On the home screen press Sta...

Страница 68: ...66 Chapter 3 Calendar Contacts Call history My stuff The My Stuff displays My Pictures My Ringtones My Videos Notes and Templates My Stuff s menu is same as File Explorer MY STUFF ...

Страница 69: ...This chapter addresses Voicemail Text Multimedia Message and E mail Messaging functions including VOICEMAIL TEXT MESSAGING MULTIMEDIA MESSAGE E MAIL CHAPTER 4 VOICEMAIL MESSAGING ...

Страница 70: ...back in the order they were received You will have options to save delete replay or skip each message CALL YOUR VOICEMAIL BOX Retrieving your voicemail is simple and can be accessed directly from the home screen 1 On the home screen press and hold 1 to call your voicemail box 2 Follow the instructions to retrieve it VOICEMAIL ...

Страница 71: ...mbers Insert a semicolon between multiple text message recipients phone numbers 5 Press D and compose message you want to send 6 Press Send Text messages are sent immediately TIP You can quickly enter text message numbers from your contact cards In To press Menu Add Recipient from the list Then select the recipient s phone number To cancel creating a message just press Menu Cancel Message DELETE A...

Страница 72: ...multimedia message 5 Input text message in text box 6 To add an image press Menu Add Item O then select Image 7 Select an image from picture file browser and the image is added to the multimedia message 8 Press Send to send message 9 If multimedia message was sent successfully a Message sent successfully dialog will appear TIP You can quickly enter multimedia message numbers from your contact cards...

Страница 73: ...u Add Recipient HP s Snapfish Upload photos on the web Press Menu Add Recipient Bcc Show Bcc field to add recipients in Bcc field Press Menu Add Recipient Cc Show Cc field to add recipients in Cc field Check Name Press Menu Check Name convert phone number to corresponding name if that number is registered in contact list Add Item You can add content such as text image sound video vCard vCalendar a...

Страница 74: ...template Save current components as a new template Remove Item You can remove content such as image sound text and video Press Menu Remove Item My Text Press Menu My Text You can add predefined text mess ages to text field Copy Paste Press Menu Copy Paste You can cut copy paste text messages to text field Priority Level You can set the importance of Multimedia message Press Menu Priority Level Hig...

Страница 75: ...s etc Press Menu Options Individual Msg Setting Set properties of per message such as delivery report read report etc Press Menu Options About Show information about multimedia Message client Save Press Menu Save Save multimedia message in draft folder Back to Inbox Cancel Composer Press Menu Cancel Composer Cancel multimedia message Back to Inbox VIEW MULTIMEDIA MESSAGE To view multimedia message...

Страница 76: ...addresses including Cc Bcc sender 5 Press Menu Forward to forward multimedia message open multimedia message editor 6 Press Menu Save Adress to save address to phonebook 7 Press Menu Details to show detailed information about current multimedia message such as message size sender 8 Press Menu Delete to delete current message in the inbox list 9 Press Menu Back to terminate multimedia message viewe...

Страница 77: ...you can make phone calls from a contact card you can select a contact and send a message from the contact card 1 On the home screen press Start All Programs Contacts O 2 Select a contact 3 Select the messaging address or phone number to use 4 Select the account to use and press O 5 Use left soft key that displays corresponding action or press Menu and select the message you want to use For example...

Страница 78: ... Outlook on your PC E mail messages can be synchronized as part of the general synchronization process You will need to enable Inbox synchronization in ActiveSync DURING SYNCHRONIZATION Messages are copied from the mail folders of Exchange or Outlook on your PC to the Outlook E mail folders on your phone E mail messages in Outlook E mail on your phone are transferred to Exchange or Outlook and the...

Страница 79: ...the server Therefore messages are available to you anytime you connect to your mail server This synchronization of folders occurs whenever you connect to your mail server create new folders or rename delete folders when connected CREATING AN E MAIL ACCOUNT You need to create a new account to be used for retrieving and sending e mail messages To make a new account 1 From the main Messaging screen s...

Страница 80: ...ping in the address 1 On the home screen press Start All Programs Messaging O 2 Select the e mail account with which you want to send 3 Press Menu New 4 In To Cc and or Bcc enter the recipient s e mail addresses Insert a semicolon between the multiple addresses 5 Enter a subject 6 Enter a message 7 Press Send E mail messages are stored in Outbox and are sent to recipients the next time you synchro...

Страница 81: ...occurs when a hacker intercepts and reads your e mail messages Using a cryptographic message format such as S MIME for encryption helps improve e mail privacy because it converts plain readable text of the message into cipher scrambled text The sender s messaging program uses the recipient s public key to encrypt lock the e mail message and attachments Only the recipient who has the private key th...

Страница 82: ...ent is downloaded the next time you synchronize or connect to your e mail server and send and receive e mail NOTE If there are multiple attachments in the message all attachments are downloaded MARK A FOLDER FOR SYNCHRONIZATION When you synchronize your Outlook e mail account with your PC the same Inbox folders that are in Outlook on your PC are created on your phone 1 On the home screen press Sta...

Страница 83: ...not valid For example the sender s certificate may have expired it may have been revoked by the certificate authority or the server that verifies the certificate is unavailable Contact the sender to report the problem S MIME encryption and digital signatures for Windows Mobile based devices are available only with Exchange Server 2003 Service Pack 2 or a later version that supports S MIME If you aren ...

Страница 84: ... which appears before the at sign Password Choose a strong password You will have the option to save your password so that you do not need to enter it each time you connect to your e mail server Domain The domain name This may be required Account type The type of e mail server that hosts your mailbox POP3 or IMAP4 Account name A name for this account You must use a different name for each account ...

Страница 85: ...r the outgoing e mail server Password Your password for the outgoing e mail server Domain The domain name of the outgoing e mail server Require SSL connection Outgoing mail server only A connection that enables you to send personal information more securely Note that if you select this and your ISP does not support an SSL connection you will not be able to send e mail DELETE A MESSAGE Messages fro...

Страница 86: ...r phrases that you frequently use in messages 1 On the home screen press Start All Programs Messaging O 2 Select an account 3 Press Menu New and scroll to the body of the message 4 Press Menu My Text 5 Press Menu Edit My Text 6 Select the text to edit 7 Edit the text and press Done EMPTY THE DELETED ITEMS FOLDER If you don t have a need to store deleted items you can delete the Deleted Items folde...

Страница 87: ...nsfer costs based on your rate plan INSERT PREDEFINED TEXT INTO A MESSAGE To save time when entering text you can insert predefined text into messages 1 On the home screen press Start All Programs Messaging O 2 Select an account and press Menu New 3 Press Menu My Text 4 Press the text you want to insert TIP Quickly insert text by entering its associated number MARK A MESSAGE AS READ OR UNREAD You h...

Страница 88: ...home screen press Start All Programs Messaging O 2 Select an account 3 Scroll to the message to move 4 Press Menu Move 5 Press the folder into which to move the message TIP You can move an open message in the same manner by pressing Menu Move OPEN A MESSAGE To review or use a message you open it from its account in the Messaging function 1 On the home screen press Start All Programs Messaging O 2 ...

Страница 89: ...en draft and send it to someone else 1 On the home screen press Start All Programs Messaging O 2 Select an account 3 Press Menu Folders 4 Press Drafts 5 When you have finished composing the message press Send REPLY TO A MESSAGE You can reply to a message you ve received easily from within an open message 1 From the received message opened press Menu Reply Reply or Reply All 2 Enter a message in the...

Страница 90: ...anguages 2 In Email message language scroll to the language 3 Press Done The message is displayed using the appropriate characters for the selected language TIP When you are composing press Menu Message Options Language to set the language STOP ADDING A SIGNATURE TO MESSAGES If you have previously added a signature to an account and wish to stop using it you can turn the signature off for that acc...

Страница 91: ...NTS You can store messages in folders and create the types of folders you need 1 On the home screen press Start All Programs Messaging O 2 Select an account 3 Press Menu Folders 4 Press the folder to view 5 To return to the message list view of the Inbox folder press Menu Folders Inbox TIP To view all Outlook E mail folders including those not marked for synchronization press Menu Show All Folders...

Страница 92: ...HAT IS SSL Secure Sockets Layer SSL is a security protocol that enables you to send personal information in a more secure manner over the Internet When you send a message from an account that you have with an Internet service provider ISP or from an account that you access using a VPN server connection typically a work account Messaging always tries to use an SSL connection However sometimes the e...

Страница 93: ... ALARM VOICE NOTE NOTEPAD CALCULATOR WORLD TIME TASKS CHAPTER 5 ORGANIZER ...

Страница 94: ...screen press Start All Programs More Organizer Alarm O 2 Select Alarm1 or Alarm2 O NEW Alarm registration Set Time Alarm1 or 2 Sound Type and Volume Alarm1 or 2 time Time for wake up alarm Alarm1 or 2 Alarm1or 2 activation on off Alarm1 or 2 sound Choose an alarm melody Alarm1 or 2 type Choose an alarm type Alarm1 or 2 volume Adjust alarm volume ALARM ...

Страница 95: ...iefly press Record and speak into the microphone to record your voice note 3 Press Stop to stop recording a voice note 4 The voice note is recorded and appears in the all notes list of voice note LISTEN TO A VOICE NOTE You can retrieve any voice notes you wish When the voice notes were saved they were recorded by time and category 1 On the home screen press Start All Programs More Organizer Voice N...

Страница 96: ... this name becomes available for a new voice note RENAME A VOICE NOTE You have the option of renaming a voice note or assigning it to a different category 1 On the home screen press Start All Programs More Organizer Voice Note O 2 Select the voice note to rename 3 Press Menu Rename O 4 Enter a new name 5 Press Done SET AS RINGTONE A VOICE NOTE You have the option of settnig as ringtone 1 On the ho...

Страница 97: ...2 Enter the memo text and press the Done VIEWING A MEMO To view memo details select the memo you want from the list SENDING A MEMO You can send your notes as part of a SMS or email message 1 Scroll to the memo you want 2 Press the Menu Send via Email or Send via Text Message 3 Compose and send a message DELETING A MEMO 1 Scroll to the memo you want 2 Press the Menu Delete 3 Press the O to confirm t...

Страница 98: ...umber using the keypad 4 Press Menu and choose the type of calculation to perform and Equals to perform the operation then press O TIP Press to enter a decimal Use the navigation key to display the available mathematical symbols up for plus down for minus right for division and left for multiplication x Press the to make a negative number Press the C briefly to clear the last digit entered Press th...

Страница 99: ...izer O 2 Select World Time O 3 Select one of the three time zone and press Menu Edit 4 Press the L R to move the time zone line To apply daylight savings to the currently selected time zone press DST Off On 5 Press the Done to save the selected time zone 6 Press the Local time to set the time 7 Repeat from step 3 to select another time zone NOTE In world time screen press Local time to set this zo...

Страница 100: ...ize tasks with your phone the reminder will play at the time it was set on your PC CHANGE A COMPLETED TASK TO INCOMPLETE If you have marked a task as complete on your list and the status changes you can easily go back to the task and change its status to incomplete by activating the task again 1 On the home screen press Start All Programs More Organizer O 2 Select Tasks O 3 Select the task and pre...

Страница 101: ...list 1 On the home screen press Start All Programs More Organizer O 2 Select Tasks O 3 Select the task and press Menu 4 Select Delete Task O MARK A TASK AS COMPLETE To designate a task as inactive or complete you will mark it as complete through the Tasks menu 1 On the home screen press Start All Programs More Organizer O 2 Select Tasks O 3 Select the task and press Complete LOCATE A TASK There ar...

Страница 102: ...ess Menu Sort by Choose a sort option and press O To filter the list by category to sort the list press Menu Filter Choose the category you want displayed TIP To filter your tasks further press Active Tasks or Completed Tasks NOTE Categories only appear in Tasks that are synchronized with your PC TASKS ...

Страница 103: ...his chapter addresses AT T Music applications to play buy identify and join music communities WINDOWS MEDIA PLAYER SHOP MUSIC MUSIC ID XM RADIO MOBILE MUSIC VIDEOS PANDORA COMMUNITY CHAPTER 6 AT T MUSIC ...

Страница 104: ...e ActiveSync to copy media files from a computer to your phone 1 Connect your phone to a computer 2 Start synchronization 3 Open the file directory on the phone using File Explorer 4 Drag the media files and drop them into a folder Windows Media Player automatically retrieves But if the media files do not appear in Library update the library by pressing the Windows Media Player s Menu and selecting Up...

Страница 105: ...playlist Library Allows you to select the library that you want to view Update Library adds new files to the library by searching your phone or a memory card Open File allows you to find and play files that are stored on your phone or a memory card but those are not in the library Open URL allows you to specify a URL address for a streaming service Properties displays information about the selecte...

Страница 106: ...v To move backward in a file press and hold the L To move forward in a file press and hold the R To access the next file press the R To access the previous file press the L To pause or resume playback press O To play the files in the playlist randomly or repeatedly press the Menu Shuffle Repeat Shuffle or Repeat To view the video on a full screen press the Menu Full Screen To stop playback press t...

Страница 107: ...enu Save Playlist 7 Enter the list name and press the Done The list is saved in the My Playlists library Opening the playlist 1 On the player screen press Now Playing You can use various options by pressing the Menu Editing the playlist To change the play order press Menu Move Up or Move Down To delete the selected files press Menu Remove from Playlist To clear the playlist press Menu Clear Now Pl...

Страница 108: ...sized Network Change the connections speed and protocol for playing music and streaming video Library Select whether the player screen or the Library screen is displayed when you open Windows Media Player Skins Change the appearance of the player screen by selecting a new skin Buttons Assign Windows Media Player functions to the keys on your phone to quickly control playback without having to use ...

Страница 109: ...107 Chapter 6 AT T Music This menu connects to AT T s music download site 1 On the home screen press Start All Programs AT T Music O 2 Select Shop Music O SHOP MUSIC ...

Страница 110: ...ource of the song which can be from either radio stereo or headset The handset then begins to analyze the audio signal If a song match is found the screen displays the Artist Name Track Title and Album cover art 3 To purchase the song with ringtone and wallpaper if available highlight get and press the O 4 To share the song ID with another user highlight Share ID O Enter the recipient s phone numb...

Страница 111: ...d wait for analysis GETTING HELP WITH MUSICID 1 Highlight help me out O to select a topic The screen displays a list of helpful topics related to the MusicID application These topics cover IDing a Song Provides information about the analysis process ID Picks and More Describes the process following the successful identification of a song You can choose to purchase the song and wallpaper if availab...

Страница 112: ...lecting XM Radio Mobile from the AT T Music sub menu launches an application which allows the user to listen to streaming audio 1 On the home screen press Start All Programs AT T Music O 2 Select XM Radio Mobile O XM RADIO MOBILE ...

Страница 113: ...g Music Videos from the AT T Music sub menu launches an application called MobiVJ which allows the user to listen to streaming music videos 1 On the home screen press Start All Programs AT T Music O 2 Select Music Videos O MUSIC VIDEOS ...

Страница 114: ...T T Music Selecting Pandora from the AT T Music sub menu launches an application which allows the user to listen to personal radio 1 On the home screen press Start All Programes AT T Music O 2 Select Pandora O PANDORA ...

Страница 115: ...s the O Wallpaper Provides you with color graphic files which can be uses as wallpaper on your handset Highlight an entry and press O Photos Allows you to view some artist specific photos Use the Next and Back buttons to navigate through these pages Bio Provides a biographical description of the artist band Artist Info Provides more specific group member information Discography Provides a descript...

Страница 116: ...resses MEdia Mall applications to shop for Tones Games Graphics Multimedia and Accessing the Media Net Home site SHOP TONES SHOP GAMES SHOP GRAPHICS SHOP MULTIMEDIA SHOP APPLICATIONS MEDIA NET HOME CHAPTER 7 MEDIA MALL ...

Страница 117: ...n options The downloaded files can be stored into the Main Memory or Storage Card found within the My Stuff Phone location Music Tone categories include Featured Artists Answer Tones Search for a specific audio file by name 4 Select an audio file and press the O 5 When you are ready to purchase the audio file press the Buy Now to charge your e wallet account and complete the transaction SHOP TONES ...

Страница 118: ...on screen options 4 Categories include New Releases Retro Arcade Featured Games Search for a specific game by name 5 Select a game entry and press the O 6 When you are ready to purchase the game press the Buy Now to charge your e wallet account and complete the transaction 7 The downloaded applications will be stored in the My Stuff within My Account of AT T Media Net Home SHOP GAMES ...

Страница 119: ...llow the on screen options The downloaded files can be stored in the My Pictures folder found within the My Stuff Phone location These images can be used as wallpaper or included into multimedia messages 4 Select an image entry and press the O 5 When you are ready to purchase the image press the Buy Now to charge your e wallet account and complete the transaction SHOP GRAPHICS ...

Страница 120: ...ultimedia O 3 Follow the on screen options The downloaded files can be stored in the My Document folder found within the My Stuff Phone location These files can be included in multimedia messages 4 Select a video file entry and press the O 5 When you are ready to purchase the file press the Buy Now to charge your e wallet account and complete the transaction SHOP MULTIMEDIA ...

Страница 121: ...All Programs MEdia Mall O 2 Select Shop Applications O 3 Follow the on screen options 4 When you are ready to purchase the application press the Buy Now to charge your e wallet account and complete the transaction 5 The downloaded applications will be stored in the My Stuff within My Account of AT T Media Net Home SHOP APPLICATIONS ...

Страница 122: ...to information such as local weather sports scores horoscope information and quick links to the previously mentioned shopping sites To access this menu option use the following steps 1 On the home screen press the Start All Programs MEdia Mall and MEdia Net Home 2 Press O 3 The MEdia Net Home menu launches the built in browser and launches this AT T homepage MEDIA NET HOME ...

Страница 123: ... CELLULAR VIDEO MEDIA CLIP OPTIONS USING THE VIDEO CATEGORIES CUSTOMIZING CELLULAR VIDEO MY PURCHASES PARENTAL CONTROLS CHAPTER 8 CELLULAR VIDEO ...

Страница 124: ...uploaded video clips from among the following media providers CNN ESPN HBO Mobile Preview or Access Hollywood Video Categories Provides some general content categories from which to begin searching for media TV to Go Entertainment Sports News Weather HBO Mobile and Premium Channel Customize CV Allow you to access the Cellular Video Settings menu where you can configure most of the settings associa...

Страница 125: ... you to the main Cellular Video homepage SHUFFLE REPEAT This feature allows you to toggle between the shuffle or repeat options for your videos you have played and saved to your device FULL SCREEN This feature changes the screen content to remove or include the information regarding the Options or to display the video only Press the 0 key to switch between screen options OPTIONS The following optio...

Страница 126: ...se the L R to make your selection Press to make your selection Buttons Displays the buttons and their options for the media clip application PROPERTIES Displays a Media Player window which gives file specific information such as Length and Location SETTINGS This feature pauses the content and navigates you to the Player Settings menu where you can configure the Media Player s volume setting 1 Use the...

Страница 127: ...efined by AT T s homepage and cannot be changed VIEWING A VIDEO CLIP 1 On the home screen press the Start All Programs Highlight Cellular Video O 2 Use the U D to highlight the video clip from within the Favorites section and press the Select or the O 3 After the stream has been buffered into memory you can choose to either Pause or Play the content Pressing the O toggles the Play and Pause functio...

Страница 128: ...vorites section of the page and highlight one the additional streaming media channels which are not currently in your Favorites list ex Cartoon Network 5 Press the Menu Add to Favorites Add ADDING A VIDEO ALERT When new media is available for upload to your phone such as breaking news you can set your phone to notify you of the new available content 1 On the home screen press the Start All Program...

Страница 129: ...ducts 1 On the home screen press the Start All Programs Cellular Video O 2 Use the U D to highlight the Customize CV O 3 From the Customize CV Options My Purchases O 4 Highlight Purchase History O This provides you with an on screen listing of your to date purchase history for media content 5 Highlight My Account O This provides you with an on screen description of your account details MY PURCHASE...

Страница 130: ...the bottom of the homepage and press the O 3 From the Customize CV Options Parental Controls O 4 Press O to access the MEdia Net parental setup fields 5 From the Parental Control Setup screen use your keypad to enter information into the following fields PIN Code Re enter PIN code contact e mail address 6 Use the navigation keys to highlight the Save O Allow a few minutes for your information to be ...

Страница 131: ... IM E MAIL MOBITV MEDIA NET OFFICE MOBILE CHAPTER 9 IM E MAIL MOBITV MEDIA NET OFFICE MOBILE ...

Страница 132: ...plications AOL Instant Messenger Windows Live Messenger Y Messenger 1 On the home screen press the Start All Programs More IM Email IM O GET XPRESS MAIL Xpress Mail allows users to gain access to both their personal and work e mail on a single device allowing users to best manage multiple e mail accounts and keep up to date with their most current messages 1 On the home screen press the Start All ...

Страница 133: ...ble through your wireless carrier and offers over 100 TV channels worldwide such as MSNBC ABC News Now CNN International FOX News Channel Fox Sports ESPN 3GTV NBC Mobile Bravo To Go Sci Fi Pulse Mobile Telemundo Mobile Discovery Channel TLC The Weather Channel and others that deliver the latest music videos cartoons comedy and more 1 On the home screen press the Start All Programs More MobiTV O Fo...

Страница 134: ...132 Chapter 9 IM E mail MobiTV Media net Office mobile See MEdia Net home in Chapter 7 MEdia Mall MEDIA NET ...

Страница 135: ...Microsoft Office Excel Mobile charts on the go ONENOTE MOBILE Microsoft OneNote Mobile is a tool for notetaking information gathering and multi user collaboration by Microsoft POWERPOINT MOBILE Practice and view your slides with Microsoft Office PowerPoint Mobile while you re on the road WORD MOBILE View Word documents while away from your desk OFFICE MOBILE ...

Страница 136: ...This chapter addresses picture and video functions including CAMERA CAMCORDER MODE CAMERA CAMCORDER OPERATIONS CAMERA CAMCORDER CONTROLS CHAPTER 10 CAMERA ...

Страница 137: ... change the mode to camcorder 3 Press Options Settings 4 Use L R to select Quality Then select the setting you want and select O 5 Press Close NOTE Video clips of higher quality require more memory COPY AN IMAGE TO YOUR PHONE You can upload standard image files from a PC to your phone You should customize the size and resolution of your images for display on the phone screen 1 Connect the phone to ...

Страница 138: ...tart All Programs More Applications Camera 2 Press Options Camcorder to change the mode to camcorder 3 Press Options Settings 4 Use L R to select Self Timer Then select the setting you want and select O 5 Press Close 6 Press O and after the timer interval the video will start record and automatically saved to the default storage location ADJUST PICTURES AND VIDEO FOR LIGHTING CONDITIONS White bala...

Страница 139: ...n press Start All Programs More Applications File Explorer My Pictures 2 Press Menu Edit New Folder EDIT A PICTURE You can actually edit pictures and videos on the Pantech Matrix Pro using the Menu 1 On the home screen press Start All Programs More Applications File Explorer My Pictures 2 Select the picture to edit O 3 Press Menu Edit O Do one of the following To rotate a picture 90 degree clockwi...

Страница 140: ... You can also rotate the view using U D To move forward or backward through the slides press L R SET A PICTURE AS THE HOME SCREEN Any picture you have uploaded can be saved as the background for the home screen 1 On the home screen press Start All Programs More Applications File Explorer My Pictures 2 Select the picture to set as the background O 3 Press Menu Use as Home Screen 4 Use the navigatio...

Страница 141: ...reated folder 1 On the home screen press Start All Programs More Applications File Explorer My Pictures 2 Select the picture to save O 3 Press Menu Save Save As 4 Enter a name for the picture and press Done TIP To cancel all unsaved changes press Cancel VIEW PICTURES ON YOUR PHONE You can view pictures stored on your phone or on a plug in storage card 1 On the home screen press Start All Programs ...

Страница 142: ...im your camera and press O 4 To stop recording press O again or Stop soft key 5 You can see the first frame of recording file Select Options Delete to delete the captured file 6 Select Options Send via Multimedia Msg to attach to multimedia message 7 Play recorded file 8 Press O or View Finder to return to take picture PLAY RECORDED FILE After you ve recorded and stored a video file you can retrieve it...

Страница 143: ...t All Programs More Applications Camera 2 Press Options Camera to change the mode to picture icon 3 Aim your camera and press O 4 Change camera screen to review screen 5 Select Options Delete to delete the captured file 6 Select Options Send via Multimedia Msg to attach to multimedia message 7 Press O or View Finder to return to take picture VIEWING SAVED FILE After a file has been saved it is very ...

Страница 144: ...ARE You can do Video Share by selecting the camera menu 1 On the home screen press Start All Programs More Applications Camera 2 Press Options Video Share 3 Select phone number in the list and press Call CAMERA CAMCORDER OPERATIONS ...

Страница 145: ...4 Press O to apply the chosen values Item Description White Balance Choose white balance in Options Settings W B Default value is Auto Daylight Control of the white value Cloudy Setting of the white value Fluorescent Setting value Incandescent Setting of the white value Effect Choose color effect in Options Settings Effects Default value is Normal Normal Color effect is normal Gray Color effect is...

Страница 146: ...t value is High Low quality is a small file size and High quality is a large file size Low Setting for still shot Normal Setting for still shot High Setting for still shot CAMCORDER MENU The Camcorder Menu allows you to control video features such as resolution and quality and allows you to select the mode and turn the audio on and off 1 On the home screen press Start All Programs More Application...

Страница 147: ...3 Seconds Take a photograph after 3 sec 5 Seconds Take a photograph after 5 sec 10 Seconds Take a photograph after 10 sec Resolution Choose a Resolution in Options Settings Resolution 176x144 Camera resolution is in 176x144 Quality Choose Quality in in Options Settings Quality Default value is High Low quality is a small file size and High quality is a large file size Low Setting for still shot No...

Страница 148: ...es stored in the SD Memory Card CAMERA SETTINGS Camera Settings allows you to control the multi shot count and image prefix 1 On the home screen press Start All Programs More Applications Camera 2 Press Options Settings 3 Use L R to select Advanced Settings 4 Press Camera Settings and change values using the navigation keys and O 5 Press Done to apply the chosen values The camera screen is displaye...

Страница 149: ...imit Recording Sound Recording and File Extension 1 On the home screen press Start All Programs More Applications Camera 2 Press Options Settings 3 Use L R to select Advanced Settings 4 Press Video Settings and change values using navigation keys and press O 5 Press Done to apply the chosen values The camera screen is displayed 6 If you do not wish to apply new values press C Item Description Reco...

Страница 150: ...ff Video Prefix Change video prefix Default video prefix is video Overview of the default hardware button assignments By default these hardware buttons are assigned to camera functions Hardware Button Camera Camcorder Function O Start Record Video Stop Record Video Take a picture L Brightness down R Brightness up U Zoom in D Zoom out CAMERA CAMCORDER CONTROLS ...

Страница 151: ...This chapter addresses Internet services and web browsing For more detailed information contact your service provider USING INTERNET EXPLORER CHAPTER 11 INTERNET EXPLORER ...

Страница 152: ...uick way to add favorites to your phone is to synchronize with your PC using ActiveSync For more information see ActiveSync Help on your PC See also Go to a Web page CHANGE CONNECTION OPTIONS Depending on your location and your access settings you can connect to different networks through Internet Explorer 1 On the home screen press Start All Programs More Internet Explorer 2 Press Menu Tools Opti...

Страница 153: ...lly Fit To Screen Maintains a layout similar to what you see on a desktop computer but makes items smaller and arranges the content so that you can see most of it without having to scroll horizontally Desktop Keeps the same layout and size as on a desktop computer which will require both horizontal and vertical scrolling CLEAR HISTORY COOKIES OR TEMPORARY FILES The Internet Explorer typically stor...

Страница 154: ... DELETE A FAVORITE Any favorite can be deleted from your favorites list at any time 1 On the home screen press Start All Programs More Internet Explorer 2 Press Favorites 3 Select the favorite to delete 4 Press Menu Delete 5 Press Yes to confirm the deletion DISCONNECT FROM THE INTERNET Be sure to disconnect from the Internet when you are finished using it Connections will time out automatically if ...

Страница 155: ...previously set up links you can access them from the main page of Internet Explorer 1 On the home screen press Start All Programs More Internet Explorer 2 Scroll vertically or horizontally to see all available links 3 Press the link GO TO A WEB PAGE The Internet Explorer on your phone accesses web pages by letting you enter the address in the address bar after pressing the 1 On the home screen pre...

Страница 156: ...ible options from the home screen 1 On the home screen press Start All Programs More Internet Explorer 2 Refresh a Web page To refresh a web page use the Menu and select Refresh 1 On the home screen press Start All Programs More Internet Explorer 2 If necessary select the Web page in your Favorites or History list and press Go 3 Press Menu Refresh RETURN TO A WEB PAGE YOU VISITED IN THE SAME SESSI...

Страница 157: ...allows you to select a site you ve already visited and go to that site 1 On the home screen press Start All Programs More Internet Explorer 2 Press Menu History MOVE A FAVORITE TO A FOLDER After you ve created folders in your favorites list you can move any of the sites already on the list into one of the folders 1 On the home screen press Start All Programs More Internet Explorer 2 Press Favorite...

Страница 158: ...idden or not on screen 1 On the home screen press Start All Programs More Internet Explorer 2 Press Menu View Show Pictures 3 A check mark next to Show Pictures indicates that pictures will be displayed on Web pages VIEW A PAGE IN FULL SCREEN MODE You can toggle back and forth between a full screen or minimized screen on your phone s display 1 On the home screen press Start All Programs More Inter...

Страница 159: ...t 5 A new message is created with the page address inserted in the message body ADJUST THE SCROLLING SPEED You will use the scrolling feature of the phone to view web pages it can be adjusted to scroll as slowly or as quickly as you need 1 On the home screen press Start All Programs More Internet Explorer 2 Open a Web page Do one of the following Use the navigation key to scroll from link to link ...

Страница 160: ...This chapter addresses Bluetooth and ActiveSync functions ACTIVESYNC INTERNET SHARING REMOTE DESKTOP BLUETOOTH CHAPTER 12 PC CONNECTIVITY INTERNET SHARING REMOTE DESKTOP BLUETOOTH ACTIVESYNC ...

Страница 161: ...elationship between your PC and the phone Configure an Exchange Server connection to synchronize directly with Exchange Server To synchronize your phone with Exchange Server obtain the name of the Exchange Server your user name password and domain name from your administrator before completing the wizard Choose information types to synchronize NOTE When you finish the wizard ActiveSync synchronizes...

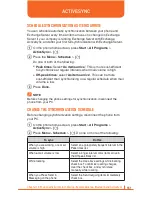
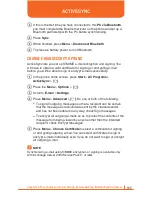
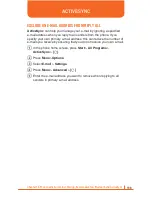
Страница 162: ...of information items that you want to synchronize with Exchange Server 7 To change available synchronization settings select the type of information and press Menu Settings O 8 To change the rules for resolving synchronization conflicts press Menu Advanced O 9 Press Finish CHANGE ACTIVESYNC SETTINGS Once you set up synchronization using the Sync Setup wizard on the PC you can later change your sync...

Страница 163: ...ost efficient than synchronizing on a regular schedule when mail volume is low 3 Press Done NOTE Before changing the phone settings for synchronization disconnect the phone from your PC CHANGE THE SYNCHRONIZATION SCHEDULE Before changing synchronization settings disconnect the phone from your PC 1 On the phone home screen press Start All Programs ActiveSync O 2 Press Menu Schedule O Do one or more...

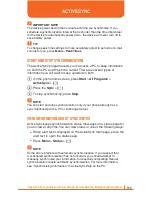
Страница 164: ... phone home screen press Start All Programs ActiveSync O 2 Press the Sync O 3 To stop synchronizing press Stop NOTE You can start and stop synchronization only if your phone already has a sync relationship with a PC or Exchange Server VIEW INFORMATION ABOUT SYNC STATUS ActiveSync keeps synchronization status messages on a status page for you to view at any time You can view status in one of the fo...

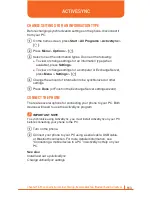
Страница 165: ...press Menu Settings O 4 Change the amount of information to be synchronized or other settings 5 Press Done or Finish in the Exchange Server settings wizard CONNECT THE PHONE There are several options for connecting your phone to your PC Both devices will need to use the ActiveSync program IMPORTANT NOTE To synchronize using ActiveSync you must install ActiveSync on your PC before connecting your p...

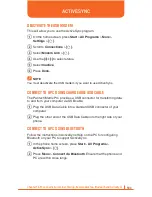
Страница 166: ...ONNECT TO A PC USING CHARGEABLE USB CABLE The Pantech Matrix Pro provides a USB connector for transferring data to and from your computer via USB cable 1 Plug the USB Data Cable into a standard USB connector of your computer 2 Plug the other end of the USB Data Cable into the right side of your phone CONNECT TO A PC USING BLUETOOTH Follow the instructions in ActiveSync Help on the PC for configurin...

Страница 167: ...s Start All Programs ActiveSync O 2 Press the Menu Options O 3 Scroll to E mail Settings 4 Press Menu Advanced O Do one or both of the following To sign all outgoing messages so that a recipient can be certain that the message as received was sent by the claimed sender and has not been altered in any way check Sign messages To encrypt all outgoing e mails so as to protect the contents of the messa...

Страница 168: ... to all senders from the phone If you specify your own primary e mail address this can reduce the number of e mails you receive by ensuring that you do not receive your own e mail 1 In the phone home screen press Start All Programs ActiveSync O 2 Press Menu Options 3 Select E mail Settings 4 Press Menu Advanced O 5 Enter the e mail address you want to remove when replying to all senders in primary...

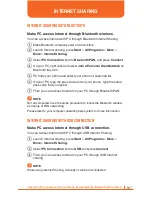
Страница 169: ...d list 6 On your PC type the pass code and on your phone type the same pass code that you typed 7 Then you can access Internet on your PC through Bluetooth PAN NOTE Not all computers have the same procedure to locate the Bluetooth window and setup of PAN networking Please refer to your computer operating help system for more information INTERNET SHARING WITH USB CONNECTION Make PC access Internet ...

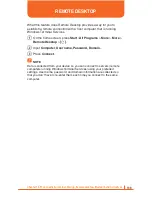
Страница 170: ...ices 1 On the home screen press Start All Programs More More Remote Desktop O 2 Input Computer User name Password Domain 3 Press Connect NOTE Data is collected from your device so you can connect to servers remote computers running Windows Terminal Services using your preferred settings User name password and domain information are collected so that you don t have to re enter them each time you co...

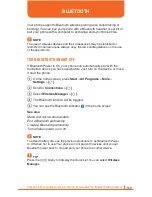
Страница 171: ... with the handsfree device you have used before Just turn on the device or move it near the phone 1 On the home screen press Start All Programs More Settings O 2 Scroll to Connections O 3 Select Wireless Manager O 4 The Bluetooth function will be toggled 5 You can see the Bluetooth indicator in the home screen See also Make your device discoverable End a Bluetooth partnership Create a Bluetooth pa...

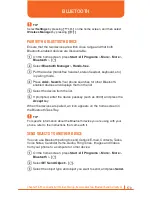
Страница 172: ...Bluetooth enabled devices and displays them in the list 5 Select the device from the list 6 If prompted enter the device passkey such as 0000 and press the Accept key When the devices are paired an icon appears on the home screen in the Bluetooth Task Tray TIP For specific information about the Bluetooth device you are using with your phone refer to the instructions that came with it SEND OBJECTS T...

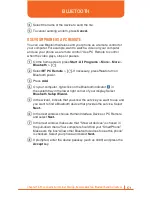
Страница 173: ...y press Yes to turn on Bluetooth power 3 Press Add 4 On your computer right click on the Bluetooth indicator in the system tray in the lower right corner of your display Select Bluetooth Setup Wizard 5 In the wizard indicate that you know the service you want to use and you want to find a Bluetooth device that provides the service Select Next 6 In the next window choose Human Interface Device or PC...

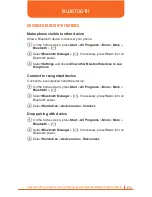
Страница 174: ...ect Settings and check Allow other Bluetooth devices to see this phone Connect to recognized device Connect to a recognized handsfree device 1 On the home screen press Start All Programs More More Bluetooth O 2 Select Bluetooth Manager O If necessary press Yes to turn on Bluetooth power 3 Select Hands free device name Connect Drop pairing with device 1 On the home screen press Start All Programs M...

Страница 175: ...e device name Edit the properties of a recognized device 1 On the home screen press Start All Programs More More Bluetooth O 2 Select Bluetooth Manager Settings O If necessary press Yes to turn on Bluetooth power 3 Select Hands free device name 4 Press Menu Properties 5 Enter Nickname Done TIP Select To change the Bluetooth name of your phone press Start All Programs More More Bluetooth Bluetooth ...

Страница 176: ... CAMERA FILE EXPLORER GET NAVIGATOR JAVA JETCET PDF MOBILE BANKING MY CAST WEATHER SPEED DIAL SYSTEM INFO TASK MANAGER VOICE COMMANDER CHAPTER 13 APPLICATIONS ...

Страница 177: ...175 Chapter 13 Applications Enable camera programs launch and run under the Windows Mobile Application CAMERA ...

Страница 178: ...oll to File Explorer O Enter the following options and press Menu Send Send a file as multimedia message or an Outlook E mail message Edit Access file editing options such as Cut Copy Paste Delete Rename and New Folder Properties Access the file or folder properties View Change the view mode of the files from Icons or List Sort By Change the sort order of the files by Name Date Size or Type My Dev...

Страница 179: ...177 Chapter 13 Applications Your handset comes with GPS navigation Select Get Navigator and then follow the on screen instructions GET NAVIGATOR ...

Страница 180: ...y default My Cast Weather BrainChallange2 Demo and Midnight Pool Demo For the multi MIDlet management this phone provides Application Manager The Application Manager is accessible from the Menu or by pressing the camera key when a MIDlet is excuted If you install any Java applications you can find the applications listed here JAVA ...

Страница 181: ...hone with Westtek s JETCET PDF With the integrity of the original files intact the information can be accessed just as the author intended JETCET PDF does not require any file conversion desktop connection or ActiveSync filters All files are accessible from whenever and wherever For more information check the website http www westtek com JETCET PDF ...

Страница 182: ...ng balance checks account transactions payments etc via a mobile device such as a Pantech Matrix Pro 1 On the home screen press Start All Programs More Applications O 2 Scroll to Mobile Banking O You can download Mobile Banking application through this menu MOBILE BANKING ...

Страница 183: ...181 Chapter 13 Applications Now you can get weather on your cell phone Anytime and anywhere you are For more information check the website http www my cast com MY CAST WEATHER ...

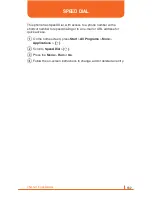
Страница 184: ...ith a shortcut number for speed dialing or to an e mail or URL address for quick access 1 On the home screen press Start All Programs More Applications O 2 Scroll to Speed Dial O 3 Press the Menu Run or Go 4 Follow the on screen instructions to change add or deleted an entry SPEED DIAL ...

Страница 185: ...183 Chapter 13 Applications There may be instances when you wish to see the state about your phone s CPU Memory Storage and Battery SYSTEM INFO ...

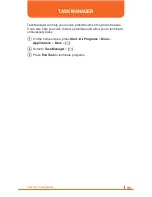
Страница 186: ...oblems when the phone freezes It can also help you solve memory problems and allow you to terminate unnecessary tasks 1 On the home screen press Start All Programs More Applications More O 2 Scroll to Task Manager O 3 Press End Task to terminate programs TASK MANAGER ...

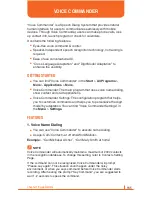
Страница 187: ... contact and start applications Voice Commander Settings The configuration program that helps you to customize commands and helps you to personalize the digit model by adaptation You can find Voice Commander Settings in the Menu Settings FEATURES 1 Voice Name Dialing You can use Voice Commander to execute name dialing Usage Call Contact at Home Work Mobile Example Call Michasel Archer Call Mary Sm...

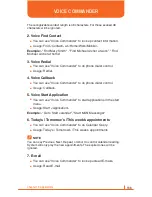
Страница 188: ...u can use Voice Commander to do phone dialer control Usage Callback 5 Voice Start Application You can use Voice Commander to start applications in the start menu Usage Start Application Example Go to Start calendar Start MSN Messenger 6 Today s Tomorrow s This week s appointments You can use Voice Commander to do Calendar Query Usage Today s Tomorrow s This week s appointments NOTE You can say Pre...

Страница 189: ...esume to control music playing The command Resume only works when the Windows Media is running The commands Previous and Next only work when playing all music files Voice Commander only support media files with mp3 and wma format Voice Commander supports the music files in the following folders 1 Playlists or Media files synched by Active Sync 2 My Documents and its subfolder 3 SD card and its subfold...

Страница 190: ...read E mails When a box is checked means the contact can be recognized normally When a box is unchecked means the contact is not in the recognition range When a box is grayed and can t be checked means the name contains some unrecognizable characters such as symbols or marks You can build a voice tag to enable it The default recognition database is limited to 2 000 contacts You can check the leadi...

Страница 191: ...be recognized normally When a box is unchecked means the music file is not in the recognition range When a box is grayed and can t be checked means the name can t be recognized and needs to build a voice label to be recognized properly When the contacts name to appear a design of voice label expression the voice label has existed 4 Advanced Settings Setting Page Sensitivity Setting Set the voice r...

Страница 192: ...cy A trailing lip icon represents voice tag built Voice Tag Settings there is ways to start it After running Voice Command setting press Menu Voice Tag NOTE You can rebuild the voice tag by tapping the Rebuild button again You can delete the voice tag by tapping the Delete button 6 Play After launching the Voice Commander Settings Press Menu Play to hear the pronunciation of this item VOICE COMMAN...

Страница 193: ... the phone number and other important reference information about your phone CHAPTER 14 SETTINGS PHONE SOUNDS PROFILES HOME SCREEN CLOCK ALARM CONNECTIONS SECURITY REMOVE PROGRAMS POWER MANAGEMENT VIDEO SHARE ACCESSIBILITY REGIONAL SETTINGS OWNER INFORMATION ABOUT DEVICE NAME ERROR REPORTING CUSTOMER FEEDBACK WINDOWS UPDATE SET E MAIL MANAGED PROGRAMS ...

Страница 194: ...d calls when your phone is off or out of service range Data calls Forward all data calls Fax calls Forward all fax calls 2 Enter the number to which you want the calls forwarded 3 Make sure enable call forwarding is selected 4 Press Done CALL OPTIONS You can customize settings related to call functions such as an answering option voicemail and SMS access 1 On the home screen press Start All Progra...

Страница 195: ...ion you will be notified of an incoming call if this option is selected 1 On the home screen press Start All Programs More Settings Phone Call Waiting 2 Select or clear Provide call waiting notifications then press Done CALLER ID When you place a call your phone number can be displayed to or hidden from the person to whom you are calling Using this option you can enable or disable the display of you...

Страница 196: ...same digit s as a phone number on the list NETWORKS Find a New Network Search for all available networks You can start searching when the device is out of your service area 1 On the home screen press Start All Programs More Settings Phone Networks 2 Press Menu Find a New Network Select a Network Select a network from the available networks 1 On the home screen press Start All Programs More Setting...

Страница 197: ...ry inquiries NOTE This menu is available only when your SIM card supports Service Dialing Numbers SELECT TTY MODE Your phone is able to operate with TTY Teletypewriter digital modes This feature is system dependent and may not be available in all areas 1 On the home screen press the Start All Programs More 2 Select Settings O 3 Scroll to Phone More TTY Mode O 4 Select TTY mode Full Talk Hear Off 5...

Страница 198: ...tones you can use sounds in wav mid mp3 or wma file formats TIP When you select a sound it plays To hear it again select Menu Play DELETE A SOUND You can only delete sounds that you have added You cannot delete sounds pre installed in the phone 1 On the home screen press Start All Programs More 2 Select Settings O 3 Scroll to Sounds O 4 Press Menu Delete Sounds O 5 Select the sound to delete 6 Pres...

Страница 199: ...click Explorer and double click My Windows Mobile Based Device Do one of the following To save the sound file on your phone double click Application Data double click Sounds and paste the file into Sounds folder To save the sound file on your storage card double click Storage Card and paste the file into the folder you want See also Specify the sound for an event NOTE During playing the music the ...

Страница 200: ...en that profile change its settings and save it again with the same name 1 On the home screen use the U D to select Profile O 2 Select the profile to edit 3 Press the Menu Edit from popup menu 4 Modify the settings and press Done 5 To cancel without saving changes press C TIP To revert to the default profile settings Select a profile and press Menu Reset to default CHANGE THE CURRENT PROFILE If you hav...

Страница 201: ...screen press Start All Programs More Settings Home Screen 2 Select each option Home screen layout Color scheme and Background image 3 Under Time out select the length of time you want the home screen to be displayed if you are not using the device and press Done HOME SCREEN ...

Страница 202: ...e Zone Select your time zone Date Edit the month day or year Time Edit the hour minute and second 2 User to modem time offset 3 Enable NITZ provides the means for serving PLMNs to transfer current identity time Daylight Saving Time and the local timezone to Mobile 4 Press Done ALARM Alarm is mentioned at Chpater 5 Organizer CLOCK ALARM ...

Страница 203: ...ys an icon marked with an X NOTE To change settings for one of the displayed wireless connection types press Menu and press the type of settings you want to change TIP If you connect wireless LAN card to microSD slot you can use WI FI CREATE A DIAL UP CONNECTION Every network connection is different You should gather all of the relevant information or network settings you need before starting this...

Страница 204: ...ollowing information Description Enter a name for the connection Connects to Select the type of network to which you will connect Access point Enter the access point name User name Enter your user name for the GPRS network if required Password Enter your password if required Authentication Type Enter the Authentication Type if required Primary DNS Enter the primary Domain Name System DNS address i...

Страница 205: ... will connect Proxy name port Enter the proxy server name and port number in this form server name port number Type Select the type of proxy connection to create User name Enter your user name for the network to which you will connect Password Enter your password 4 Press Done CREATE A VPN CONNECTION Every network connection is different You should gather all the relevant information or network set...

Страница 206: ...type in IPSec authentication select the type of authentication Pre Shared Key or Certificate If you selected Pre Shared Key in IPSec authentication in IPSec Pre shared key enter the key 4 Press Done DELETE A DIAL UP CONNECTION 1 On the home screen press Start All Programs More Settings Connections 2 Press Dial up 3 Select the connection to delete 4 Press Menu Delete 5 Press Yes DELETE A GPRS CONNEC...

Страница 207: ...Connections 2 Press Menu Advanced Menu Work URL Exceptions 3 Select the URL to edit 4 Press Menu Edit 5 Edit the URL Done MAKE YOUR DEVICE VISIBLE In order for your device to receive beamed information beaming devices or computers must be able to detect it 1 On the home screen press Start All Programs More Settings 2 Press Connections Wireless Manager Bluetooth Menu 3 Select Bluetooth Settings Set...

Страница 208: ...tings 2 Press Connections Modem Link NOTE ActiveSync may not function properly when the modem link function is active To avoid problems deactive the modem link before establishing an ActiveSync connection DOMAIN ENROLL Enrolling a domain will connect your device with company resources 1 On the home screen press Start All Programs More Settings 2 Press Connections Domain Enroll NOTE You will need t...

Страница 209: ...e lock is automatically activated 7 Enter and confirm your password 8 Press Done IMPORTANT NOTE To ensure you can always make emergency calls at any time do not begin your password with the digits of your local emergency number DISABLE THE DEVICE LOCK When you disable a device lock remember to disable the automatic feature that locks the device if it is unused for a specified amount of time 1 On the...

Страница 210: ... when the SIM PIN is set to enable 1 On the home screen press the Start All Programs More 2 Select Settings Security Change SIM PIN 3 Enter the current PIN in the Old PIN field then a new PIN in the New PIN field and re enter the new PIN in the Confirm new PIN field 4 Press Done CHANGING PIN2 A PIN 2 is used for certain functions supported by the SIM card You can change the PIN2 supplied with your SIM...

Страница 211: ...press O DELETE A CERTIFICATE Be careful when deleting certificates select only the certificate you intend to delete Root certificates should only be deleted when you are certain you do not need that security on the phone 1 On the home screen press Start All Programs More 2 Select Settings O 3 Scroll to Security O 4 Select Certificates O Choose one of the following Personal to view the list of personal...

Страница 212: ...rd in the New password field and re enter the new password in the Confirm new password field 4 Press the Done NOTE To ensure the operation the SIM card should be inserted while Device Lock is unlocked MASTER CLEAR When you have purchased your phone all the settings are pre configured and installed Any time you can return your phone to the factory default settings 1 On the home screen press the Start A...

Страница 213: ...e that you select the right program before removing it 1 On the home screen press the Start All Programs More 2 Select Settings O 3 Scroll to Remove Programs 4 Select the program to remove 5 Press Menu 6 Select Remove NOTE Programs that come pre installed in the phone cannot be deleted REMOVE PROGRAMS ...

Страница 214: ... idle before the home screen turns off Keypad light time out Turns off keypad LED after a set period of time Display Brightness Select the brightness level for user preferences Keypad light on The user can select between Any time and Custom time Any time default The keypad light turns on whenever a key is pressed Custom time The keypad light turns on whenever a key is pressed but only during the t...

Страница 215: ...rts which displays a message and a tone Choose Alerts ON or OFF Default value is OFF Auto Record Allows you to turn On or Off the Auto Record which records the Video Share call Choose Auto Record ON or OFF Default value is OFF Recording Location Allows you to set the memory location Choose from Phone Memory or Storage card if inserted IMS Service Allows you to turn the Video Share Service On or Of...

Страница 216: ... select your preferences for the following System font size set the size of the font that is displayed on the screen Multi press time out Set the length of time between key presses when entering text in Multi tap mode Confirmation time out Set the delay before an unconfirmed action times out In call alert volume Set the volume of sounds that play during a call 5 Press Done TIP You need to press Mo...

Страница 217: ... the following Language Select your preferred language Locale Select the locale for the language you selected The locale option automatically changes the format of the remaining options such as date time and currency according to the locale you specify 4 Press Done NOTE You must turn your phone off and on again for the changes to take effect TIP You need to press More in the Settings popup menu to...

Страница 218: ...e phone number E mail address etc using Owner Information setting and save memo using note 1 On the home screen press Start All Programs More 2 Select Settings O 3 Select More O Owner Information 4 Enter the information and press Done OWNER INFORMATION ...

Страница 219: ...hapter 14 Settings You can see your device s information such as Windows Mobile version and software version 1 On the home screen press Start All Programs More 2 Select Settings O 3 Select More O About ABOUT ...

Страница 220: ...ses this information to identify itself to other devices You can change your device name 1 On the home screen press Start All Programs More 2 Select Settings O 3 Select More O Device Name 4 Write your device name and press Done DEVICE NAME ...

Страница 221: ...red No documents or any data contained in them are intentionally sent with the report information To ensure further security the data that is collected is transmitted via a secure connection and is kept confidential and anonymous in a limited access database This approach is in keeping with the privacy regulations of the European Union EU as well as the Fair Information Practice Principles of the F...

Страница 222: ...ngs If you participate in the Customer Experience Improvement Program enable the Feedback Reportig 1 On the home screen press Start All Programs More 2 Select Settings O 3 Select More O Customer Feedback CUSTOMER FEEDBACK ...

Страница 223: ...221 Chapter 14 Settings You can update your Windows Mobile device using this fuction 1 On the home screen press Start All Programs More 2 Select Settings O 3 Select More O Windows Update WINDOWS UPDATE ...

Страница 224: ...E mail account 1 On the home screen press Start All Programs More 2 Select Settings O 3 Select More More O Setup E mail O 4 Write your E mail address and password 5 Press Next and follow the instructions to register your E mail account SETUP E MAIL ...

Страница 225: ...resolve problems when the phone freezes It can also help you solve memory problems and allow you to terminate unnecessary programs 1 On the home screen press Start All Programs More 2 Select Settings O 3 Select More More O Managed Programs MANAGED PROGRAMS ...

Страница 226: ... are many games included with your Pantech Matrix Pro BRAIN CHALLENGE V2 DEMO BUBBLE BREAKER GUITAR HERO 3 MOBILE JEWEL QUEST II MIDNIGHT POOL DEMO MS PAC MAN DEMO SCRABBLE SOLITAIRE TETRIS GAMES CHAPTER 15 ...

Страница 227: ...ach and entertaining easy solution for keeping your brain alert Using various amusing exercises train your brain whenever and wherever you want Your coach will follow you everywhere on your mobile phone START A GAME OF BRAIN CHALLENGE 1 On the home screen press Start All Programs More Games Brain Challenge 2 Open the device sideways to play 3 Start game Daily Brain Test or Training Room 4 Set Brai...

Страница 228: ...gain to burst the bubbles BREAKER BONUS If you manage to leave fewer than five bubbles on the board you will be rewarded with more points at the conclusion of the game UNDO Moves in Bubble Breaker can be undone 1 To take back the last move you made press Menu Undo START A GAME OF BUBBLE BREAKER 1 On the home screen press Start All Programs More Games Bubble Breaker SET BUBBLE BREAKER OPTIONS Bubble...

Страница 229: ...MegaShift A combination of the shifter and continuous styles where bubbles will shift down and to the right while empty columns will fill on the left Breakers Changes the color of the bubbles from Colorful to Grayscale VIEW BUBBLE BREAKER STATISTICS Bubble Breaker records your statistics for each playing style 1 Press Menu Statistics Games The total number of games played Average The average score...

Страница 230: ... through 3 venues each with 4 set songs and an encore Shred as your favorite characters on four authentic Gibson guitars in three killer venues Unlock guitars earn achievements and break records Hit the right notes to drive the crowd wild with star power START A GAME OF GUITAR HERO 3 MOBILE 1 On the home screen press Start All Programs More Games Guitar Hero 3 Mobile 2 Start a game by selection Ca...

Страница 231: ...il in search of the grandest Jewel Board ever Guide him through the mystery as he explores Africa in search of jewels and his lost love START A GAME OF JEWEL QUEST II 1 On the home screen press Start All Programs More Games Jewel Quest II 2 Start New Game For more information check the website http www iplay com JEWEL QUEST II ...

Страница 232: ...ball rules depending on your preference Win a match and you re sure to leave with your opponents respect Lose and you ll be lucky to walk out with an empty wallet START A GAME OF MIDNIGHT POOL 1 On the home screen press Start All Programs More Games Midnight Pool 2 Open the device sideways to play 3 Start game Tournament or Versus or Challenges 4 Set Midnight Pool Options SOUND MUSIC AIMING LINES ...

Страница 233: ... eaten for bonus points 200 400 800 and 1600 points if all 4 are eaten before they change back to their normal colors Fruit bonuses can be consumed for increasing point values twice per level As the levels increase the speed and difficulty increase as well There are however some notable differences There are now six different mazes four styles with 5 colors and filled in walls compared with the ori...

Страница 234: ...While it may be possible to reach the 256th board using the rack test cheat available as a DIP switch usable through MAME or other arcade emulator the actual arcade hardware will crash at or around the 134th board At this point in the game a bug in the code causes invalid data tables to be used for a subroutine which is supposed to draw invisible characters which slow down the ghosts in the tunnel...

Страница 235: ... phone or enjoy pass n play with a friend Easily keep track of your game scores and statistics Pause when you have to and then pick up where you stopped Fun new features appeal to both wordplay mavens and casual gamers START A GAME OF SCRABBLE BLAST 1 On the home screen press Start All Programs More Games Scrabble 2 Start game by selecting DEMO 3 Set Scrabble Opitons Music Sound Vibration Tutorial...

Страница 236: ... want to move and then press the number or character above the stack to which you want to move the card 2 To move a card up to one of the four stacks in the right hand corner of the screen press the number above the card in the lower stack and then press U PLAY SOLITAIRE 1 Move any aces on the seven stacks to the four card spaces at the top of the screen and then make any other available plays 2 W...

Страница 237: ... or battle the computer in your phone Block your opponent s efforts to clear lines Race a two minute clock in Ultra and try Forty Line clearing 40 lines as fast as you can Plus enjoy the famous single player Marathon mode that made Tetris a phenomenon START A GAME OF TETRIS 1 On the home screen press Start All Programs More Games Tetris 2 Start game by selecting SINGLE PLAYER Set Tetris Options SO...

Страница 238: ... terms and conditions of services and the warranty for your phone Please review them thoroughly SAFETY INFORMATION FOR WIRELESS HANDHELD PHONES PRECAUTIONS SAFETY INFORMATION FOR FCC RF EXPOSURE SAR INFORMATION FCC INDUSTRY COMPLIANCE FCC HEARING AID COMPATIBILITY REGULATIONS FOR WIRELESS DEVICES FDA CONSUMER UPDATE PROTECT YOUR WARRANTY MANUFACTURER S WARRANTY CHAPTER 16 SAFETY AND WARRANTY ...

Страница 239: ... Report 86 1986 ICNIRP 1996 Those standards were based on comprehensive and periodic evaluations of the relevant scientific literature For example over 120 scientists engineers and physicians from universities government health agencies and industry reviewed the available body of research to develop the ANSI Standard C951 The design of your phone complies with the FCC guidelines and those standards...

Страница 240: ... portable wireless equipment in the area over the airbag or in the air bag deployment area If in vehicle wireless equipment is improperly installed and the air bag inflates serious injury could result WARNING Failure to follow these instructions may lead to serious personal injury and possible property damage Warning Operating certain parts of this system requires user attention Diverting attention...

Страница 241: ...r when the phone is turned on Do not carry the phone in a breast pocket Use the ear opposite the pacemaker to minimize the potential for interference If you have any reason to suspect that interference is taking place turn your phone OFF immediately Other medical devices If you use any other personal medical device consult the manufacturer of your device to determine if they are adequately shielde...

Страница 242: ... explosive atmosphere and obey all signs and instructions Sparks in such areas could cause an explosion or fire resulting in bodily injury or even death Areas with a potentially explosive atmosphere are often but not always clearly marked They include fueling areas such as gas stations below deck on boats fuel or chemical transfer or storage facilities vehicles using liquefied petroleum gas such as ...

Страница 243: ...led beverages DO NOT use unauthorized accessories DO NOT disassemble the phone or its accessories If service or repair is required return unit to an authorized AT T cellular service center If unit is disassembled the risk of electric shock or fire may result DO NOT short circuit the battery terminals with metal items etc Keep your mobile phone and its accessories out of the reach of children and pe...

Страница 244: ...viously set by both U S and international standards bodies The design of this phone complies with the FCC guidelines and these international standards Use only the supplied or an approved antenna Unauthorized antennas modifications or attachments could impair call quality damage the phone or result in violation of FCC regulations Do not use the phone with a damaged antenna If a damaged antenna come...

Страница 245: ... 2 0 cm separation distance between the user s body and the back of the phone including the antenna The use of belt clips holsters and similar accessories should not contain metallic components in its assembly The use of accessories that do not satisfy these requirements may not comply with FCC RF exposure requirements and should be avoided NOTE For more information about RF exposure please visit ...

Страница 246: ...ecause the phone is designed to operate at multiple power levels so as to use only the power required to reach the network In general the closer you are to a wireless base station antenna the lower the power output Before a phone model is available for sale to the public it must be tested and certified to the FCC that it does not exceed the limit established by the government adopted requirement fo...

Страница 247: ...er liquids expose to fire explosion or other hazard Only use the battery for the system for which it is specified Only use the battery with a charging system that has been qualified with the system per this standard Use of an unqualified battery or charger may present a risk of fire explosion leakage or other hazard Do not short circuit a battery or allow metallic conductive objects to contact bat...

Страница 248: ...ding to FCC part 15 105 NOTE This equipment has been tested and found to comply with the limits for a Class B digital device pursuant to Part 15 of the FCC Rules These limits are designed to provide reasonable protection against harmful interference in a residential installation This equipment generates uses and can radiate radio frequency energy and if not installed and used in accordance with th...

Страница 249: ...sorption rate SAR for uncontrolled environment general population exposure limits specified in ANSI IEEE Std C95 1 1992 and had been tested in accordance with the measurement procedures specified in FCC OET Bulletin 65 Supplement C 2001 and IEEE Std 1528 2003 Ministry of Health Canada Safety Code 6 The standards include a substantial safety margin designed to assure the safety of all persons regardl...

Страница 250: ...s to assist hearing device users find phones that may be compatible with their hearing devices Not all phones have been rated Phones that are rated have the rating on their box or a label located on the box The ratings are not guarantees Results will vary depending on the user s hearing device and hearing loss If your hearing device happens to be vulnerable to interference you may not be able to us...

Страница 251: ...ded by the Alliance for Telecommunications Industries Solutions ATIS The U and UT marks are referenced in Section 20 19 of the FCC Rules The HAC rating and measurement procedure are described in the American National Standards Institute ANSI C63 19 standard For information about hearing aids and digital wireless phone FCC Hearing Aid Compatibility and Volume Control http www fcc gov cgb dro hearin...

Страница 252: ...s or in determining the reasons for inconsistent results 2 What is FDA s role concerning the safety of wireless phones Under the law FDA does not review the safety of radiation emitting consumer products such as wireless phones before they can be sold as it does with new drugs or medical devices However the agency has authority to take action if wireless phones are shown to emit radiofrequency ene...

Страница 253: ...igher power than do the wireless phones themselves the RF exposures that people get from these base stations are typically thousands of times lower than those they can get from wireless phones Base stations are thus not the subjects of the safety questions discussed in this document 3 What kinds of phones are the subjects of this update The term wireless phone refers here to hand held wireless pho...

Страница 254: ...oma meningioma or acoustic neuroma tumors of the brain or salivary gland leukemia or other cancers None of the studies demonstrated the existence of any harmful health effects from wireless phone RF exposures However none of the studies can answer questions about long term exposures since the average period of phone use in these studies was around three years 5 What research is needed to decide wh...

Страница 255: ... include both laboratory studies and studies of wireless phone users The CRADA will also include a broad assessment of additional research needs in the context of the latest research developments around the world 7 How can I find out how much radiofrequency energy exposure I can get by using my wireless phone All phones sold in the United States must comply with Federal Communications Commission FC...

Страница 256: ...in watts kg or milliwatts g of matter This measurement is used to determine whether a wireless phone complies with safety guidelines 9 What steps can I take to reduce my exposure to radiofrequency energy from my wireless phone If there is a risk from these products and at this point we do not know that there is it is probably very small But if you are concerned about avoiding even potential risks ...

Страница 257: ...nes can interact with some electronic devices For this reason FDA helped develop a detailed test method to measure electromagnetic interference EMI of implanted cardiac pacemakers and defibrillators from wireless telephones This test method is now part of a standard sponsored by the Association for the Advancement of Medical instrumentation AAMI The final draft a joint effort by FDA medical device m...

Страница 258: ...hones http www fda gov cdrh phones index html Federal Communications Commission FCC RF Safety Program http www fcc gov oet rfsafety International Commission on Non Ionizing Radiation Protection http www icnirp de World Health Organization WHO International EMF Project http www who int emf National Radiological Protection Board UK http www nrpb org uk FDA CONSUMER UPDATE ...

Страница 259: ...er than the AT T product Be careful Some of these products may not be compatible to use with your AT T product and may damage the unit or cause it to malfunction If service is required on your unit and it is determined that a non AT T accessory has created the problem with your unit the Warranty will not apply In addition if the unit has already suffered irreversible damage by reason of a non comp...

Страница 260: ...ronic serial number has been removed altered or defaced c Damage from exposure to moisture humidity excessive temperatures or extreme environmental conditions d Damage resulting from connection to or use of any accessory or other product not approved or authorized by the Company e Defects in appearance cosmetic decorative or structural items such as framing and non operative parts f Product damage...

Страница 261: ...NDER THIS WARRANTY IS LIMITED TO THE REPAIR OR REPLACEMENT PROVIDED ABOVE AND IN NO EVENT SHALL THE COMPANY S LIABILITY EXCEED THE PURCHASE PRICE PAID BY PURCHASER FOR THE PRODUCT ANY IMPLIED WARRANTIES INCLUDING ANY IMPLIED WARRANTY OF MERCHANTABILITY OR FITNESS FOR A PARTICULAR PURPOSE SHALL BE LIMITED TO THE DURATION OF THIS WRITTEN WARRANTY ANY ACTION FOR BREACH OF ANY WARRANTY MUST BE BROUGHT...

Отзывы: