background image

AT-UHD-SW-52ED

19

Device Operation

Setting Static IP Mode using the Front Panel

By default, the AT-UHD-SW-52ED is set to DHCP mode.  Once connected to a network, and if a DHCP server is 

found (or available), the AT-UHD-SW-52ED will be assigned an IP address on the network, and no further network 

configuration is required.  However, in some cases, a static IP assignment may be desired.  This procedure can be 

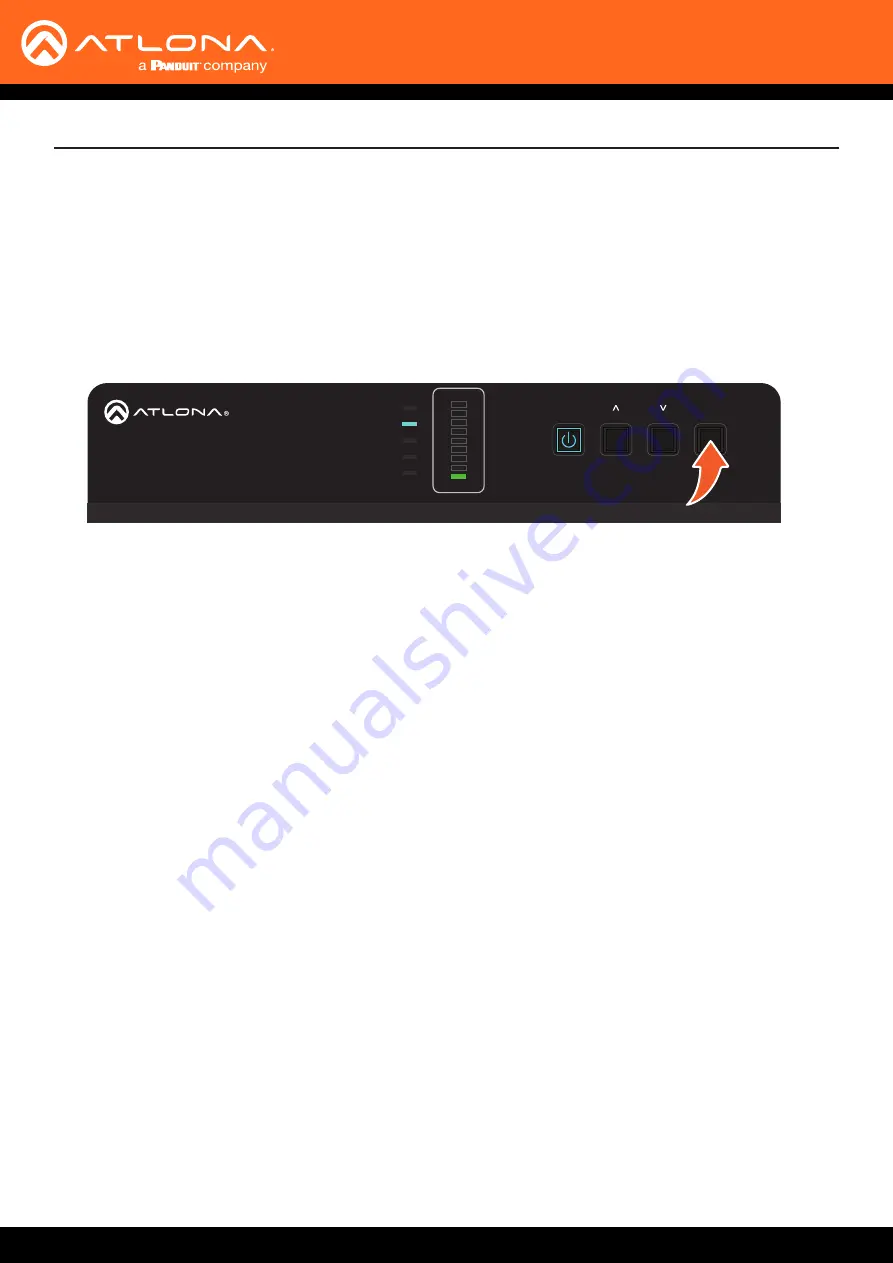
done through the web server (see previous page) or by using the front-panel buttons, as shown below.

1. 

Verify that the AT-UHD-SW-52ED is powered.

2. 

Press and hold the 

INPUT

 button for 15 seconds, then release the button.

HDMI 1

HDMI 2

HDMI 3

HDMI 4

HDMI 5

VOLUME

AT-UHD-SW-52ED

POWER

INPUT

S/PDIF OUT

RX TX

RS-232

LAN

FW

DC 48V

+

-

1

2

3

4

5

HDMI IN

HDMI OUT

CAT5e/6/7 OUT

AUDIO OUT

IR

L

R

P S

S

IN

OUT

3.  The 

POWER

 button will flash four times to indicate that the AT-UHD-SW-52ED is in static IP mode.  The following 

IP settings are assigned, automatically:


IP Address: 192.168.1.254


Subnet: 255.255.0.0


Gateway: 192.168.1.1

Содержание ATLONA AT-UHD-SW-52ED

Страница 1: ...AtlonaManuals Switchers AT UHD SW 52ED Five Input HDMI Switcher with Mirrored HDMI HDBaseT Outputs 4K UHD ...

Страница 2: ...AT UHD SW 52ED 2 Version Release Date Notes 1 Apr 2020 New manual format Version Information ...

Страница 3: ...uct go to http atlona com registration Sales Marketing and Customer Support Welcome to Atlona Operating Notes Main Office Atlona Incorporated 70 Daggett Drive San Jose CA 95134 United States Office 1 877 536 3976 US Toll free Office 1 408 962 0515 US International Sales and Customer Service Hours Monday Friday 6 00 a m 4 30 p m PST http atlona com International Headquarters Atlona International AG...

Страница 4: ...rms New Products 10 years from proof of purchase date for hardware electronics products purchased on or after June 1 2013 3 years from proof of purchase date for hardware electronics products purchased before June 1 2013 Lifetime Limited Product Warranty for all cable products Limited Product Warranty Terms Refurbished B Stock Products and Discontinued Products 3 years from proof of purchase date ...

Страница 5: ...ricts or states do not allow the exclusion or limitation of relief special incidental consequential or indirect damages or the limitation of liability to specified amounts so the above limitations or exclusions may not apply to you Exclusive Remedy To the maximum extent permitted by law this limited product warranty and the remedies set forth above are exclusive and in lieu of all other warranties...

Страница 6: ... 5 Do not use this product near water 6 Clean only with a dry cloth 7 Do not block any ventilation openings Install in accordance with the manufacturer s instructions 8 Do not install or place this product near any heat sources such as radiators heat registers stoves or other apparatus including amplifiers that produce heat 9 Do not defeat the safety purpose of a polarized or grounding type plug A...

Страница 7: ...elnet Port 20 Telnet Login Mode 21 Setting the Host Name 22 Video Switching 23 Enabling Disabling Auto Switching 23 Selecting the Input 24 Resetting to Factory Defaults 25 Using the Web Server 25 Using the Front Panel 26 Audio Management 27 Adjusting Output Volume 27 Audio Output Muting 28 User Management 29 Changing the Administrator Password 29 Adding Users 30 Editing Deleting Users 31 EDID Mana...

Страница 8: ... of Contents Appendix 49 Updating the Firmware 49 Using the Web Server 49 Using the USB Interface 50 Mounting Instructions 52 Single Unit Rack Installation 52 Dual Unit Rack Installation 53 Flat Surface 54 Specifications 55 ...

Страница 9: ...tegration featuring a compact 1U half rack width enclosure that is easily installed with the included 19 rack mount brackets Two units can be mounted side by side The AT UHD SW 52ED adds 4K UHD performance and extended distance HDBaseT transmission to Atlona s HDMI small switcher family for a unique solution for professional integration applications Internal HDBaseT and video distribution eliminat...

Страница 10: ...port A solid blue indicator represents the active input being used 2 VOLUME Displays the output audio level Refer to LED Indicators page 16 for more information 3 POWER Press this button to toggle between on and standby power states When in standby A V is muted When on A V muting will be disabled 4 Cursor Buttons Press and release these buttons to increase or decrease the audio output volume on th...

Страница 11: ...ver or other audio output device 5 HDBaseT OUT Connect a category cable from this port to a the HDBaseT IN port of a compatible receiver unit 6 FW Connect a USB to mini USB cable to this port from a computer for firmware updates 7 IR IN OUT Connect the included 5 pin captive screw block to this port 8 LAN Connect an Ethernet cable from this port to the Local Area Network LAN The AT UHD SW 52ED inc...

Страница 12: ... signals Unbalanced output audio is not supported Audio 1 2 3 1 2 3 GND GND Connect the included 2 pin captive screw connector to the DC 48V power receptacle on the rear of the unit Insert the positive and negative leads from the power supply into the terminals of the 2 pin captive screw connector block as shown P O S W h i t e B l a c k N E G Power HDMI 1 HDMI 2 HDMI 3 HDMI 4 HDMI 5 VOLUME POWER ...

Страница 13: ...et 100 meters 330 feet 100 meters IMPORTANT Stranded or patch cable is not recommended due to performance issues Sheilded cables are strongly recommended to minimize signal noise and interference Core Shielding CAT5e CAT6 CAT6a CAT7 Solid UTP unshielded N A STP sheilded 4 Connect an Ethernet cable from the LAN port to the Local Area Network LAN 5 OPTIONAL Connect the included 5 pin captive screw c...

Страница 14: ... AT UH D S W 52E D POW ER INP UT H D M I H D M I Set Top Box AT PA100 G2 Bookshelf Speakers FW POW ER LINK AT UHD EX 100 CE R X LAN 4 med ia4 SET T OP BOX OK 224 E t h e r n e t AT VGW HW AT VTP 800 E t h e r n e t P o E ETHE RNET HDM I OUT MDP OUT DC 19V 1 2 AT VG W 25 0 Ge ne ric SPEAK ER SYSTE MS Ge ne ric SPEAK ER SYSTE MS A u d i o A u d io A m p lif ie r AT P A10 0 G2 MIC LINE MUT E BAS S IN...

Страница 15: ... the AT UHD SW 52ED is unable to detect a DHCP server within 15 seconds then the unit will use a self assigned IP address within the range of 169 254 xxx xxx If this occurs connect the AT UHD SW 52ED to a computer running Microsoft Windows and follow the procedure below 1 Click Start Settings Control Panel Network and Sharing Center 2 Click Change adapter settings 3 Right click on the adapter that...

Страница 16: ...ume level is approaching audio clipping Solid red Audio clipping POWER Solid blue Unit is powered and in normal operating mode A V muting is disabled Solid red Unit is powered and in standby mode In this mode A V will be muted Press the POWER button to place the unit in normal operating mode Off Unit is not powered Check the power supply and make sure it is securely fastened to the captive screw c...

Страница 17: ...Server page 37 The default username and password are listed below Username root Password Atlona 2 Click Network Setup in the menu bar 3 Locate the MAC address field as shown below This is the hardware address of the AT UHD SW 52ED Getting the MAC Address MAC address Device Operation NOTE When a setting within the Network Settings page is being modified the background color will switch from white t...

Страница 18: ...ystem administrator and obtain a available IP address If the AT UHD SW 52ED is assigned an IP address which is already in use by another device it may cause either network issues and or the AT UHD SW 52ED will be not accessible 1 Login to the web server Refer to Introduction to the Web Server page 37 The default username and password are listed below Username root Password Atlona 2 Click Network S...

Страница 19: ... through the web server see previous page or by using the front panel buttons as shown below 1 Verify that the AT UHD SW 52ED is powered 2 Press and hold the INPUT button for 15 seconds then release the button HDMI 1 HDMI 2 HDMI 3 HDMI 4 HDMI 5 VOLUME AT UHD SW 52ED POWER INPUT S PDIF OUT RX TX RS 232 LAN FW DC 48V 1 2 3 4 5 HDMI IN HDMI OUT CAT5e 6 7 OUT AUDIO OUT IR L R P S S IN OUT 3 The POWER ...

Страница 20: ...ment the default Telnet port can be changed 1 Login to the web server Refer to Introduction to the Web Server page 37 The default username and password are listed below Username root Password Atlona 2 Click Network Setup in the menu bar 3 Locate the Telnet Port field and enter the desired port in the field Device Operation 4 Click Save Settings to commit changes Click Cancel to abort changes ...

Страница 21: ...N to prompt for user credentials Set this button to OFF to bypass user credentials request Telnet Login Mode When a Telnet session is requested the AT UHD SW 52ED provides the option to prompt for user credentials or bypass authentication before the Telnet session begins Prompting for credentials can be enabled or disabled When prompting for user credentials use the same login information required...

Страница 22: ...efault the AT UHD SW 52ED is assgned a hostname which is constructed as follows SW52ED last six digits of MAC address For example a default hostname might look like this SW52ED 006154 This value can be changed to easily identify the AT UHD SW 52ED within the Atlona Management System AMS or a network If using a custom hostname it must meet the hostname standards defined here https tools ietf org ht...

Страница 23: ...menu bar 3 Click the Auto Switch drop down list and select On to enable auto switching Auto switching is disabled by default If auto switching is not desired select Off from the drop down list 4 Auto switching configuration is complete NOTE The AT UHD SW 52ED retains the currently selected input even after the unit is powered off then powered on The AT UHD SW 52ED provides auto switching capabilit...

Страница 24: ...h drop down list and select On to enable auto switching Auto switching is disabled by default If auto switching is not desired select Off from the drop down list 4 Selection of the active input is complete 5 To select the input using the front panel buttons press and release the INPUT button to cycle through each of the available inputs on the unit Selecting the Input The active input can be selec...

Страница 25: ...ername root Password Atlona 2 Click Settings in the menu bar 3 Click the Reset button next to Factory Default 4 The following message will be displayed at the top of the screen Click OK to continue with the factory default reset procedure Click Cancel to abort the process 5 Once the factory default process is complete the web server Login screen will be displayed 6 The factory reset process is com...

Страница 26: ...button 3 Simultaneously press and hold the INPUT and POWER buttons for 15 seconds Using the Front Panel HDMI 1 HDMI 2 HDMI 3 HDMI 4 HDMI 5 VOLUME AT UHD SW 52ED POWER INPUT S PDIF OUT RX TX RS 232 LAN FW DC 48V 1 2 3 4 5 HDMI IN HDMI OUT CAT5e 6 7 OUT AUDIO OUT IR L R P S S IN OUT 4 The input indicator will switch to HDMI 1 5 Factory reset is complete ...

Страница 27: ...s Audio output is always downmixed to two channel stereo 1 Login to the web server Refer to Introduction to the Web Server page 37 The default username and password are listed below Username root Password Atlona 2 Click Settings in the menu bar 3 Under Audio Settings click and drag the Volume slider to adjust the audio output level The current output volume in decibels will be displayed in the Vol...

Страница 28: ...below Username root Password Atlona 2 Click Settings in the menu bar 3 Locate the Audio Settings section 4 Click the drop down list for the desired output For example to mute the audio output on the ANALOG OUT port click the L R Audio Mute drop down list and select on To re enable the audio for that output select off from the drop down list Device Operation ...

Страница 29: ...nage other users Up to three additional users can be created 1 Login to the web server Refer to Introduction to the Web Server page 37 The default username and password are listed below Username root Password Atlona 2 Click Config in the menu bar 3 Click the Password field and enter the new password 4 Click the Save Setting to commit changes To login with the new username close the web session the...

Страница 30: ...rname and password are listed below Username root Password Atlona 2 Click Config in the menu bar 3 Enter the desired username and password for the desired user field User 1 User 2 and User 3 4 Click Save Setting to commit changes 5 To login with the new username close the web session then enter the username and password on the Login page ...

Страница 31: ... bar a Click in the Username or Password field for the desired user and update the current information b Click Save Setting to commit changes Click Cancel to abort changes a Click Delete in the row next to the user to be deleted Note that no prompt will be provided to confirm the deletion of the desired user The username and password of a user can be changed using this method Editing Users Deletin...

Страница 32: ...igital audio support ATL 1080P 3D 2CH 1920 x 1080p 60 Hz with 3D and two channel audio support ATL 1080P 3D Multi CH 1920 x 1080p 60 Hz with 3D and multichannel audio support ATL 1080P 3D DD 1920 x 1080p 60 Hz with 3D and Dolby Digital audio support ATL 720P 2CH 1280 x 720p 60 Hz with two channel audio support ATL 720P DD 1280 x 720p 60 Hz with Dolby Digital audio support ATL 1280x800 RGB 2CH 1280...

Страница 33: ...p down list next to the port that is connected to the display device and select the desired EDID preset For example if the HDMI IN 1 port is connected to a display click the Input 1 drop down list and select the EDID 5 EDID preset selection is complete ...

Страница 34: ... 1920x1080p at 60Hz 16 9 Modeline 1920x1080 148 500 1920 2008 2052 2200 1080 1084 1089 1125 hsync vsync Detailed timing 2 1920x1080p at 50Hz 16 9 Modeline 1920x1080 148 500 1920 2448 2492 2640 1080 1084 1089 1125 hsync vsync Detailed timing 3 1280x720p at 60Hz 16 9 Modeline 1280x720 74 250 1280 1390 1430 1650 720 725 730 750 hsync vsync Detailed timing 4 1280x720p at 50Hz 16 9 Modeline 1280x720 74...

Страница 35: ...ed in MEM_1 6 The saved EDID will appear next to the memory location as shown below 7 Click any of the Input drop down list boxes Note that the stored EDID appears as an available EDID preset for each available input on the AT UHD SW 52ED 8 The EDID storing procedure is completed Saved EDID NOTE Once an EDID is written to a memory location it can be overwritten with a different EDID when desired T...

Страница 36: ...d 1 Login to the web server Refer to Introduction to the Web Server page 37 The default username and password are listed below Username root Password Atlona 2 Click EDID in the menu bar 3 Locate the HDCP Settings section 4 Click the drop down list next to the desired input For example clicking the drop down list next to Input 2 and selecting Noncompliant will instruct the source device to send non...

Страница 37: ...AN port on the AT UHD SW 52ED and the network 2 Launch a web browser and enter the IP address of the unit If the default static IP address is being used enter 192 168 1 254 3 The AT UHD SW 52ED Login page will be displayed Introduction to the Web Server 4 Enter the username and password in the Username and Password fields The default username and password are listed below Username root Password At...

Страница 38: ...nning Always make sure to check the AT UHD SW 52ED product page on the Atlona web site for the latest version of firmware On Time d h m s Displays how long the system has been powered since the last reboot reset Active Input The currently selected active input Signal Type The type of input signal Video Format The input resolution of the source device Aspect Aspect ratio of the input signal Color S...

Страница 39: ... Subnet Enter the subnet mask of the AT UHD SW 52ED in this field This field will only be available when DHCP is set to OFF Gateway Enter the gateway router IP address in this field This field will only be available when DHCP is set to OFF Telnet Port Enter the desired Telnet port for Telnet sessions in this field The default port is 23 Refer to Changing the Telnet Port page 20 for more informatio...

Страница 40: ...Defaults page 25 for more information Source Click this drop down list to select the desired input Available inputs are HDMI IN 1 through HDMI IN 5 Volume Click and drag this slider to adjust the output volume Output volume is measured in decibels dB and ranges from 80 to 15 dB The default setting is 0 dB HDMI Audio Mute Click this drop down list to control HDMI audio output muting If set to on th...

Страница 41: ...ttings for both local and HDBaseT RS 232 control Username old This field cannot be changed root is the administrator user Password old Enter the current password for the root username in this field The default password is Atlona Username new Enter the new username in this field Password new Enter the new password in this field PW again Verify the new password by retyping it in this field User 1 Us...

Страница 42: ...client to detect the end of a character stream The following options are available 1 or 2 System Sets the RS 232 port settings and used for local control by a third party control system Output2 If the AT UHD SW 52ED is connected to a device such as the AT UHD EX 100CE RX PSE the drop down list boxes will be disabled and the HDBaseT baud rate will be locked at 115200 If the AT UHD SW 52ED is connec...

Страница 43: ...t displays In addition eight memory locations are available for storing captured EDID data If an EDID is stored in a memory location it will also be added to the list available EDID selections EDID Page This page provides controls for selecting and storing EDID data Refer to EDID Management page 32 for more information EDID listing STD ATL 2160P 2CH ATL 1080P 2CH ATL 2160P Multi CH ATL 1080P Multi...

Страница 44: ... is detected However there may be applications where sending HDCP content is not desired Setting the port to the OFF position will instruct the source to send non HDCP content to the display Note that not all sources have this capability NOTE Setting this feature to OFF for any source does not provide decryption of HDCP content to non HDCP compliant sink devices Sources such as Mac computers and t...

Страница 45: ...on Display switches on off source audio video signal always on DispSW AVSW Display switches on off source audio video signal switches on off AV SW Display is always on source audio video signal switches on off Always ON Both source and display are always on Setting Description Audio Out Volume and mute buttons will control the volume output of the AT UHD SW 52ED RS 232 Volume Mute buttons will sen...

Страница 46: ...nds Available values are 15 seconds to 15 minutes Display Warm Up Timer Click this drop down list to select the display warm up time interval Available values are 10 to 300 seconds The default value is 10 seconds Control Type Click this drop down to select the control type Available settings are CEC IP and RS 232 When this drop down list is set to CEC the RS 232 IP Commands window group will be hi...

Страница 47: ...password in this field ASCII Hex Click these radio buttons to set the desired data transmission method Test Click these buttons to send the appropriate data to the unit being controlled On Off Volume Volume Mute Enter the appropriate ASCII or Hex data string in each of these fields Refer to the user manual for the display or device being controlled for the proper command strings Feedback Enter the...

Страница 48: ...mware Choose File Click this button to select the firmware file to be uploaded to the AT UHD SW 52ED Note that this button is available for both the master firmware and Valens chip update Upload Click this button to begin the firmware update process Note that this button is available for both the master firmware and Valens chip update ...

Страница 49: ...wse to the location of the firmware file select it and click the Open button AT UHD SW 52ED Firmware file Computer on the same network as the AT UHD SW 52ED Choose File button 6 Click the Upload button under the Firmware Update section 7 A progress bar will be displayed during the update process After the update is complete and if a restart is required the web server will display a prompt 8 The AT...

Страница 50: ...y to the AT UHD SW 52ED Continue to hold down the INPUT key for five seconds AFTER the power supply has been connected 5 Release the INPUT key Requirements Using the USB Interface HDMI 1 HDMI 2 HDMI 3 HDMI 4 HDMI 5 VOLUME AT UHD SW 52ED POWER INPUT S PDIF OUT RX TX RS 232 LAN FW DC 48V 1 2 3 4 5 HDMI IN HDMI OUT HDBaseT OUT AUDIO OUT IR L R P S S IN OUT HDMI 1 HDMI 2 HDMI 3 HDMI 4 HDMI 5 VOLUME AT...

Страница 51: ...if any are present 8 Drag and drop the firmware file to the drive 9 After the file has been copied disconnect the USB cable from both the computer and the AT UHD SW 52ED 10 The firmware update process is complete and the AT UHD SW 52ED is now ready for use Appendix ...

Страница 52: ...losure screws on the sides of the unit to attach the mounting brackets 1 Attach the included small rack ear to one side of the AT UHD SW 52ED using the included screws 2 Attach the included longer rack ear to the opposite side of the AT UHD SW 52ED using the included screws HDMI 1 HDMI 2 HDMI 3 HDMI 4 HDMI 5 VOLUME AT UHD SW 52ED POWER INPUT Single Unit Rack Installation ...

Страница 53: ... U H D S W 5 2 E D P O W E R IN P U T H D M I 1 H D M I 2 H D M I 3 H D M I 4 H D M I 5 V O L U M E A T U H D S W 5 2 E D P O W E R IN P U T U S B C D P H D M I 3 H D M I 4 B Y O D D I S P L A Y I N P U T A T U H D S W 5 1 0 W I P P O W E R Countersink bevel PWR VOL LEVEL AUDIO AMPLIFIER FW SIGNAL ANALO G IN NET AUDIO DEVICE ID GAINTM H D M I 1 H D M I 2 H D M I 3 H D M I 4 H D M I 5 V O LU M E A ...

Страница 54: ...the circular holes on each mounting plate If using a drywall surface a 6 drywall screw is recommended Mounting screws are not included NOTE The unit can also be mounted under a flat surface such as a table by turning the unit upside down Appendix PWR VOL LEVEL AUDIO AMPLIFIER FW SIGNAL ANALO G IN NET AUDIO DEVICE ID GAINTM H D M I 1 H D M I 2 H D M I 3 H D M I 4 H D M I 5 V O L U M E A T U H D S W...

Страница 55: ...60 Hz 1920x1080i 50 59 94 60 Hz 1280x720p 50 59 94 60 Hz 720x576p 720x576i 640x480p 640x480i PCM 2 0 LPCM 5 1 LPCM 7 1 Dolby Digital Dolby Digital Plus Dolby TrueHD DTS Digital Surround DTS HD Master Audio PCM 2 0 Dolby Digital DTS HD Master Audio Control RS 232 Device control and configuration Bidirectional pass through from control system over HDBaseT Supported baud rates 2400 4800 9600 19200 38...

Страница 56: ...n amber red Power Consumption 22 W Idle Consumption 9 06 W External Power Supply optional Input 100 240 V AC 50 60 Hz Output 48 V DC 0 83 A Safety CE FCC cULus RoHS RCM Environmental Operating Temperature 32 to 113 F 0 to 45 C Storage Temperature 4 to 140 F 20 to 60 C Operating Humidity RH 20 to 95 non condensing Chassis Dimensions H x W x D 1 34 in x 8 19 in x 4 41 in 34 mm x 208 mm x 112 mm Weig...

Страница 57: ...d names and trademarks or registered trademarks are the property of their respective owners Pricing specifications and availability subject to change without notice Actual products product images and online product images may vary from images shown here Toll free US International atlona com 877 536 3976 41 43 508 4321 ...

Отзывы: