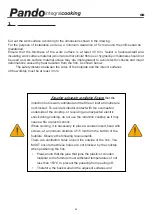
11. CARE AND CLEANING
WHAT?
How?
Important!
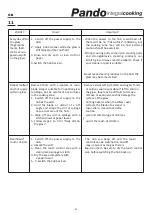
Everyday dirt on
the glass
(fingerprints,
marks, food
stains or non-
gaseous spills
on the glass).
1. Switch off the power supply to the
hob.
2. Apply a hob cleaner while the glass is
still tempered (but not hot!).
3. Rinse and dry with a clean cloth or
paper.
4. Switch the hob back on.
- When the power to the hob is switched off,
there will be no "hot surface" indication, but
the cooking zone may still be hot! Extreme
caution should be exercised.
- Strong scouring pads, some nylon scouring pads
and strong/abrasive cleaning products can
scratch glass. Always read the label to check if
your cleaner or pad is suitable.
- Never leave cleaning residues on the hob: the
glass may become stained.
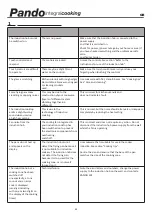
Boiled, melted
and hot sugary
spills on glass
Remove them with a spatula or razor
blade scraper suitable for induction glass
cooktops, but be careful of hot surfaces
in the cooking zone:
1. Switch off the power supply to the
hob at the wall.
2. Hold the blade or utensil at a 30°
angle and scrape the dirt or spillage
onto a cool area of the hob.
3. Wipe off any dirt or spillage with a
kitchen towel or paper towel.
4. Follow steps 2 to 4 for "Daily dirt on
the glass".
- Remove stains left by melted and sugary foods
or spills as soon as possible. If left to cool on
the glass, they may be difficult to remove.
remove or even permanently damage the
surface of the glass.
- Cutting hazard: when the safety cover
retracts, the blade of a scraper is
razor-sharp. Use with extreme
caution
care and safe storage at all times
y
out of the reach of children.
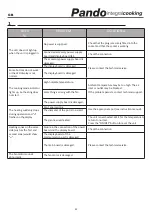
Overflow of
touch controls
1. Switch off the power supply to the
hob.
2. Absorb the spill
3. Clean the touch control area with a
clean, damp sponge or cloth.
4. Dry the area completely with
a paper towel.
5. 5. Switch the hob back on.
- The hob can beep off and the touch
controls can be switched on and off.
may not work as long as there is
liquid on them. Be sure to dry the touch control
area before switching the hob back on.
GB
21
Содержание PI-3110
Страница 48: ......
Страница 88: ...19 FICHAS DE DADOS PARA OS MODELOS PI 3110 3111 PI 3150 3151 PI 3210 3211 37...
Страница 93: ......
Страница 133: ...19 FICHES TECHNIQUES POUR LES MOD LES PI 3110 3111 PI 3150 3151 PI 3210 3211 37...
Страница 138: ...42...
Страница 178: ...19 TECHNICAL DATA SHEETS FOR MODELS PI 3110 3111 PI 3150 3151 PI 3210 3211 37...
Страница 183: ......


