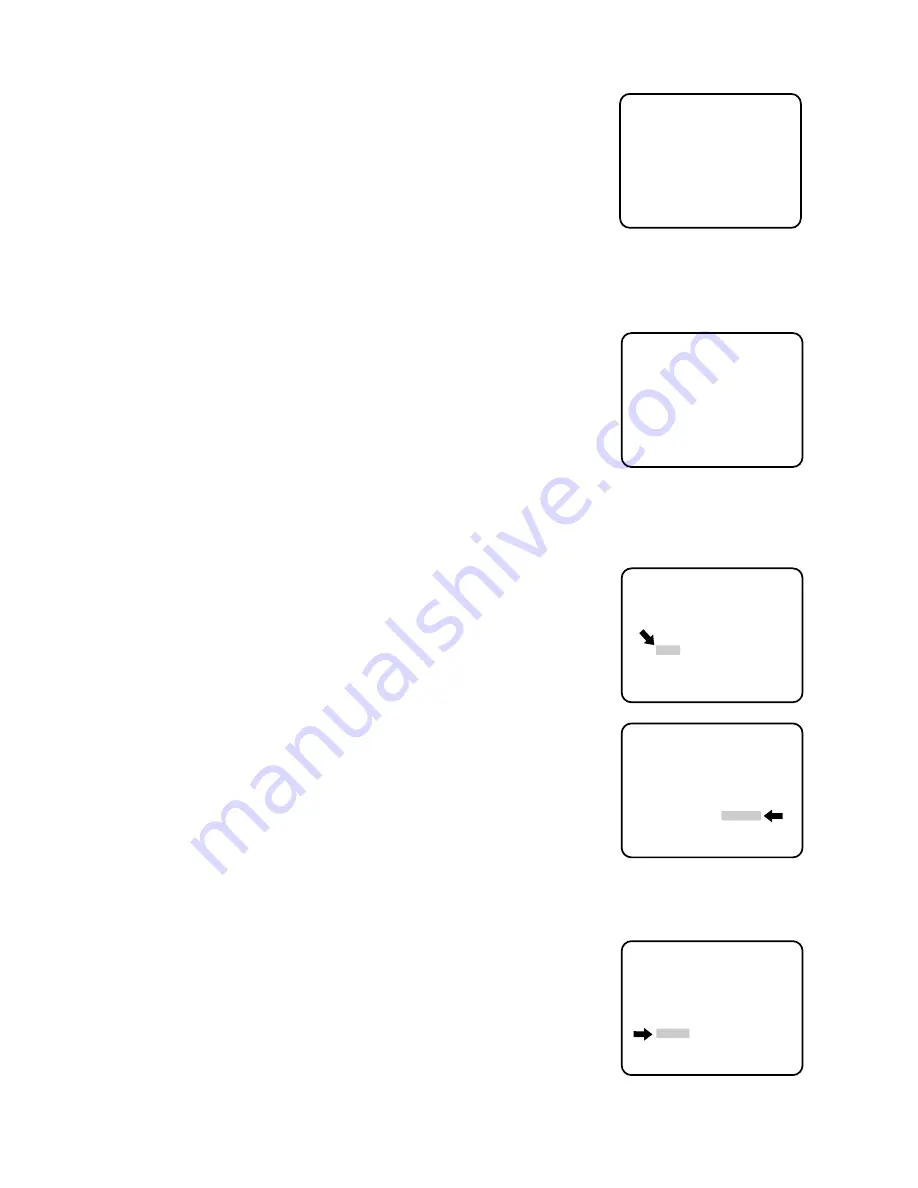
manualshive.com logo in svg
background image

- 9 -

Submenu Display

The items having 

mark enable to edit the submenu.

• Move the cursor to an item having 

mark and press the CAM (SET)

button.
The submenu is displayed.

Camera ID setting menu

    ABCDEFGHIJKLM
    NOPQRSTUVWXYZ
    0123456789
    ().,'":;&#!?=
    +

*/%$ÄÜÖÆÑÅ


←  →        

SPACE

   POSI RET RESET

   WV-BS300.......

Setup menu

    ABCDEFGHIJKLM
    NOPQRSTUVWXYZ
    0123456789
    ().,'":;&#!?=
    +

*/%$ÄÜÖÆÑÅ


←  →        

SPACE

   POSI RET RESET

   WV-BS300.......

    ABCDEFGHIJKLM
    NOPQRSTUVWXYZ
    0123456789
    ().,'":;&#!?=
    +

*/%$ÄÜÖÆÑÅ


←  →        

SPACE

   POSI RET RESET

   WV-BS300.......

CAMERA SETTING

1. Camera Identification (CAMERA ID) Setting

• Move the cursor to "CAMERA ID" and select either "ON" (Camera

identification characters are displayed) or "OFF" mode by using the
joystick.

• When the camera identification character needs editing, perform the

following steps by using the submenu of camera identification.

• Move the cursor to "CAMERA ID" and press the CAM (SET) button to

display the character editing menu.

• The character cursor on the letter "A" and the editing cursor on the left

end of the editing area starts blinking.

• Move the character cursor to the desired letter by using the joystick

and then press the CAM (SET) button.  The selected letter is written to
the editing cursor position. (The blinking editing cursor moves to the
right automatically at this moment.)

• Repeat the above procedure until all character editing is completed.

• When the position of the editing cursor is to be shifted in the editing

area, move the character cursor to "

" or "

" and press the CAM

(SET) button.  This function is used to move the editing position or to
correct an individual character.

• When a blank space is needed, move the character cursor to the

"SPACE" position and press the CAM (SET) button.  The blank space
is inserted into the cursor position in the editing area.

• When all characters in the editing area are to be erased, move the

character cursor to "RESET" and press the CAM (SET) button.

• After completing the editing of the camera Identification characters,

the display position of the camera identification characters on the
monitor screen can be set as follows.

• Move the character cursor to "POSI" and press the CAM (SET) button

to display the ID position menu.  The characters of the camera ID start
blinking to identify the selection of the positioning menu.

    ABCDEFGHIJKLM
    NOPQRSTUVWXYZ
    0123456789
    ().,'":;&#!?=
    +

*/%$ÄÜÖÆÑÅ


←  →        

SPACE

   POSI RET RESET

   WV-BS300.......

  ** SET UP **

CAMERA ID    OFF *

ALC/MANUAL   ALC *

SHUTTER      OFF

AGC          ON

SYNC         INT

AUTO PAN     OFF

 SPECIAL *

Setup menu

Содержание WV-BS300

Страница 1: ...Combination Camera WV BS300 Before attempting to connect or operate this product please read these instructions completely...

Страница 2: ...D INTO ANY 13 AMP SOCKET If a new plug is to be fitted please observe the wiring code as shown below If in any doubt please consult a qualified electrician WARNING This apparatus must be earthed IMPOR...

Страница 3: ......

Страница 4: ...E 4 Setup Menu 4 Setup Menu Description 6 Setting Procedures 8 INSTALLATION 17 CONNECTIONS 19 SYSTEM CONNECTION 20 PREVENTION OF BLOOMING AND SMEAR 21 SPECIFICATIONS 22 ACCESSORIES 22 OPTIONAL ACCESSO...

Страница 5: ...picture sharpness b Minimum of aliasing on fine objects c Expanded dynamic range by use of knee circuit d Highlight aperture correction for greater picture detail of bright object 8 Back Light Compen...

Страница 6: ...MAJOR OPERATING CONTROLS AND THEIR FUNCTIONS 1 Video Output Connector 2 Power Cable 3 Camera Mounting Angle 4 Pan Tilt Starting Point 5 Fall Prevention Wire 6 Decoration Cover 7 Dome Cover q w e r t y...

Страница 7: ...the cursor upward downward right left and select the mode Also used to adjust the level CAM SET Button The mode is set by this button Also the menus can be changed by this button SETUP PROCEDURE Setu...

Страница 8: ...t The mode is also selected by this switch and adjustment of certain levels can be made by this switch Left Switch Moves the cursor to the left The mode is also selected by this switch and adjustment...

Страница 9: ...ion function to overcome this problem Setup menu tree both the ALC light control modes can select either preset ON or OFF for back light compensation WV BS300 Preset ON B Conventional Camera Night Day...

Страница 10: ...lens iris when in the ALC mode or a exposure time control signal to the CCD image sensor when in the ELC mode 3 Shutter Speed SHUTTER The electronic shutter speed can be selected from 1 50 second OFF...

Страница 11: ...nning manually AUTO PAN Operates the panning automatically with the preset panning range SET UP CAMERA ID OFF ALC MANUAL ALC SHUTTER OFF AGC ON SYNC INT AUTO PAN OFF SPECIAL MENU DISPLAY Setup Menu Di...

Страница 12: ...ter is written to the editing cursor position The blinking editing cursor moves to the right automatically at this moment Repeat the above procedure until all character editing is completed When the p...

Страница 13: ...tup menu If necessary refer to Setup Menu Display on page 8 for details on displaying the setup menu on the monitor screen Move the cursor to ALC MANUAL and select either ALC or MANUAL by using the jo...

Страница 14: ...ess the CAM SET button to mask that area The area turns to white When the cursor is moved to an area that has already been masked the mask and cursor start blinking alternately Press the CAM SET butto...

Страница 15: ...etup Menu Display on page 8 for details on displaying the setup menu on the monitor screen Move the cursor to SHUTTER and select the electronic shutter speed by using the joystick The following electr...

Страница 16: ...e Camera 1 to the dual trace oscilloscope Set the dual trace oscilloscope to the vertical rate and expand the vertical sync portion on the oscilloscope Control the joystick to match as closely as poss...

Страница 17: ...AUTO PAN and select either ON or OFF by moving the joystick to the left or right SET UP CAMERA ID OFF ALC MANUAL ALC SHUTTER OFF AGC ON SYNC INT AUTO PAN OFF SPECIAL Setup menu 2 When AUTO PAN is sel...

Страница 18: ...I L H ENDLESS ON STOP TIME 2S RET 8 Special Menu This menu lets the customer adjust and setup the video signal of the camera to meet the customer s requirement Display the setup menu If necessary ref...

Страница 19: ...menu Move the cursor to RET by using the joystick and press the joystick The setup menu is displayed How to reset to factory setup Any of the above settings plus the ALC MANUAL level control and phas...

Страница 20: ...the following Note Be sure to protect the video and power cables Otherwise these cables will be damaged with the cutting surface b The cables go through into the ceiling 1 Remove the mounting screw M...

Страница 21: ...unt ing angle a In case of coming the cables from the side Pass the cables into the pre made hole refer to a The cables come from the side in INSTALLATION on the decoration cover b In case of going th...

Страница 22: ...he self check operation the zooming and focusing are operated once is done after turning on the power When the AUTO PAN ON mode has been selected panning will start automatically Coaxial cable length...

Страница 23: ...8 CAMERA IN VIDEO OUT1 VIDEO OUT2 INPUT 1 2 3 4 5 6 7 8 CAMERA IN VIDEO OUT1 VIDEO OUT2 INPUT 1 2 3 4 5 6 7 8 CAMERA IN VIDEO OUT1 VIDEO OUT2 INPUT 1 2 3 4 5 6 7 8 CAMERA IN VIDEO OUT1 VIDEO OUT2 INP...

Страница 24: ...aimed at a bright light such as a spot light or a surface that reflects bright light smear or blooming may appear Therefore the camera should be operated carefully in the vicinity of extremely bright...

Страница 25: ...nual Iris Auto Open Close is possible MANUAL Maximum Aperture Ratio 1 1 2 WIDE 1 9 TELE Focal Length 5 50 mm Electronic Shutter 1 50 OFF 1 120 1 250 1 500 1 1000 1 2000 1 4000 1 10000 Back Light Compe...

Отзывы: