


54
Screenshot 2
The map will be created.
Step 2
Select the created map displayed in the "Map" column,
and then click the [Load] button to apply the background
image.
For example, a schematic image of inside a bank, a
supermarket, etc.
The background image should be a bitmap image (bmp)
or a jpeg image (jpeg).
To cancel the applied background image, click the
[Clear] button.
Step 3
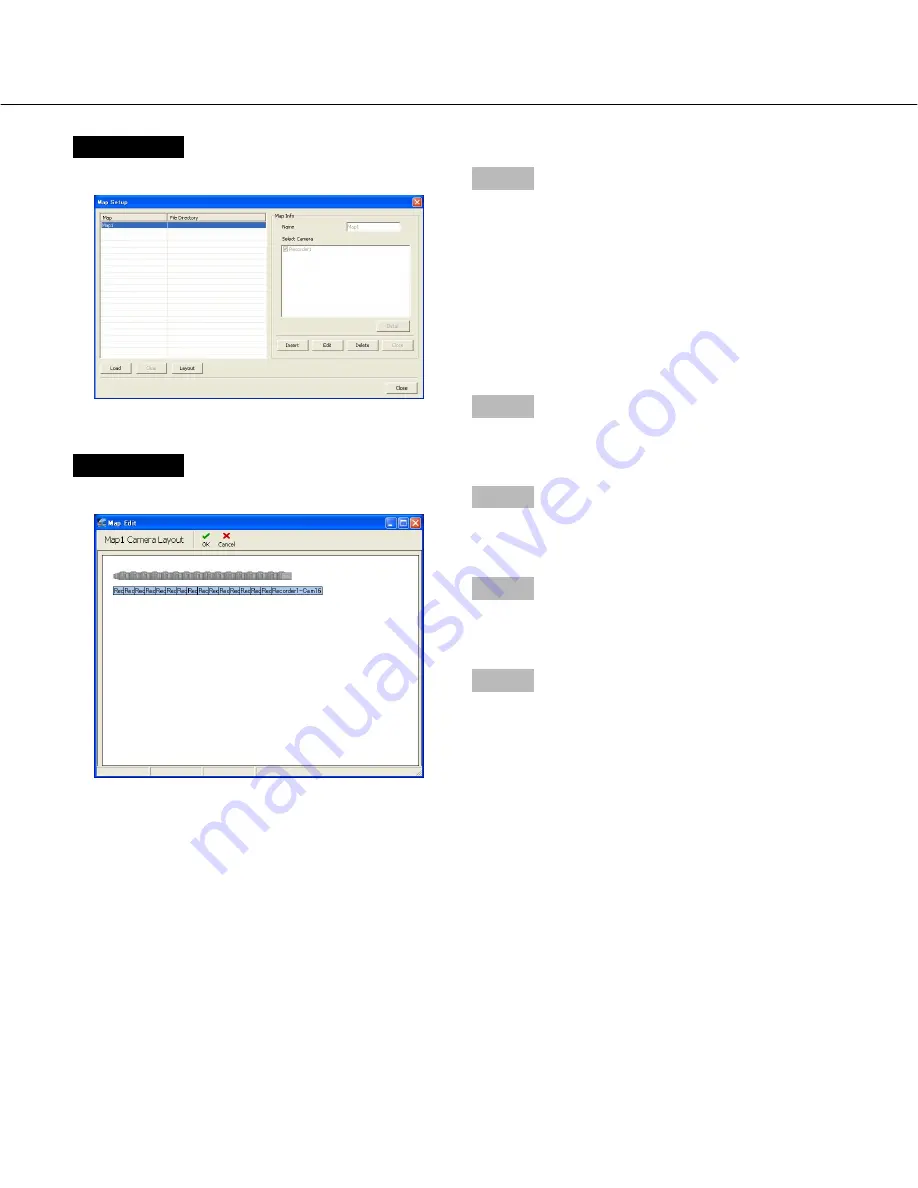
Click the [Layout] button.
Screenshot 3
The "Map Edit" window will be displayed.
Step 4
Locate each of the camera icons onto the actual posi-
tions on the background image.
Step 5
Click the [OK] button.
→
The "Map Edit" window will close.
Step 6
Click the [Close] button on the "Map Setup" window.


