


4
English
Installation
Precautions
• Before removing, turn the power off with the tuner board’s remote control and then turn the main power
of the unit off.
• When installing or removing the terminal board, exercise care to avoid injury.
There may be some sharp-pointed solder joints on the rear side of the board that could cause unexpected injury.
• When installing the board, fully insert the Board into the slot horizontally until it is firmly plugged into the
connector.
Note that incomplete insertion may damage the internal components.
■
Compatible slot
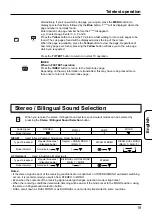
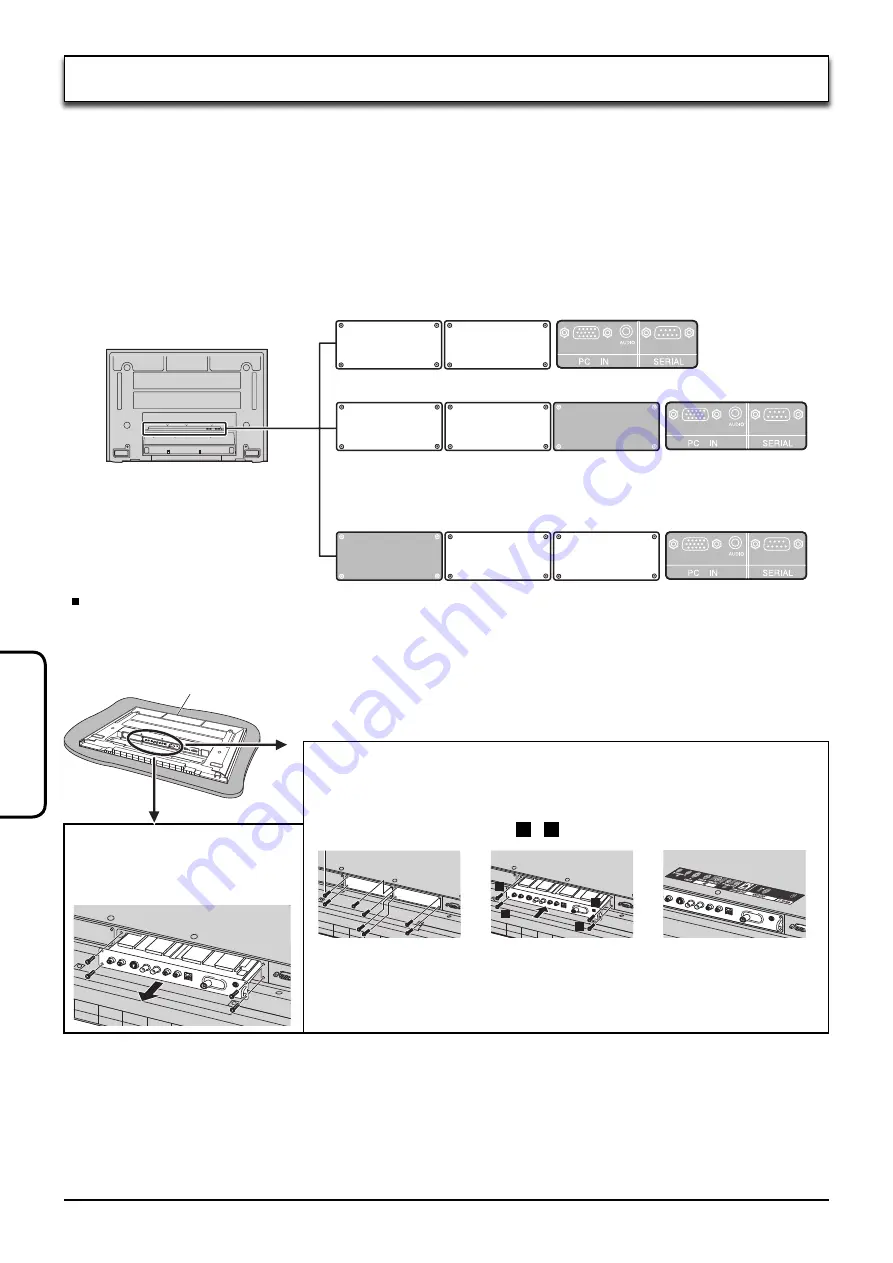
To install
To remove
1. Remove the slot
cover.
2. Insert the terminal board
until it is firmly plugged
into the connector.
Tighten screws in the
order
1
-
4
.
3. Affix the terminal
function label
(included).
Remove the slot cover. Grip the
handle of the terminal board, and
slowly pull out in the direction of
the arrow.
Securing screw
• Make sure that the Board does not ride on the two lower claws.
• Be sure to fasten all screws tightly.
• Have the customer keep the removed Terminal Board for future servicing
needs.
Foam mat or thick soft cloth
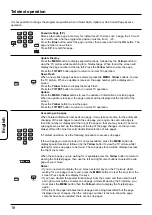
2 slots model (For TH-37PWD8WK/S)
3 slots model (For TH-42PWD8WK/S)
3 slots model (For TH-37PG9W, TH-42PG9W)
(For TH-42PS9WK/S, TH-42PH9WK/S, TH-50PH9WK/S
(Singapore and India only))
SLOT1
SLOT2
SLOT1
SLOT2
SLOT1
SLOT2
SLOT3
SLOT3
1
2
3
4
Installation Procedure
1
Turn off the display and the connected equipment, and disconnect the power supply plugs from the wall sockets.
Disconnect all cables connected to the unit.
2
Follow the procedure below and install the tuner board in the display.
[The following steps are not required when using the TH-37PWD8WK/S or the TH-42PWD8WK/S.]
3
Connect the power supply plug to the wall socket and turn on the display’s power.
4
Use the display’s remote controller and check that the “Serial Slot Select” item in the Options menu is set to “Slot2”.
If it is set to other than “Slot2”, change the setting to “Slot2”.
Note:
The default setting for professional displays (such as the TH-50PHXX) is “Slot1”, so make sure to check the
setting. The tuner board will not function properly if the setting is incorrect.
See page 21 “Display’s setting” for the Options menu operation method.