23
R
Q
T
X
111
1
Getting S
tarted
Playing
Discs
Ot
her Op
era
tions
Reference
E
N
GLIS
H
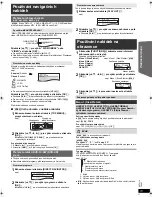
It takes time before play starts.
≥
Play may take time to begin when an MP3 track has still picture data.
Even after the track starts, the correct play time will not be displayed.
This is normal.
[MP3]
≥
This is normal on DivX video.
[DivX]
A menu screen appears during skip or search.
[VCD]
This is normal for Video CDs.
Playback control menu does not appear.
[VCD]
with playback control
Press [
∫
STOP]
6
twice and then press [
1
PLAY]
6
.
Program and Random play do not work.
[DVD-V]
These functions do not work with some DVD-Videos.
Play does not start.
≥
This unit may not play WMA and MPEG4 that contains still picture data.
≥
If playing DivX VOD content, refer to the homepage where you
purchased the DivX VOD content. (Example: http://vod.divx.com)
[DivX]
≥
If a disc contains CD-DA and other formats, proper playback may not be
possible.
No subtitles.
≥
Display the subtitles. (“SUBTITLE” in Menu 1) (
B
14)
≥
Subtitles may not be displayed depending on the disc.
[DivX]
Point B is automatically set.
The end of an item becomes point B when it is reached.
The Setup menu cannot be accessed.
Select “DVD/CD” as the source.
Sound is distorted.
≥
Noise may occur when playing WMA.
≥
When using the HDMI output, audio may not be output from other
terminals.
Effects do not work.
Some audio effects do not work or have less effect with some discs.
Humming is heard during play.
An AC mains lead or fluorescent light is near the main unit. Keep other
appliances and cables away from the main unit.
No sound.
≥
There may be a slight pause in sound when you change the play speed.
≥
If the input source is bitstream, set the sound setting to PCM on the
external equipment.
≥
Audio may not be output due to how files were created.
[DivX]
No sound from the TV.
≥
If the TV is not ARC compatible and only the HDMI connection is used,
an extra audio connection is necessary. (
B
8)
≥
Confirm the audio connection. Press [RADIO, EXT-IN]
5
to select the
corresponding source. (
B
8, 10)
≥
When using the HDMI connection, ensure that “AUDIO OUT” in the
HDMI menu is set to “ON”. (
B
18)
No sound from the surround speakers.
Press [SURROUND]
<
to select “MULTI-CH”. (
B
11)
The picture on the TV is not displayed correctly or
disappears.
≥
The unit and TV are using different video systems. Use a multi-system
or PAL TV.
≥
The system used on the disc does not match your TV.
– PAL discs cannot be correctly viewed on an NTSC TV.
– This unit can convert NTSC signals to PAL 60 for viewing on a PAL TV
(“NTSC DISC OUT” in VIDEO menu). (
B
18)
≥
Ensure that the unit is connected directly to the TV, and is not
connected through a VCR. (
B
8)
≥
Mobile telephone chargers can cause some disturbance.
≥
If you are using an indoor TV antenna, change to an outdoor antenna.
≥
The TV antenna wire is too close to the unit. Move it away from the unit.
≥
Change “SOURCE SELECT” in Menu 2.
[DivX]
(
B
14)
≥
Reduce the number of connected devices.
≥
When using the HDMI AV OUT terminal, ensure that an incompatible
video output with the connected TV is not selected. Press and hold
[CANCEL]
4
until the picture is displayed correctly. (The output will
return to “480p” or “576p”.) (
B
14)
≥
Video images converted to 1920
k
1080 resolution may look different
from the true native 1080p full-HD sources. This is not a malfunction of
the main unit.
≥
When the HDMI cable is connected, there will be no RGB output from
the SCART (AV) terminal. If the SCART (AV) terminal is to be used,
remove the HDMI cable and turn this unit on/off again.
Picture size does not fit the screen.
≥
Change “TV ASPECT” in the VIDEO menu. (
B
18)
≥
Use the TV to change the aspect.
≥
Change the zoom setting. (“ZOOM” in Menu 2) (
B
14)
Menu is not displayed correctly.
Restore the zoom ratio to “NORMAL”. (“ZOOM” in Menu 2) (
B
14)
Auto zoom function does not work well.
≥
Turn off TV’s zoom function.
≥
Zoom function may not work well, especially in dark scenes and may
not work depending on the type of disc.
When playing PAL disc, picture distorted.
Set “TRANSFER MODE” in Menu 2 to “AUTO”. (
B
14)
After choosing “Home Cinema” in “Speaker Selection” with
the TV’s remote control, the TV’s input selection also
changes.
Disconnect the HDMI cable from the TV and reconnect it to a different
HDMI terminal.
Cannot charge or operate.
≥
Check that the iPod/iPhone is connected firmly. (
B
16)
≥
The battery of the iPod/iPhone is depleted. Charge the iPod/iPhone,
and then operate again.
Cannot display iPod/iPhone photos/videos on the TV.
≥
Ensure the video connection to the SCART (AV) terminal on this unit
and select “VIDEO” from “VIDEO OUT – SCART” in VIDEO menu.
(
B
18)
≥
Operate the iPod/iPhone menu to make the appropriate photo/video
output settings for your TV. (Refer to operating instructions for your
iPod/iPhone.)
Disc operation
Sound
Picture
iPod/iPhone operation
23
Getting S
tarted
Playing
Discs
Ot
her Op
era
tions
SC-PT580-880EP-RQTX1111-R_eng.book Page 23 Monday, December 28, 2009 5:29 PM
Содержание SC-PT880
Страница 100: ...28 RQTX1111 Getting Started Playing Discs Other Operations Reference 100 ...
Страница 101: ...RQTX1111 101 ...

