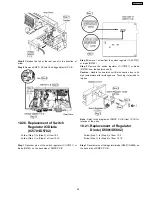
Step 8
Remove 2 screws from the rear panel.
Step 9
Release the tab of rear panel in the direction of arrow.
Step 10
Remove DVD Module P.C.B.
Caution :
Do not use strong or excessive force to avoid
damage to FFC cables.
10.14. Disassembly of Main P.C.B.
·
Follow (Step 1) to (Step 3) of Item 10.3.
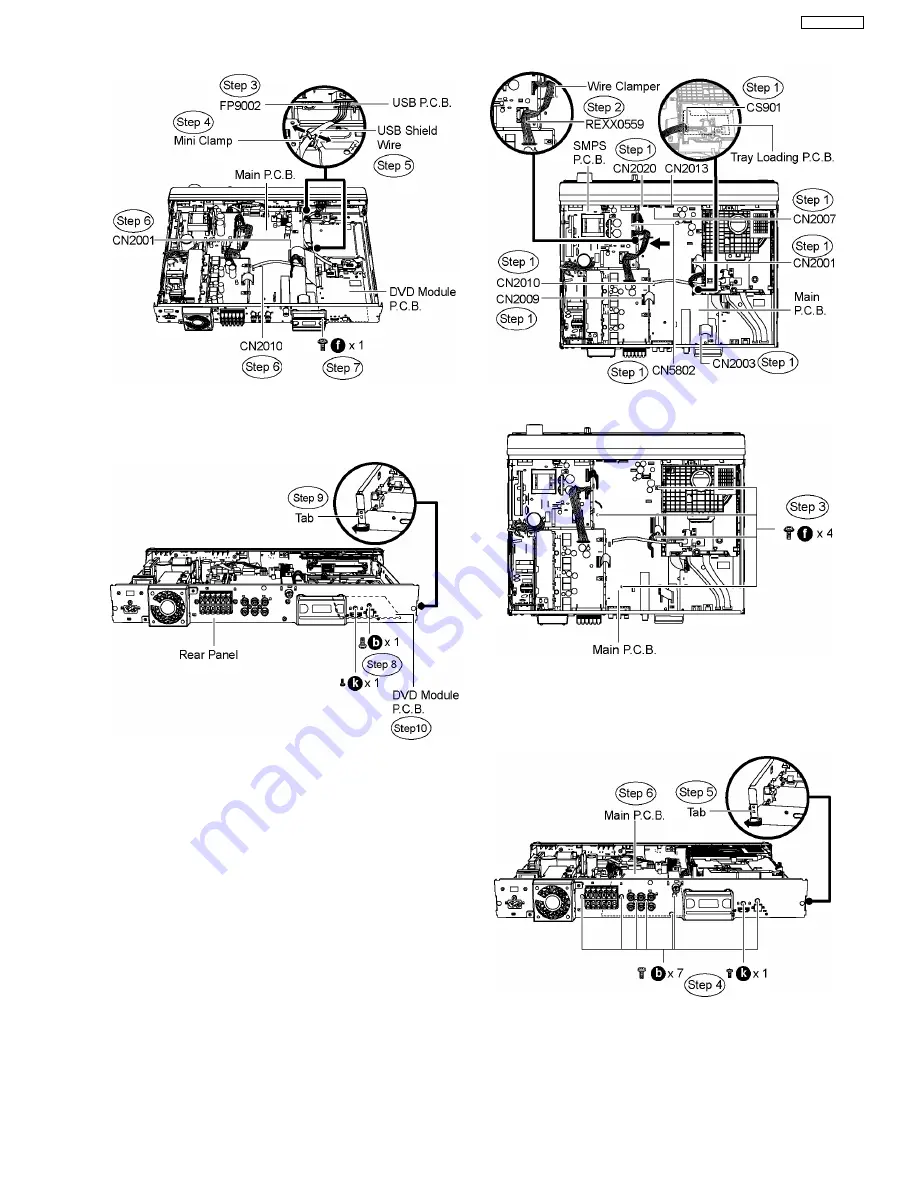
Step 1
Detach FFC cable from the connectors (CN2001,
CN2003, CN2007, CN2009, CN2010, CN2013 & CN2020) on
Main P.C.B., (CS901) on Tray Loading P.C.B. and (CN5802)
on SMPS P.C.B.
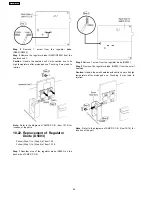
Step 2
Remove the wire clamper to move aside the FFC cable
(REXX0559, SMPS to D-Amp) in the direction of arrow.
Step 3
Remove 4 screws from Main P.C.B.
Step 4
Remove 8 screws from the rear panel.
Step 5
Release the tab of the rear panel in the direction of
arrow.
Step 6
Remove Main P.C.B.
10.15. Replacement of Regulator IC
(IC2903)
·
Follow (Step 1) to (Step 3) of Item 10.3.
·
Follow (Step 1) to (Step 6) of Item 10.14.
55
SA-PT550GCP
Содержание SA-PT550GCP
Страница 3: ...3 SA PT550GCP ...
Страница 12: ...12 SA PT550GCP ...
Страница 22: ...8 New Features 8 1 About HDMI 8 1 1 What is HDMI 8 1 2 Advanced Digital Pictures 22 SA PT550GCP ...
Страница 23: ...8 1 3 Advanced Digital Sound 8 1 4 Easy to Use 8 1 5 HDMI Compatible Products 23 SA PT550GCP ...
Страница 49: ...10 2 Main Components and P C B Locations 49 SA PT550GCP ...
Страница 65: ...Step 3 Remove the middle chassis Step 4 Remove the traverse unit 65 SA PT550GCP ...
Страница 68: ...68 SA PT550GCP ...
Страница 82: ...SA PT550GCP 82 ...
Страница 92: ...92 SA PT550GCP ...
Страница 110: ...SA PT550GCP 110 ...
Страница 118: ...SA PT550GCP 118 ...
Страница 126: ...25 Exploded Views 126 SA PT550GCP ...
Страница 127: ...25 1 Cabinet Parts Location SA PT550GCP 127 ...
Страница 128: ...SA PT550GCP 128 ...
Страница 129: ...25 2 Packaging SA PT550GCP 129 ...


