This button will send command to the main unit to play CD/DVD as well as the iPod. This function is therefore meaningful only
if the second room selector is in Main Source (with the first room user in CD/DVD or iPod) and iPod.
·
Stop Button
This button will send command to the main unit to stop CD/DVD as well as the iPod. This function is therefore meaningful only
if the second room selector is in Main Source (if the first room user is in CD/DVD mode or iPod) and iPod.
·
Forward Skip/Channel Up
This button depends on the second room source currently selected. It will be interpreted as a Forward Skip by the main unit if
the second room source is in Main Source (with the first room user is in CD/DVD or iPod mode) and iPod. It will be interpreted
as a Channel Up (preset channels only) if the second room source is in FM, AM, or XM.
·
Reverse Skip/Channel Down
This button depends on the second room source currently selected. It will be interpreted as a Reverse Skip by the main unit if
the second room source is in Main Source (if the first room user is in CD/DVD or mode) and iPod. It will be interpreted as a
Channel Down (preset channels only) if the second room source is in FM, AM, or XM.
·
Volume Control
Volume control will be local to the FX85 module only. Default volume (TBD) will be set every time power is first supplied to the
system or during exit from stand by mode.
·
ID-setting Operation
ID setting operation can be invoked by pressing fast-forward key in the main unit and three [3] key in the remocon. Once ID-
setting is triggered, the receiver must press its ID-setting button within 60 seconds. During this period, the transmitter will be in
open connect mechanism whereby any receiver can pair with the transmitter. After this period elapsed, the transmitter will revert
back to using close connect code whereby only those receivers which have the same ID as the transmitter will be able to link.
The user also has the option to exit the ID setting operation by pressing the same keys.
·
iPod Detection and Charging
iPod is detected once inserted on the FX85 and battery charging automatically starts.
−
−
−
−
The iPod Charging in Standby Mode:
l
Upon iPod insertion detection and FX85 is in Power OFF (stand by), FX85 set will enter iPod charging Standby Mode.
l
The FX85’s CHARGE LED will light up whenever the iPod is charging.
l
FX85 will charge the battery up to five hours. After this period, FX85 will not try to recharge the iPod.
l
After battery full condition, even if the iPod is operated such as play, FX85 will not retry to recharge the iPod (timer will start
immediately once iPod is inserted).
l
Re - charging of the battery in iPod Charging Standby Mode can be done only by removing and reinserting the iPod to the
dock.
−
−
−
−
The iPod charging in Power On Mode:
l
The iPod automatically charges its battery whenever it is connected during Power ON.
l
The FX85’s CHARGE LED will light up whenever the iPod is charging.
l
FX85 will continue charging the iPod as long as it is inserted (no charging time limit of five hours).
27
SA-PT550GCP
Содержание SA-PT550GCP
Страница 3: ...3 SA PT550GCP ...
Страница 12: ...12 SA PT550GCP ...
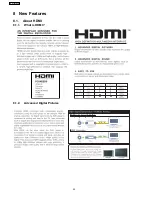
Страница 22: ...8 New Features 8 1 About HDMI 8 1 1 What is HDMI 8 1 2 Advanced Digital Pictures 22 SA PT550GCP ...
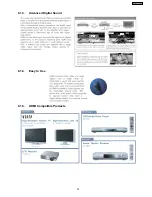
Страница 23: ...8 1 3 Advanced Digital Sound 8 1 4 Easy to Use 8 1 5 HDMI Compatible Products 23 SA PT550GCP ...
Страница 49: ...10 2 Main Components and P C B Locations 49 SA PT550GCP ...
Страница 65: ...Step 3 Remove the middle chassis Step 4 Remove the traverse unit 65 SA PT550GCP ...
Страница 68: ...68 SA PT550GCP ...
Страница 82: ...SA PT550GCP 82 ...
Страница 92: ...92 SA PT550GCP ...
Страница 110: ...SA PT550GCP 110 ...
Страница 118: ...SA PT550GCP 118 ...
Страница 126: ...25 Exploded Views 126 SA PT550GCP ...
Страница 127: ...25 1 Cabinet Parts Location SA PT550GCP 127 ...
Страница 128: ...SA PT550GCP 128 ...
Страница 129: ...25 2 Packaging SA PT550GCP 129 ...


