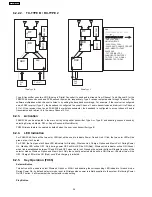
9.4. Service Mode Table (Wireless)
By pressing various button combinations on the player and remote control unit, you can activate the various service modes for
checking.
9.4.1. Service Mode Table 1
FL Display
Key Operation
Front Key
Item
Description
Mode Name
ID Setting
After 10 seconds.
To cancel, press the same
buttons.
(Display 1)
(Display 2)
(Display 3)
Main room is in CD/DVD
mode.
Press and hold [FAST
FORWARD] button on the
main unit, and [3] button
on the remote control unit.
To set the ID in the Tx & Rx. The
system goes into "Pairing Mode".
[P] will be displayed for 60 seconds to
indicate it is in "Pairing Mode".
During this condition, the "ID set"
button on the receiver unit can be
pressed to pair the Tx & Rx.
After 60 seconds, the FL display will
return to its previous display.
FL Display sequence:
Display 1 2 3.
Note: Carry out pairing when Tx or Rx
has been changed.
40
SA-PT550GCP
Содержание SA-PT550GCP
Страница 3: ...3 SA PT550GCP ...
Страница 12: ...12 SA PT550GCP ...
Страница 22: ...8 New Features 8 1 About HDMI 8 1 1 What is HDMI 8 1 2 Advanced Digital Pictures 22 SA PT550GCP ...
Страница 23: ...8 1 3 Advanced Digital Sound 8 1 4 Easy to Use 8 1 5 HDMI Compatible Products 23 SA PT550GCP ...
Страница 49: ...10 2 Main Components and P C B Locations 49 SA PT550GCP ...
Страница 65: ...Step 3 Remove the middle chassis Step 4 Remove the traverse unit 65 SA PT550GCP ...
Страница 68: ...68 SA PT550GCP ...
Страница 82: ...SA PT550GCP 82 ...
Страница 92: ...92 SA PT550GCP ...
Страница 110: ...SA PT550GCP 110 ...
Страница 118: ...SA PT550GCP 118 ...
Страница 126: ...25 Exploded Views 126 SA PT550GCP ...
Страница 127: ...25 1 Cabinet Parts Location SA PT550GCP 127 ...
Страница 128: ...SA PT550GCP 128 ...
Страница 129: ...25 2 Packaging SA PT550GCP 129 ...


