VCR Mode
-27-
approximately 1.5 seconds, and at [SLOW] within
approximately 2 seconds.
≥
If you set [SWING] to [ON], the intervals at which the
9 still pictures are taken are longer at the beginning and
end than in the middle of the swing strobe period, and it
is useful for analyzing swing motion, etc. in sports.
3
Play back the tape.
4
Press the [MULTI] Button
(24)
.
If [STROBE] is selected:
≥
9 screens are automatically captured starting at the point
which the Button is pressed.
If [MANUAL] is selected:
≥
Press the [MULTI] Button at each scene you want to
capture. When 9 screens are captured, the tape will stop.
If [PHOTO] or [SCENE] is selected:
≥
From the point at which the [MULTI] Button is pressed,
9 screens of pictures to which index signals are attached
are captured in the playback direction. After 9 screens
are captured, the tape will stop, but if there are 8 or less
pictures to be captured, the tape will stop at its end.
Deleting all the captured Multi pictures
While displaying the multi-pictures that have been captured,
press the [MULTI] Button
(24)
.
≥
If [MANUAL] has been selected, press the [MULTI] Button
after 9 pictures are displayed.
To display the Multi-Pictures again
Press the [MULTI] Button
(24)
for 1 second or longer.
To Delete Multi pictures one by one
(When Pictures have been captured in Manual Mode)
When the [MULTI] Button
(24)
is pressed for 1 second or
longer while the still pictures are displayed, the pictures
captured last is deleted. If you continue to press the Button,
the pictures are deleted consecutively.
≥
After still pictures are deleted one by one, they cannot be
displayed again.
To Cancel Capturing Pictures (When Pictures have been
captured in Index Mode)
Press the [
∫
] Button.
To Search the tape position of a desired picture among
the playback pictures displayed on 9 screens
1
After displaying pictures in Multi-Picture Mode, turn
the [PUSH] Dial
(26)
to select the image whose tape
position you want to search.
≥
The selected picture is marked with a frame.
(18)
(24)
MULTI/P-IN-P
PUSH
SHUTTER/IRIS/
VOL/JOG
(26)
2
Press the [
:
] or [
9
] Button
(67)
on the Remote
Controller.
≥
A still picture playback takes place at the selected
picture.
≥
For other notes concerning this item, see
-45-
.
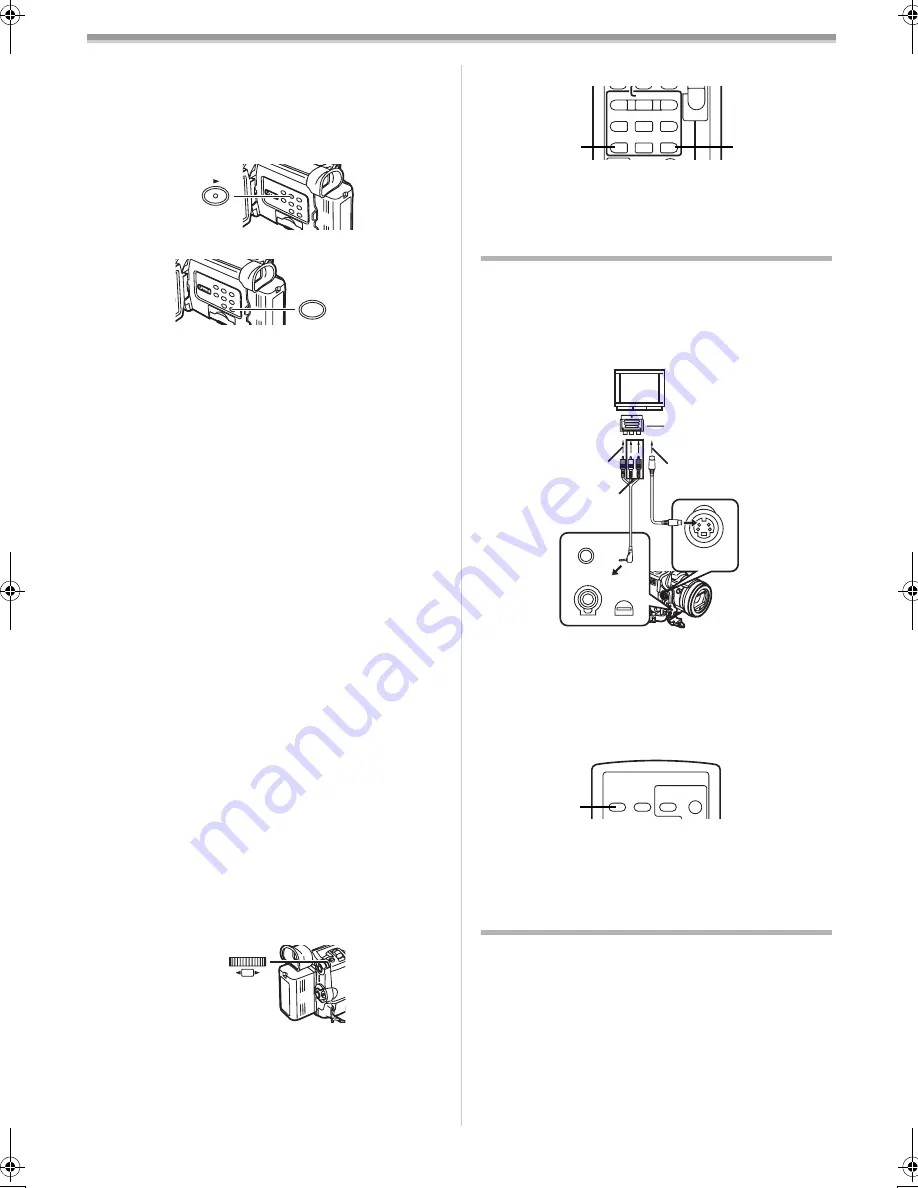
Playing Back on Your TV
By connecting your Movie Camera with your TV, the
recorded scenes can be viewed on your TV screen.
≥
Before connecting them, turn off the power of both the
Movie Camera and TV.
1
Connect the [AV IN/OUT] Socket of the Movie Camera
and the Video and Audio Input Sockets of the TV.
≥
Using the AV Cable
1
, make a connection with the TV. If
the TV has an S-Video Socket, connect the S-Video
Cable
2
(not supplied), too.
≥
When plugging the pin plug of the AV cable into the
[AV IN/OUT] Socket, plug it in as far as it goes.
To Make the Indications Appear on the TV Screen
Press the [OSD] Button
(60)
on the Remote Controller.
≥
If your TV is not equipped with AV Input Sockets, the 21-pin
Adaptor (purchase separately) is necessary. Consult your
dealer.
≥
For other notes concerning this item, see
-45-
.
Audio Dubbing
You can add music or narration to the recorded Cassette.
≥
If the tape recorded in the [16bit] Mode is dubbed with the
Audio Dubbing function, the original sound is erased. (If
you wish to preserve the original sound, use the [12bit]
Mode when recording.)
≥
Audio Dubbing cannot be performed on a recording done in
LP Mode. (
-13-
)
INDEX
INDEX
SELECT
STOP
K
L
∫
V
/REW
STILL ADV
W
s
V
PLAY
PAUSE
FF/
W
STILL ADV
6
1
5
;
E
D
(67)
(67)
21-pin Adaptor
MIC
AV IN/OUT
PHONES/REMOTE
USB/
EDIT
D
(MINI)
S-VIDEO
IN/OUT
1
2
[VIDEO IN]
[AUDIO IN]
[S-VIDEO IN]
OSD
DATE/
TIME
PHOTO
SHOT
START/
STOP
(60)
B5-B.book 27 ページ 2002年8月30日 金曜日 午前10時40分


