


- 137 -
Advanced (Recording pictures)
∫
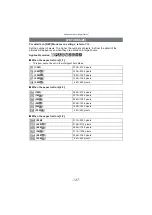
About AF area selection
You can select the AF area by pressing
3
(FOCUS) when [
Ø
] is selected.
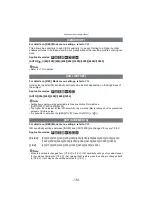
It is also possible to switch to AF area selection screen by pressing
1
when AF Mode is
selected with
3
/
4
.
• You can set from the quick menu.
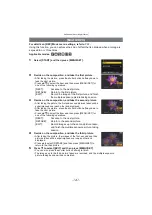
1
Press
3
/
4
/
2
/
1
to move the AF area.
• You can set to arbitrary position of the screen. (It cannot be set to
edge of the screen)
• After moving the AF area, press [DISPLAY] to return it to the
center.
2
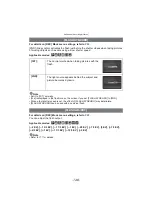
Rotate the rear dial to change the size of AF area.
Rear dial right: Enlarge
Rear dial left: Shrink
• It can be changed to 4 different sizes of “spot”
A
, “normal”
B
,
“large”
C
, and “extra large”
D
.
3
Press [MENU/SET] to set.
• You can also press the rear dial to set.
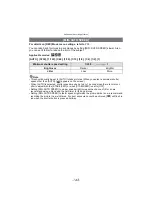
Note
• AF area cannot be moved and its size cannot be changed during motion picture recording.
• Set the size of AF area to “normal”, “large”, or “extra large” when it is hard to focus using the
“spot”.
• The spot metering target can also be moved to match the AF area when using [
Ù
].
• Position of the AF area will return to initial state when the camera is set to Intelligent Auto
Mode, When the Sleep Mode is activated, or When this unit is turned off.
• AF is performed at the center position with a large frame instead of the area selected by AF
area selection in the following cases:
– While using Digital Zoom
– When it is hard to focus due to darkness
A
B
D
C


