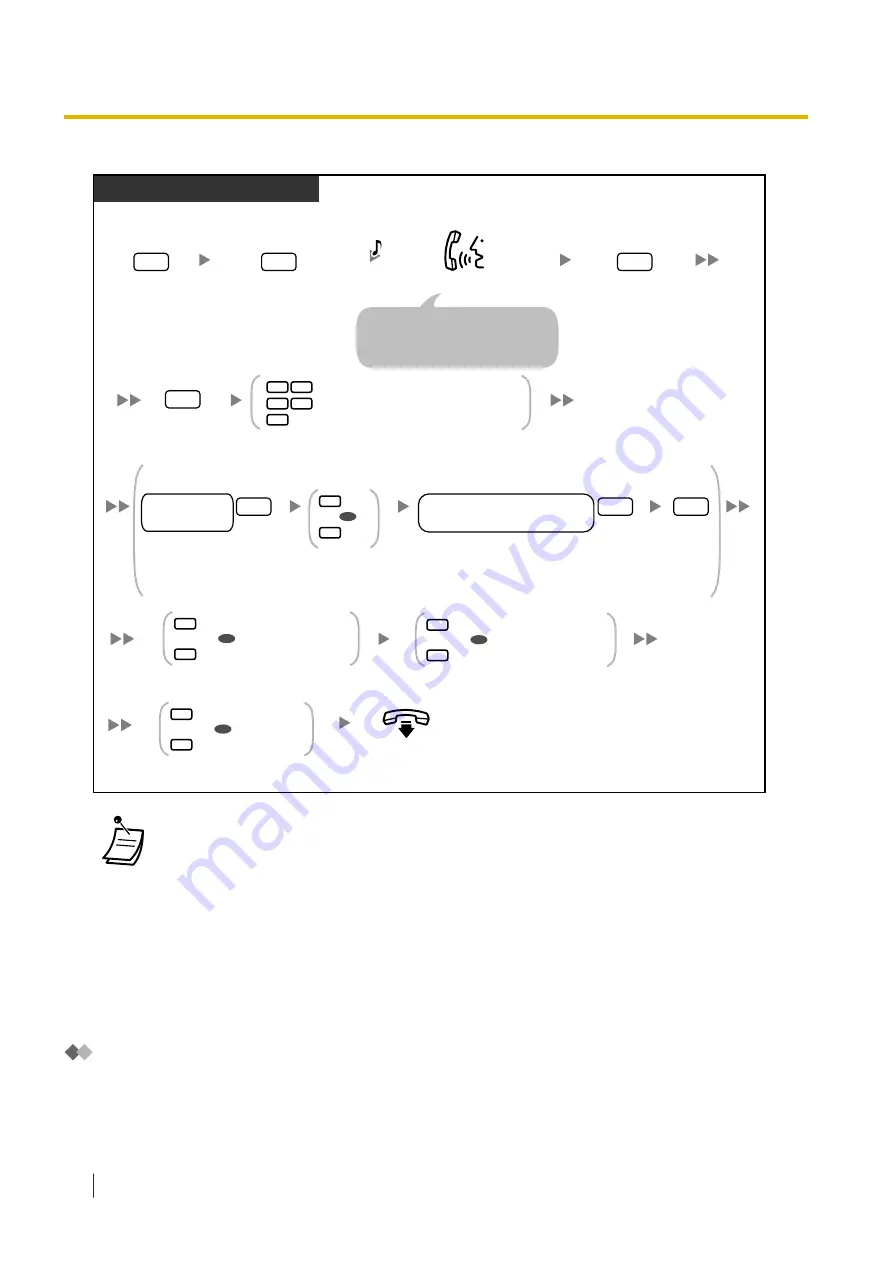
To leave a message for the sender
PT/SLT/PS/SIP Extn./S-PS
Enter
2
to begin recording.
2
1
1
2
Set the delivery time of the message
Send the message immediately
Accept, then go on-hook.
During or after voice message/fax message envelope playback
Enter
4
.
4
Enter
1
to end recording.
1
Enter
2
to accept.
2
2
1
Enter
the
desired
delivery time
and
#
.
desired
delivery time
#
1
AM
PM
2
OR
Enter
1
for
AM
,
2
for
PM
.
Enter
the day of the month
for delivery
and
#
.
desired day of the month
for delivery
#
Enter
2
to accept.
2
1
Make the message urgent
Continue
2
Enter
1
or
2
.
OR
1
Make the message private
Continue
2
Enter
1
or
2
.
OR
1
Request a receipt
Continue
2
Enter
1
or
2
.
OR
On-hook.
To set the delivery time of the message
Record your message.
C.Tone
*
3
*
2
*
1
Enter
11
,
12
or
2
.
You can pause and resume recording
by pressing
2
. If you pause for
more than 20 seconds, recording
will stop automatically.
•
*1 Example: To enter 5:00, press
5#
. To enter 5:15, press
515#
.
•
*2 This option may not be available if the Unified Messaging system is programmed to use
24-hour time.
•
*3 Example: If today is February 16 and you enter
17#
, the message will be delivered
tomorrow. If today is February 16 and you enter
5#
, the message will be delivered on March
5.
•
Auto Receipt is not enabled by default. For more information, consult your System
Administrator.
•
New urgent messages are played before any other messages. However, old urgent
messages are treated like regular messages: messages are played starting with the oldest.
Transferring Messages
You can transfer (forward) messages in your mailbox to other subscribers. However, please note that you
cannot transfer receipt messages, or messages that were specified by the sender as "private".
When transferring a message, you can:
1.8.3 Message Playback and Related Features
138
Operating Manual
Содержание KX-NS1000
Страница 10: ...Feature Highlights 10 Operating Manual ...
Страница 14: ...Table of Contents 14 Operating Manual ...
Страница 225: ...Table 1 Standard mode 1 14 2 Using the Directories Operating Manual 225 ...
Страница 226: ...Table 1 Standard mode for RU model 1 14 2 Using the Directories 226 Operating Manual ...
Страница 227: ...Table 2 Option mode 1 14 2 Using the Directories Operating Manual 227 ...
Страница 228: ...Table 2 Option mode for CE model 1 14 2 Using the Directories 228 Operating Manual ...
Страница 229: ...Table 2 Option mode for GR model 1 14 2 Using the Directories Operating Manual 229 ...
Страница 238: ...1 15 1 Cellular Phone Features 238 Operating Manual ...
Страница 332: ...4 1 3 Supervisory Monitor ACD Control 332 Operating Manual ...


