34
Projector Mode
C
Use the Electronic Pen as a mouse
After the calibration is completed, the Electronic Pen can be used as a mouse for the projected computer screen
on the Interactive Panaboard.
C
If double-click does not work properly, confirm that the same position is accurately clicked twice.
When the position is different, it is not recognized a double click.
Or, try different timing of depressing and releasing of the Electronic Pen. This operation is also depending on
the setting of the double-click speed of the [Control Panel].
Note
Remark:
C
For precise positioning, keep the Electronic Pen perpendicularly to the Interactive Panaboard screen
during use. Inclined pen angle will cause the shift of position.
C
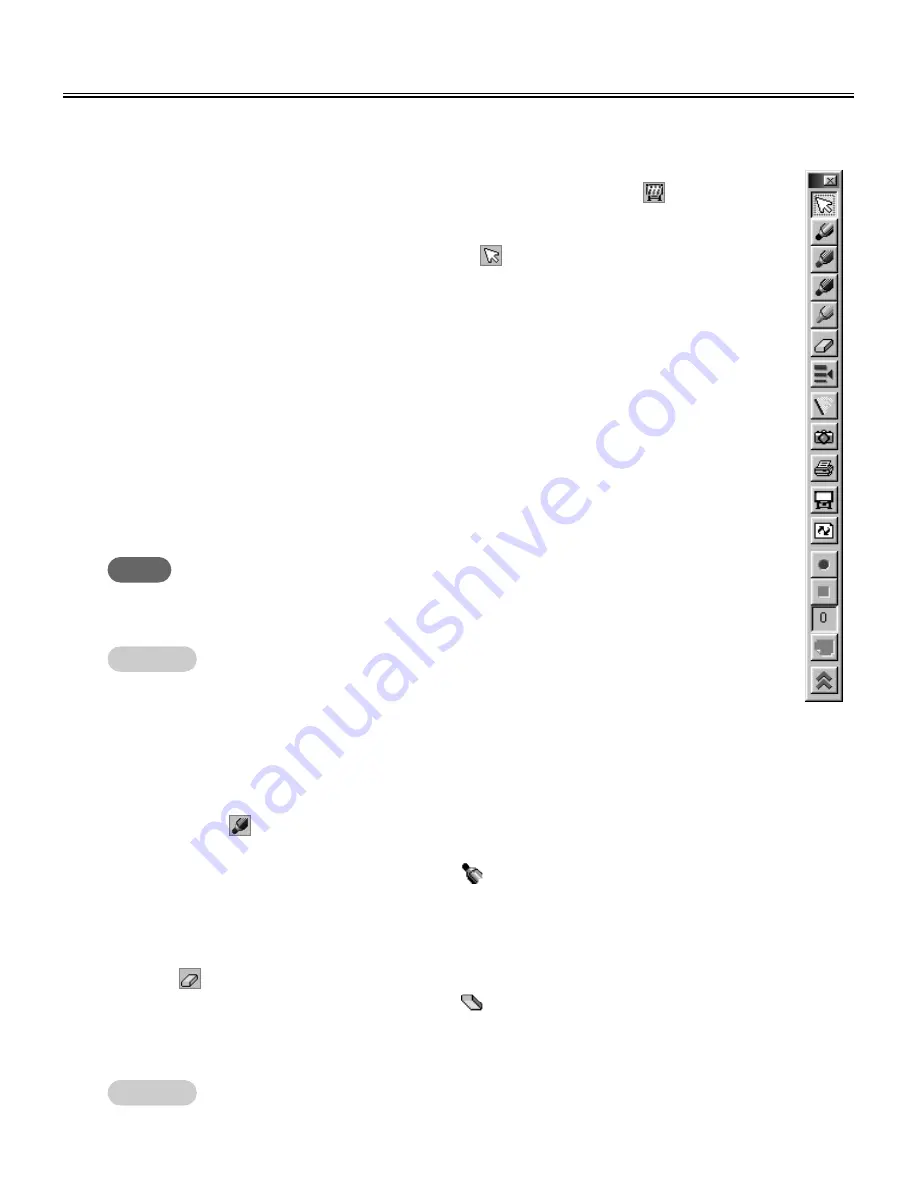
Draw and erase handwritten lines on the Desktop
(1) Click either
(Black, Red, Blue or Green Marker) in the Desktop Drawing Tool to
draw handwritten lines.
C
The shape of the mouse cursor changes to
.
(2) Position the mouse pointer where you want to draw a handwritten line on the
Desktop and drag the Mouse.
(3) Click
(Eraser) in the Desktop Drawing Tool to erase the handwritten line.
C
The shape of the mouse cursor changes to
.
(4) Drag the Mouse to the area on the Desktop to be erased.
C
The width and color of the markers and the size of the eraser can be changed. (See page 38.)
(1) If the Desktop Drawing Tool is not displayed, right-click the icon
in the Taskbar
and click [Tool] · [Draw] to display the Desktop Drawing Tool.
(2) To use the Electronic Pen as a mouse, click
(Arrow) in the Desktop Drawing Tool.
Operations of "click" and "drag" are as follows.
C
Single click:
Press the projected screen with the tip of the Electronic Pen.
C
Double-click:
Double-click is executed by performing two quick clicks at the same position with
the tip of the Electronic Pen.
C
Drag:
Press and hold the desire image with the tip of the Electronic Pen while dragging
the image to its new position.
C
Right-click:
Locate light gray button on the Electronic Pen. While pressing the button of the
Electronic Pen, press the projected screen with the tip of the Electronic Pen and
release. (Do not release the button of the Electronic Pen before all of these
operations are finished.)
For more details about the Desktop Drawing Tools, please refer to "About Desktop
Drawing Tool" from page 36.
Remark:
Содержание KX-BP8000
Страница 85: ...85 MEMO ...


