


23
Note:
• Timer that has setting nearest to current time and day will be activated first.
• To check the setting timer, press “SELECT button”, then “UP or DOWN button” to select day. The display will show each program
for the selected day.
• To reset the setting for all, press “SELECT button”, then ensure all day setting with triangle mark. Then press “CANCEL button”
for all the programs.
For example , if you want to set:
A - Monday to Friday: Same time, 1st program ON 9:00 & 2nd program OFF 16:00.
B - Only Wednesday: Additional 3rd program OFF 12:30 & 4th program ON 13:30.
C - Only Saturday: 1st program ON 10:00 with 20°C & 2nd program OFF 14:00.
D - Sunday: Holiday. No need to set any Timer.
• To set A (Monday to Friday - Collective day setting)
Press “SELECT button”
To select Monday to Friday, deselect Saturday and Sunday by pressing “UP or DOWN button” to Saturday, press
“SET button” (triangle mark on top of Saturday will disappear)
Follow the same step to deselect Sunday.
Ensure triangle mark appears on top of Monday ~ Friday.
- To confirm the selected days, press “SELECT button”.
To set the time, please refer to step 3. Select time at page 22.
- 1st program - select ON and desired time to 9:00.
2nd program - select OFF and desired time to 16:00.
3rd ~ 6th program - press “CANCEL button”.
• To set B (Wednesday - Individual day setting)
- Press “UP or DOWN button” to select WED (Wednesday).
Then press “SELECT button”.
To set the time, please refer to step 3. Select time at page 22.
- 1st program - press “SET button” twice (confirm ON and 9:00)
2nd program - also press “SET button” twice. (Confirm OFF and 16:00)
3rd program - select OFF and desired time to 12:30
4th program - select ON and desired time to 13:30
5th ~6th program - press “CANCEL button”
• To set C (Saturday - Individual day setting)
- Follow the same step as above.
To set the time, please refer to step 3. Select time at page 22.
- 1st program - select ON, desired time to 10:00 and desired temperature to 20°C.
2nd program - select OFF and desired time to 14:00.
3rd ~ 6th program - press “CANCEL button”.
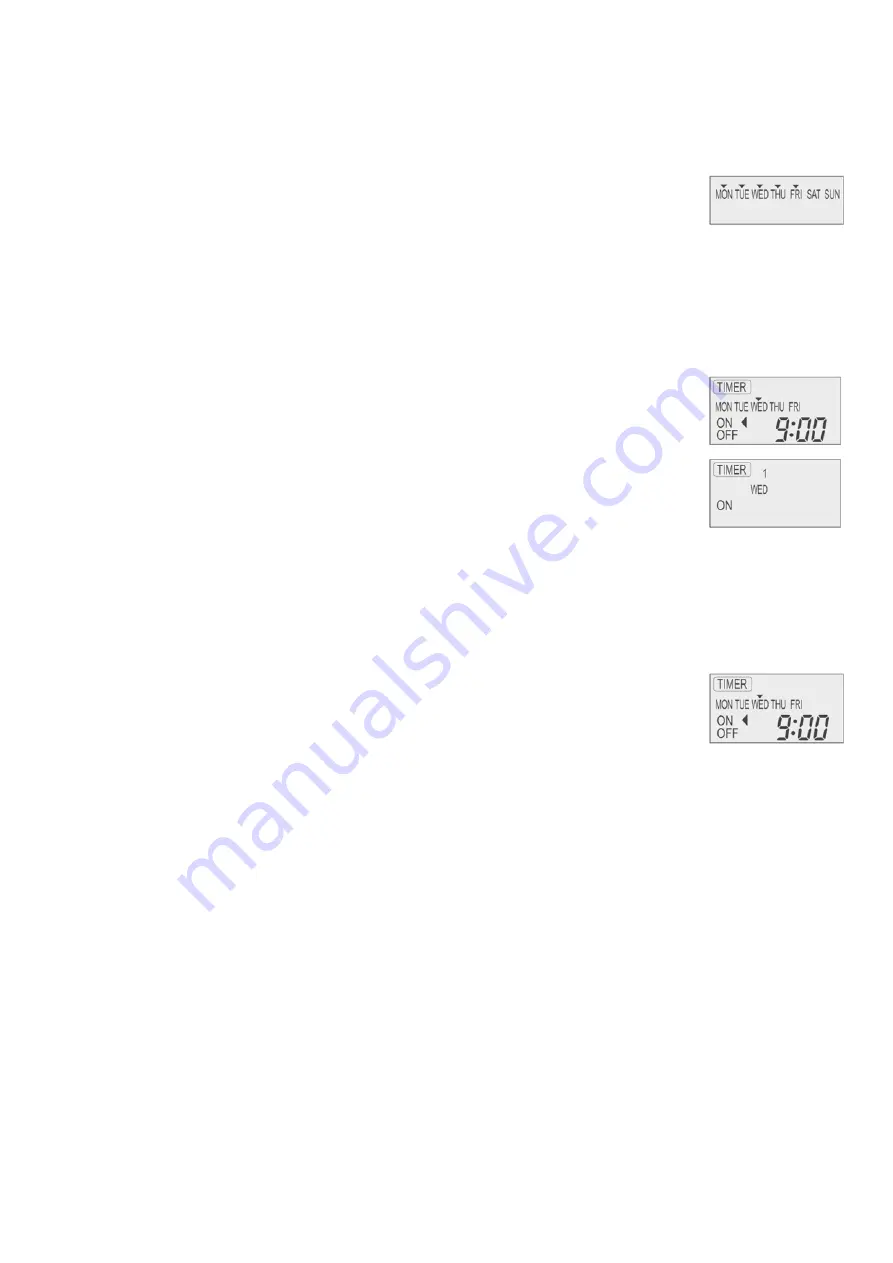
- Final Display for Weekly timer may show as:
(Display is showing, 9:00 ON - Timer on Wednesday will be activated next because it is nearest the current
day/time.)
Содержание CU-B14DBE5
Страница 11: ...11 4 Dimensions 4 1 CS F18DTE5 ...
Страница 12: ...12 4 2 CU J18DBE5 ...
Страница 13: ...13 5 Refrigeration Cycle 5 1 CS F18DTE5 CU J18DBE5 ...
Страница 14: ...14 6 Block Diagram 6 1 CS F18DTE5 6 2 CU J18DBE5 ...
Страница 15: ...15 7 Wiring Diagram 7 1 CS F18DTE5 ...
Страница 16: ...16 7 2 CU J18DBE5 ...
Страница 18: ...18 8 2 Remote Control Display ...
Страница 19: ...19 8 3 Remote Control Panel ...
Страница 95: ...95 13 3 Reaching distance CS F18DTE5 Cooling ...
Страница 96: ...96 13 4 Sound data ...
Страница 97: ...97 13 5 Sound measuring point 13 5 1 Indoor Unit 13 5 2 Outdoor Unit ...
Страница 100: ...100 14 Exploded View Indoor Unit 14 1 CS F18DTE5 ...
Страница 101: ...101 14 2 CS F18DTE5 ...
Страница 102: ...102 14 3 CS F18DTE5 ...
Страница 105: ...105 16 Exploded View Outdoor Unit 16 1 CU J18DBE5 ...
Страница 106: ...106 16 2 CU J18DBE5 ...
Страница 108: ...108 18 Print Pattern 18 1 Indoor Unit Printed Main ...
Страница 109: ...109 18 2 Indoor Unit Printed Indicator 18 2 1 Outdoor Unit Main PHAAM Printed in Malaysia SSBZ0603 00 ...


