113
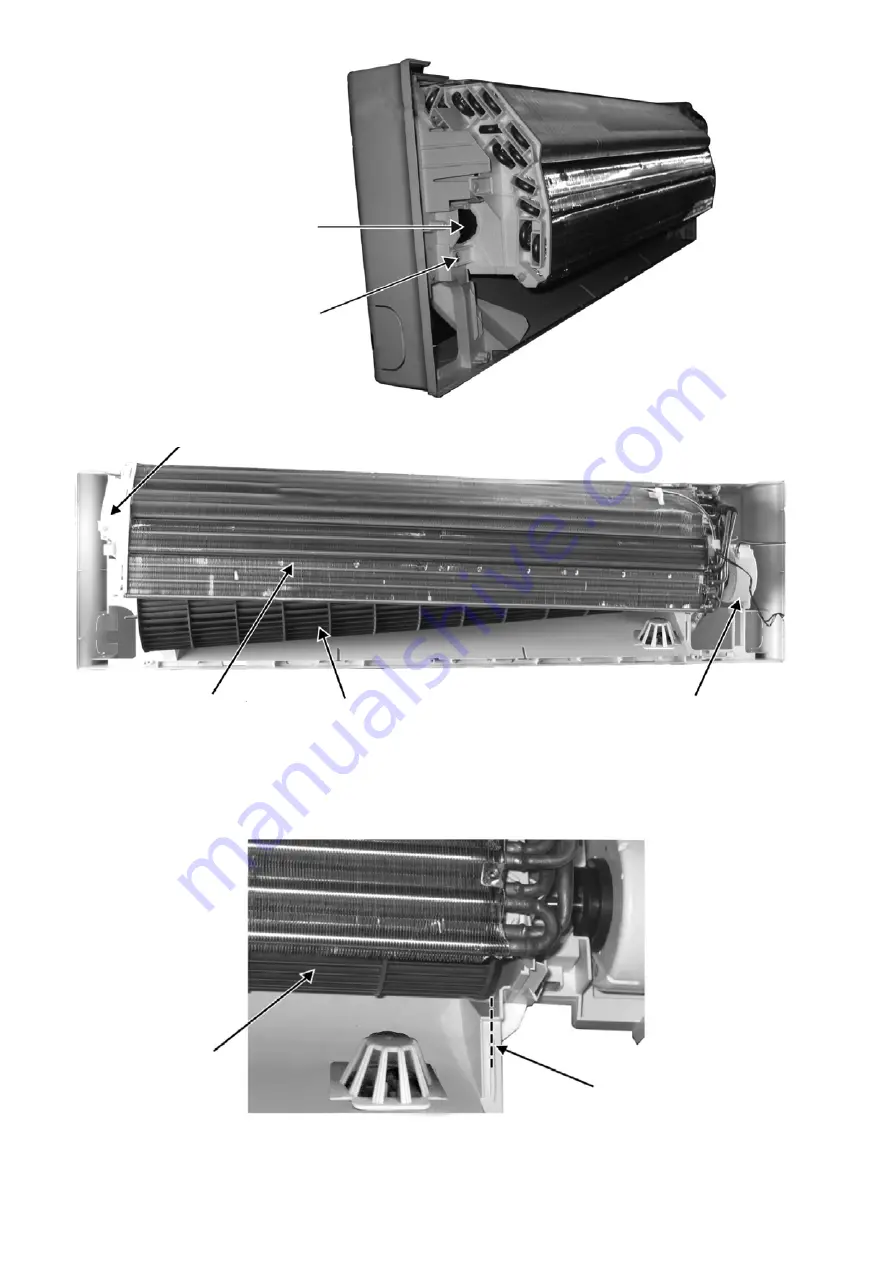
18. Remove the bearing by pulling it
out gently
17. Remove the screw from the
evaporator.
Figure 19
19. Push the holdfast to the left and lift up the evaporator.
21. Fan motor can be removed after the
removal of cross flow fan.
Reminder: To reinstall the fan motor, adjust
the fan motor connector to 45° towards you
before fixing control board.
20. Remove the cross flow fan from
the unit by pulling it to the left and
downward.
Evaporator
Figure 20
Reminder: To reinstall the cross flow
fan, ensure cross flow fan is in line as
shown in figure 21.
Cross Flow Fan
Figure 21
Содержание CS-S9NKV
Страница 15: ...15 4 2 3 CU S18NKV CU S24NKV...
Страница 16: ...16 4 2 4 CU S28NKV...
Страница 17: ...17 5 Refrigeration Cycle Diagram 5 1 CS S9NKV CU S9NKV CS S12NKV CU S12NKV...
Страница 18: ...18 5 2 CS S18NKV CU S18NKV CS S24NKV CU S24NKV...
Страница 19: ...19 5 3 CS S28NKV CU S28NKV...
Страница 24: ...24 7 Wiring Connection Diagram 7 1 Indoor Unit 7 1 1 CS S9NKV CS S12NKV...
Страница 25: ...25 7 1 2 CS S18NKV CS S24NKV...
Страница 26: ...26 7 1 3 CS S28NKV...
Страница 31: ...31 8 Electronic Circuit Diagram 8 1 Indoor Unit 8 1 1 CS S9NKV CS S12NKV...
Страница 32: ...32 8 1 2 CS S18NKV CS S24NKV...
Страница 33: ...33 8 1 3 CS S28NKV...
Страница 41: ...41 9 1 5 Human Activity Sensor Printed Circuit Board...
Страница 42: ...42 9 2 Outdoor Unit 9 2 1 Main Printed Circuit Board 9 2 1 1 CU S9NK...
Страница 43: ...43 9 2 1 2 CU S12NK...
Страница 44: ...44 9 2 1 3 CU S18NK CU S24NK...
Страница 45: ...45 9 2 1 4 CU S28NK...
Страница 46: ...46 9 2 2 Noise Filter Printed Circuit Board 9 2 2 1 CU S9NKV...
Страница 47: ...47 9 2 2 2 CU S28NKV...


